The Starknet Foundry
Starknet Foundry is a toolchain for developing Starknet smart contracts. It helps with writing, deploying, and testing your smart contracts. It is inspired by Foundry.
Installation
Starknet Foundry is easy to install on Linux, macOS and WSL. In this section, we will walk through the process of installing Starknet Foundry.
Contents
- Installation
- Uninstallation
With Starkup
Starkup helps you install all the tools used to develop packages in Cairo and write contracts for Starknet, including Starknet Foundry.
ℹ️ Info
When using starkup on Windows, please use WSL, as it only works on macOS and Linux.
Run the following in your terminal, then follow the onscreen instructions:
curl --proto '=https' --tlsv1.2 -sSf https://sh.starkup.sh | sh
To verify that Starknet Foundry was installed, open a new terminal and run
snforge --version
Manual Installation
Requirements
📝 Note
Ensure all requirements are installed and follow the required minimal versions. Starknet Foundry will not run if not following these requirements.
To use Starknet Foundry, you need:
- Scarb version >= 2.13.1
- Universal-Sierra-Compiler
- (Optional for Scarb >= 2.10.0)1 Rust version >= 1.80.1
all installed and added to your PATH environment variable.
aarch64-apple-darwinaarch64-unknown-linux-gnux86_64-apple-darwinx86_64-unknown-linux-gnu
📝 Note
Universal-Sierra-Compilerwill be automatically installed if you useasdforsnfoundryup. You can also createUNIVERSAL_SIERRA_COMPILERenv var to make it visible forsnforge.
Linux and macOS
ℹ️ Info
If you already have installed Rust, Scarb and asdf simply run
asdf plugin add starknet-foundry
Install asdf
Follow the instructions from asdf docs.
To verify that asdf was installed, run
asdf --version
Install Scarb version >= 2.13.1
First, add Scarb plugin to asdf
asdf plugin add scarb
Install Scarb
asdf install scarb latest
Set a version globally (in your ~/.tool-versions file):
asdf set --home scarb latest
To verify that Scarb was installed, run
scarb --version
and verify that version is >= 2.13.1
(Optional) Rust Installation
ℹ️️ Info
Rust installation is only required if your platform is not one of the following supported platforms:
aarch64-apple-darwinaarch64-unknown-linux-gnux86_64-apple-darwinx86_64-unknown-linux-gnu
curl --proto '=https' --tlsv1.2 -sSf https://sh.rustup.rs | sh
To verify that correct Rust version was installed, run
rustc --version
and verify that version is >= 1.80.1
See Rust docs for more details.
Install Starknet Foundry
First, add Starknet Foundry plugin to asdf
asdf plugin add starknet-foundry
Install Starknet Foundry
asdf install starknet-foundry latest
Set a version globally (in your ~/.tool-versions file):
asdf set --home starknet-foundry latest
To verify that Starknet Foundry was installed, run
snforge --version
or
sncast --version
Windows
🐧 Info - WSL (Windows Subsystem for Linux)
Starknet Foundry can be installed on Windows using WSL.
Please follow the Linux and macOS guide within your WSL environment.
Common Errors
No Version Set
Users may encounter this error when trying to use snforge or sncast without setting a version:
No version is set for command snforge
Consider adding one of the following versions in your config file at $HOME/.tool_versions
starknet-foundry 0.62.1
This error indicates that Starknet Foundry version is unset. To resolve it, set the version globally using asdf:
asdf set --home starknet-foundry latest
For additional information on asdf version management, see the asdf
Invalid Rust Version
When running any snforge command, error similar to this is displayed
Compiling snforge_scarb_plugin v0.62.1
error: package snforge_scarb_plugin 0.62.1 cannot be built because it requires rustc 1.80.1 or newer, while the currently active rustc version is 1.76.0
This indicates incorrect Rust version is installed or set.
Verify if rust version >= 1.80.1 is installed
rustc --version
1.80.1
To fix, follow the platform specific instructions:
If the version is incorrect or the error persists, try changing the global version of Rust
rustup default stable
and local version of Rust
rustup override set stable
scarb test Isn’t Running snforge
By default, scarb test doesn't use snforge to run tests, and it needs to be configured.
Make sure to include this section in Scarb.toml
[scripts]
test = "snforge test"
Set up shell completions (optional)
Shell completions allow your terminal to suggest and automatically complete commands and options when you press Tab.
⚠️ Warning
Most users DO NOT need to install shell completions manually. Starkup automatically set up shell completions for the supported shells. However, if these installation methods do not support the target shell, or for any reason fail to set up completions, you can follow the instructions below to set them up manually.
Bash
Add the following to ~/.bashrc or ~/.bash_profile (macOS):
# BEGIN FOUNDRY COMPLETIONS
_snforge() {
  if ! snforge completions bash >/dev/null 2>&1; then
    return 0
  fi
  source <(snforge completions bash)
  _snforge "$@"
}

_sncast() {
  if ! sncast completions bash >/dev/null 2>&1; then
    return 0
  fi
  source <(sncast completions bash)
  _sncast "$@"
}

complete -o default -F _snforge snforge
complete -o default -F _sncast sncast
# END FOUNDRY COMPLETIONS
Run source ~/.bashrc (or source ~/.bash_profile), or open a new terminal session to apply the changes.
ZSH
Add the following to ~/.zshrc:
# BEGIN FOUNDRY COMPLETIONS
_snforge() {
  if ! snforge completions zsh >/dev/null 2>&1; then
    return 0
  fi
  eval "$(snforge completions zsh)"
  _snforge "$@"
}

_sncast() {
  if ! sncast completions zsh >/dev/null 2>&1; then
    return 0
  fi
  eval "$(sncast completions zsh)"
  _sncast "$@"
}

autoload -Uz compinit && compinit
compdef _snforge snforge
compdef _sncast sncast
# END FOUNDRY COMPLETIONS
📝 Note
If you already have
autoload -Uz compinit && compinitin your~/.zshrc(for example, from another completions such asscarb), do not add it again. Only one call is needed.
Run source ~/.zshrc, or open a new terminal session to apply the changes.
For more information about Zsh completions, see the Zsh documentation or the Arch Wiki.
Fish
Add the following to ~/.config/fish/config.fish:
# BEGIN FOUNDRY COMPLETIONS
function _snforge
  if not snforge completions fish >/dev/null 2>&1
    return 0
  end
  source (snforge completions fish | psub)
  complete -C (commandline -cp)
end

function _sncast
  if not sncast completions fish >/dev/null 2>&1
    return 0
  end
  source (sncast completions fish | psub)
  complete -C (commandline -cp)
end

complete -c snforge -f -a '(_snforge)'
complete -c sncast -f -a '(_sncast)'
# END FOUNDRY COMPLETIONS
Run source ~/.config/fish/config.fish, or open a new terminal session to apply the changes.
Elvish
Add the following to your ~/.config/elvish/rc.elv file:
# BEGIN FOUNDRY COMPLETIONS
try {
  eval (snforge completions elvish | slurp)
} catch { return }

try {
  eval (sncast completions elvish | slurp)
} catch { return }
# END FOUNDRY COMPLETIONS
Run eval (slurp < ~/.config/elvish/rc.elv), or open a new terminal session to apply the changes.
Universal-Sierra-Compiler update
If you would like to bump the USC manually (e.g. when the new Sierra version is released) you can do it by running:
curl -L https://raw.githubusercontent.com/software-mansion/universal-sierra-compiler/master/scripts/install.sh | sh
How to build Starknet Foundry from source code
If you are unable to install Starknet Foundry using the instructions above, you can try building it from the source code as follows:
- Set up a development environment.
- Run
cd starknet-foundry && cargo build --release. This will create atargetdirectory. - Move the
targetdirectory to the desired location (e.g.~/.starknet-foundry). - Add
DESIRED_LOCATION/target/release/to yourPATH.
Uninstallation
Remove the Starknet Foundry Plugin
Follow the official asdf documentation to remove the Starknet Foundry plugin:
asdf plugin remove starknet-foundry
For more details, refer to the asdf plugin documentation.
Verify Uninstallation
To confirm Starknet Foundry has been completely removed, run:
snforge --version
If the uninstallation was successful, you should see command not found: snforge
-
Additionally, your platform must be one of the supported: ↩
First Steps With Starknet Foundry
In this section we provide an overview of Starknet Foundry snforge command line tool.
We demonstrate how to create a new project, compile, and test it.
To start a new project with Starknet Foundry, run snforge new
$ snforge new hello_starknet
📝 Note
By default,
snforge newcreates a project with a simpleHelloStarknetcontract. You can create a different project using the--templateflag. To see the list of available templates, refer to the snforge new documentation
Let's check out the project structure
$ cd hello_starknet
$ tree . -L 1
Output:
.
├── Scarb.lock
├── Scarb.toml
├── snfoundry.toml
├── src
└── tests

2 directories, 3 files
src/contains source code of all your contracts.tests/contains tests.Scarb.tomlcontains configuration of the project as well as ofsnforgeScarb.locka locking mechanism to achieve reproducible dependencies when installing the project locally
And run tests with snforge test
$ snforge test
Output:
Collected 2 test(s) from hello_starknet package
Running 0 test(s) from src/
Running 2 test(s) from tests/
[PASS] hello_starknet_integrationtest::test_contract::test_cannot_increase_balance_with_zero_value (l1_gas: ~0, l1_data_gas: ~96, l2_gas: ~360000)
[PASS] hello_starknet_integrationtest::test_contract::test_increase_balance (l1_gas: ~0, l1_data_gas: ~192, l2_gas: ~480000)
Tests: 2 passed, 0 failed, 0 ignored, 0 filtered out
Using snforge With Existing Scarb Projects
To use snforge with existing Scarb projects, make sure you have declared the snforge_std package as your project
development dependency.
Add the following line under [dev-dependencies] section in the Scarb.toml file.
# ...

[dev-dependencies]
snforge_std = "0.62.1"
Make sure that the above version matches the installed snforge version. You can check the currently installed version with
$ snforge --version
Output:
snforge 0.62.1
It is also possible to add this dependency
using scarb add
command.
$ scarb add snforge_std@0.62.1 --dev
Additionally, ensure that starknet-contract target is enabled in the Scarb.toml file.
# ...
[[target.starknet-contract]]
📝 Note
You can additionally specify
scarbsettings to avoid compiling Cairo plugin whichsnforge_stddepends on. The plugin is written in Rust and, by default, is compiled locally on the user's side.[tool.scarb] allow-prebuilt-plugins = ["snforge_std"]
Scarb
Scarb is the package manager and build toolchain for Starknet ecosystem. Those coming from Rust ecosystem will find Scarb very similar to Cargo.
Starknet Foundry uses Scarb to:
One of the core concepts of Scarb is its manifest file - Scarb.toml.
It can be also used to provide configuration for Starknet Foundry Forge.
Moreover, you can modify behaviour of scarb test to run snforge test as
described here.
📝 Note
Scarb.tomlis specifically designed for configuring scarb packages and, by extension, is suitable forsnforgeconfigurations, which are package-specific. On the other hand,sncastcan operate independently of scarb workspaces/packages and therefore utilizes a different configuration file,snfoundry.toml. This distinction ensures that configurations are appropriately aligned with their respective tools' operational contexts.
Last but not least, remember that in order to use Starknet Foundry, you must have Scarb
installed and added to the PATH environment variable.
Project Configuration
snforge
Configuring snforge Settings in Scarb.toml
It is possible to configure snforge for all test runs through Scarb.toml.
Instead of passing arguments in the command line, set them directly in the file.
# ...
[tool.snforge]
exit_first = true
# ...
snforge automatically looks for Scarb.toml in the directory you are running the tests in or in any of its parents.
sncast
Defining Profiles in snfoundry.toml
To be able to work with the network, you need to supply sncast with a few parameters —
namely the rpc node url and an account name that should be used to interact with it.
This can be done
by either supplying sncast with those parameters directly see more detailed CLI description,
or you can put them into snfoundry.toml file:
# ...
[sncast.myprofile]
account = "user"
accounts-file = "~/my_accounts.json"
url = "http://127.0.0.1:5050/rpc"
# ...
With snfoundry.toml configured this way, we can just pass --profile myprofile argument to make sure sncast uses parameters
defined in the profile.
📝 Note
snfoundry.tomlfile has to be present in current or any of the parent directories.
📝 Note
--profileonly selects thesnfoundry.tomlprofile.The Scarb profile is set with
--scarb-profileor thescarb-profilefield under[sncast.<profile>](defaults to valuerelease). See common flags). If that Scarb profile does not exist inScarb.toml,sncastfalls back with a warning. (Applies to subcommands using Scarb - namelydeclare,verify,script, andutils class-hash.)
💡 Info Not all parameters have to be present in the configuration - you can choose to include only some of them and supply the rest of them using CLI flags. You can also override parameters from the configuration using CLI flags.
$ sncast --profile myprofile \
call \
--contract-address 0x0589a8b8bf819b7820cb699ea1f6c409bc012c9b9160106ddc3dacd6a89653cf \
--function get_balance \
--block-id latest
Output:
Success: Call completed
Response: 0x34bc
Response Raw: [0x34bc]
Multiple Profiles
You can have multiple profiles defined in the snfoundry.toml.
Default Profile
There is also an option to set up a default profile, which can be utilized without the need to specify a --profile. Here's an example:
# ...
[sncast.default]
account = "user123"
accounts-file = "~/my_accounts.json"
url = "http://127.0.0.1:5050/rpc"
# ...
With this, there's no need to include the --profile argument when using sncast.
$ sncast call \
--contract-address 0x0589a8b8bf819b7820cb699ea1f6c409bc012c9b9160106ddc3dacd6a89653cf \
--function get_balance \
--block-id latest
Output:
Success: Call completed
Response: 0x34bc
Response Raw: [0x34bc]
Global Configuration
Global configuration file is a snfoundry.toml,
which is a common storage for configurations to apply to multiple projects across various directories.
This file is stored in a predefined location and is used to store profiles that can be used from any location on your computer.
Interaction Between Local and Global Profiles
Each setting in the effective config comes from the highest-precedence layer that defines it.
Layer precedence (highest to lowest):
- CLI flags
[local.<profile>][local.default][global.<profile>][global.default]- internal defaults
If a layer is missing, or it doesn't define a particular setting, the setting is looked up in the next layer.
The [local.<name>] and [global.<name>] layers are considered only when --profile <name> is set.
If --profile <name> is provided, at least one of [local.<name>] or [global.<name>] must be present.
Global Configuration File Location
The global configuration is stored in a specific location depending on the operating system:
- macOS/Linux : The global configuration file is located at
$HOME/.config/starknet-foundry/snfoundry.toml
📝 Note If missing, global configuration file will be created automatically on running any
sncastcommand for the first time.
Config Interaction Example
root/
├── .config/
│ └── starknet-foundry/
│ └── snfoundry.toml -> A
└── /../../
└── projects/
├── snfoundry.toml -> B
└── cairo-projects/
└── opus-magnum/
Glossary
A: Global configuration file containing the profiles default and testnet:
[sncast.default]
..
[sncast.testnet]
..
B: Local configuration file containing the profiles default and mainnet:
[sncast.default]
..
[sncast.mainnet]
..
No local config
In any directory in the file system, a user can run the sncast command using the default and testnet profiles, because they are defined in global config (file A).
If no local config file is present, only profiles defined in global config will be used.
- If the
testnetprofile is specified, the effective config is built by layeringglobal.testnet->global.default-> internal defaults. - If no profile is specified, the effective config is built by layering
global.default-> internal defaults.
Local config present
When running sncast from the opus-magnum directory, there is a configuration file in the parent directory (file B).
This setup allows for the use of the following profiles: default, testnet, and mainnet:
- If the
mainnetprofile is specified, the effective config is built by layeringlocal.mainnet->local.default->global.default-> internal defaults. Themainnetprofile does not need to exist in the global configuration as long as it is present in the local one. - If the
testnetprofile is specified, the effective config is built by layeringlocal.default->global.testnet->global.default-> internal defaults. Thetestnetprofile does not need to exist in the local configuration as long as it is present in the global one. - If no profile is specified, the effective config is built by layering
local.default->global.default-> internal defaults.
Environmental Variables
Programmers can use environmental variables in both Scarb.toml::tool::snforge and in snfoundry.toml. To use an environmental variable as a value, use its name either with or without curly braces, prefixed with $ (e.g. ${MY_ENV} or $MY_ENV).
This might be useful, for example, to hide node urls in the public repositories.
As an example:
# ...
[sncast.default]
account = "my_account"
accounts-file = "~/my_accounts.json"
url = "$NODE_URL"
# ...
Variable values are automatically resolved to numbers and booleans (strings true, false) where possible.
Blake Hash Support
Starting from Starknet version 0.14.1, the network switched from Poseidon hash to Blake hash for compiled class hashes.
Starknet Foundry version 0.53.0 and later includes support for Blake hash, ensuring compatibility with the new Starknet version.
Common Issue: Mismatch Compiled Class Hash
If you encounter a Mismatch compiled class hash error, it likely means you're using an older version of Starknet Foundry that doesn't support Blake hash.
Solution: Upgrade to Starknet Foundry version 0.53.0 or later:
asdf install starknet-foundry latest
asdf set --home starknet-foundry latest
This will update your installation to the latest version with Blake hash support.
📝 Note
For more detailed installation instructions, see the Installation guide.
Running Tests
To run tests with snforge, simply run the snforge test command from the package directory.
$ snforge test
Output:
Collected 3 test(s) from hello_snforge package
Running 0 test(s) from src/
Running 3 test(s) from tests/
[PASS] hello_snforge_integrationtest::test_contract::test_calling (l1_gas: ~0, l1_data_gas: ~0, l2_gas: ~40000)
[PASS] hello_snforge_integrationtest::test_contract::test_executing (l1_gas: ~0, l1_data_gas: ~0, l2_gas: ~40000)
[PASS] hello_snforge_integrationtest::test_contract::test_calling_another (l1_gas: ~0, l1_data_gas: ~0, l2_gas: ~40000)
Tests: 3 passed, 0 failed, 0 ignored, 0 filtered out
Prerequisites
snforge test requires enabled gas calculation.
This is true by default, so unless you have explicitly disabled it, you shouldn't have to do anything.
See enable-gas in the Scarb.toml reference for details.
Filtering Tests
You can pass a filter string after the snforge test command to filter tests.
By default, any test with an absolute module tree path matching the filter will be run.
$ snforge test calling
Output:
Collected 2 test(s) from hello_snforge package
Running 0 test(s) from src/
Running 2 test(s) from tests/
[PASS] hello_snforge_integrationtest::test_contract::test_calling_another (l1_gas: ~0, l1_data_gas: ~0, l2_gas: ~40000)
[PASS] hello_snforge_integrationtest::test_contract::test_calling (l1_gas: ~0, l1_data_gas: ~0, l2_gas: ~40000)
Tests: 2 passed, 0 failed, 0 ignored, 1 filtered out
Running a Specific Test
To run a specific test, you can pass a filter string along with an --exact flag.
Note, you have to use a fully qualified test name, including a module name.
📝 Note
Running a specific test results in optimized compilation.
snforgewill try to compile only the desired test, unlike the case of running all tests where all of them are compiled.
$ snforge test hello_snforge_integrationtest::test_contract::test_calling --exact
Output:
Collected 1 test(s) from hello_snforge package
Running 1 test(s) from tests/
[PASS] hello_snforge_integrationtest::test_contract::test_calling (l1_gas: ~0, l1_data_gas: ~0, l2_gas: ~40000)
Running 0 test(s) from src/
Tests: 1 passed, 0 failed, 0 ignored, 2 filtered out
Speeding Up Test Compilation
For best cache reuse across repeat runs, prefer the integration test layout (tests/) over unit tests in src/.
Thanks to Scarb's incremental compilation (enabled by default), the main package and the test code are cached separately, so editing tests does not invalidate the main package's build cache. For details on the layout difference, see Test Collection.
Skipping tests
You can use the --skip flag to exclude tests matching a specified filter pattern.
This is useful for temporarily disabling problematic tests or focusing on a subset of tests by excluding others.
You can skip tests by function name, module name or full path:
- Skip a specific test:
--skip test_feature_a - Skip tests in a module:
--skip nested_module - Skip by full path:
--skip my_tests::nested_module::test_feature_b
$ snforge test --skip test_failing --skip failing_example_tests::test_xyz
Output:
Collected 1 test(s) from failing_example package
Running 0 test(s) from src/
Running 1 test(s) from tests/
[PASS] failing_example_tests::test_abc (l1_gas: ~0, l1_data_gas: ~0, l2_gas: ~40000)
Tests: 1 passed, 0 failed, 0 ignored, 2 filtered out
Stopping Test Execution After First Failed Test
To stop the test execution after first failed test, you can pass an --exit-first flag along with snforge test command.
$ snforge test --exit-first
Output:
Collected 3 test(s) from failing_example package
Running 3 test(s) from tests/
[FAIL] failing_example_tests::test_failing
Failure data:
0x6661696c696e6720636865636b ('failing check')
Failures:
failing_example_tests::test_failing
Tests: 0 passed, 1 failed, 0 ignored, 0 filtered out
Interrupted execution of 2 test(s).
Displaying Resources Used During Tests
To track resources like builtins / syscalls that are used when running tests, use snforge test --detailed-resources.
$ snforge test --detailed-resources
Output:
Collected 2 test(s) from hello_starknet package
Running 2 test(s) from tests/
[PASS] hello_starknet_integrationtest::test_contract::test_cannot_increase_balance_with_zero_value (l1_gas: ~0, l1_data_gas: ~96, l2_gas: ~406680)
sierra gas: 406680
syscalls: (CallContract: 2, Deploy: 1, StorageRead: 1)
events: (count: 0, keys: 0, data size: 0)
messages: (l2 to l1: 0, l1 handler: 0)
[PASS] hello_starknet_integrationtest::test_contract::test_increase_balance (l1_gas: ~0, l1_data_gas: ~192, l2_gas: ~511980)
sierra gas: 511980
syscalls: (CallContract: 3, StorageRead: 3, StorageWrite: 1, Deploy: 1)
events: (count: 0, keys: 0, data size: 0)
messages: (l2 to l1: 0, l1 handler: 0)
Running 0 test(s) from src/
Tests: 2 passed, 0 failed, 0 ignored, 0 filtered out
For more information about how starknet-foundry calculates those, see gas and resource estimation section.
Writing Tests
snforge lets you test standalone functions from your smart contracts. This technique is referred to as unit testing. You
should write as many unit tests as possible as these are faster than integration tests.
Writing Your First Test
First, add the following code to the src/lib.cairo file:
fn sum(a: felt252, b: felt252) -> felt252 {
return a + b;
}
#[cfg(test)]
mod tests {
use super::sum;
#[test]
fn test_sum() {
assert(sum(2, 3) == 5, 'sum incorrect');
}
}It is a common practice to keep your unit tests in the same file as the tested code.
Keep in mind that all tests in src folder have to be in a module annotated with #[cfg(test)].
When it comes to integration tests, you can keep them in separate files in the tests directory.
You can find a detailed explanation of how snforge collects tests here.
Now run snforge using a command:
$ snforge test
Output:
Collected 1 test(s) from first_test package
Running 1 test(s) from src/
[PASS] first_test::tests::test_sum (l1_gas: ~0, l1_data_gas: ~0, l2_gas: ~40000)
Tests: 1 passed, 0 failed, 0 ignored, 0 filtered out
Failing Tests
If your code panics, the test is considered failed. Here's an example of a failing test.
fn panicking_function() {
let mut data = array![];
data.append('panic message');
panic(data)
}
#[cfg(test)]
mod tests {
use super::panicking_function;
#[test]
fn failing() {
panicking_function();
assert(2 == 2, '2 == 2');
}
}$ snforge test
Output:
Collected 1 test(s) from panicking_test package
Running 1 test(s) from src/
[FAIL] panicking_test::tests::failing
Failure data:
0x70616e6963206d657373616765 ('panic message')
Tests: 0 passed, 1 failed, 0 ignored, 0 filtered out
Failures:
panicking_test::tests::failing
When a test or contract call fails, you can get backtrace information by setting the SNFORGE_BACKTRACE=1 environment variable. Read more about it here.
Expected Failures
Sometimes you want to mark a test as expected to fail. This is useful when you want to verify that an action fails as expected.
To mark a test as expected to fail, use the #[should_panic] attribute.
You can specify the expected failure message in three ways:
- With ByteArray:
#[test]
#[should_panic(expected: "This will panic")]
fn should_panic_exact() {
panic!("This will panic");
}
// here the expected message is a substring of the actual message
#[test]
#[should_panic(expected: "will panic")]
fn should_panic_expected_is_substring() {
panic!("This will panic");
}With this format, the expected error message needs to be a substring of the actual error message. This is particularly useful when the error message includes dynamic data such as a hash or address.
- With felt
#[test]
#[should_panic(expected: 'panic message')]
fn should_panic_felt_matching() {
assert(1 != 1, 'panic message');
}- With tuple of felts, byte arrays, or a mix of both:
use core::panic_with_felt252;
#[test]
#[should_panic(expected: ('panic message',))]
fn should_panic_check_data() {
panic_with_felt252('panic message');
}
// works for multiple messages
#[test]
#[should_panic(expected: ('panic message', 'second message'))]
fn should_panic_multiple_messages() {
let mut arr = ArrayTrait::new();
arr.append('panic message');
arr.append('second message');
panic(arr);
}Mixed tuples can contain regular strings, short strings, and numbers in the same expected: (...) value, for example:
#[should_panic(expected: ("error", 11, "hello", 5, 'short_string'))]$ snforge test
Output:
Collected 5 test(s) from should_panic_example package
Running 5 test(s) from src/
[PASS] should_panic_example::tests::should_panic_felt_matching (l1_gas: ~0, l1_data_gas: ~0, l2_gas: ~40000)
[PASS] should_panic_example::tests::should_panic_multiple_messages (l1_gas: ~0, l1_data_gas: ~0, l2_gas: ~40000)
[PASS] should_panic_example::tests::should_panic_exact (l1_gas: ~0, l1_data_gas: ~0, l2_gas: ~40000)
[PASS] should_panic_example::tests::should_panic_expected_is_substring (l1_gas: ~0, l1_data_gas: ~0, l2_gas: ~40000)
[PASS] should_panic_example::tests::should_panic_check_data (l1_gas: ~0, l1_data_gas: ~0, l2_gas: ~40000)
Tests: 5 passed, 0 failed, 0 ignored, 0 filtered out
Ignoring Tests
Sometimes you may have tests that you want to exclude during most runs of snforge test.
You can achieve it using #[ignore] - tests marked with this attribute will be skipped by default.
#[cfg(test)]
mod tests {
#[test]
#[ignore]
fn ignored_test() { // test code
}
}$ snforge test
Output:
Collected 1 test(s) from ignoring_example package
Running 1 test(s) from src/
[IGNORE] ignoring_example::tests::ignored_test
Tests: 0 passed, 0 failed, 1 ignored, 0 filtered out
To run only tests marked with the #[ignore] attribute use snforge test --ignored.
To run all tests regardless of the #[ignore] attribute use snforge test --include-ignored.
Writing Assertions and assert_macros Package
⚠️ Recommended only for development ️⚠️
Assert macros package provides a set of macros that can be used to write assertions such as
assert_eq!. In order to use it, your project must have theassert_macrosdependency added to theScarb.tomlfile. These macros are very expensive to run on Starknet, as they result a huge amount of steps and are not recommended for production use. They are only meant to be used in tests. This dependency is added automatically when creating a project usingsnforge new.
[dev-dependencies]
snforge_std = ...
assert_macros = "<scarb-version>"
Available assert macros are
assert_eq!assert_ne!assert_lt!assert_le!assert_gt!assert_ge!
Test Attributes
snforge allows setting test attributes for test cases in order to modify their behavior.
Currently, those attributes are supported:
#[test]#[ignore]#[should_panic]#[available_gas]#[fork]#[fuzzer]#[disable_predeployed_contracts]#[test_case]
📝 Note
If you want to use other attributes (for example custom ones or from different packages) on the test function, they should be placed above the
snforgeattributes. This ensures that they execute first on the raw code, rather than on the code generated bysnforge. Otherwise, it may result in unexpected behavior.
#[test]
Marks the function as a test case, to be visible for test collector. Read more about test collection here.
#[ignore]
Marks the function as ignored, it will be skipped after collecting. Use this if you don't want the test to be run (the runner will display how many tests were ignored in the summary).
Read more about the behavior and how to override this here.
#[should_panic]
A test function can be marked with this attribute, in order to assert that the test function itself will panic. If the test panics when marked with this attribute, it's considered as "passed".
Moreover, it can be used with a string, a shortstring, a number, or a tuple containing any mix of those values for assessment of the exit panic data (depending on what your contract throws).
Usage
Asserting the panic data can be done with multiple types of inputs:
ByteArray:
#[should_panic(expected: "No such file or directory (os error 2)")]Shortstring:
#[should_panic(expected: 'panic message')]Tuple of shortstrings:
#[should_panic(expected: ('panic message', 'second message', )]Mixed tuple of strings, shortstrings and numbers:
#[should_panic(expected: ("error", 11, "hello", 5, 'short_string'))]Asserting that the function panics (with any panic data):
#[should_panic]📝 Note
If generic
ENTRYPOINT_FAILEDerrors are included in the expected field, the full panic data (including all such errors) will be checked. If they’re not included, these generic errors will be ignored and only the actual user-defined error will be validated.Example:
#[should_panic(expected: ('panic', 'message', 'ENTRYPOINT_FAILED')]#[should_panic(expected: ('panic', 'message')]
#[available_gas]
Sets a gas limit for the test. If the test exceeds the limit, it fails with an appropriate error.
Usage
Asserts that the test does not use more than 5 units of l2 gas:
#[available_gas(l2_gas: 5)]Asserts that the test does not use more than 5 units of l1 gas, l1 data gas and l2 gas each:
#[available_gas(l1_gas: 5, l1_data_gas: 5, l2_gas: 5)]#[fork]
Enables state forking for the given test case.
Read more about fork testing here.
Usage
Configures the fork endpoint with a given URL and a reference point for forking, which can be a block number, block hash, or a named tag (only "latest" is supported).
| Reference Type | Example Usage |
|---|---|
block_number | #[fork(url: "http://example.com", block_number: 123)] |
block_hash | #[fork(url: "http://example.com", block_hash: 0x123deadbeef)] |
block_tag | #[fork(url: "http://example.com", block_tag: latest)] |
You can also define your frequently used fork configs in your Scarb.toml:
[[tool.snforge.fork]]
name = "TESTNET"
url = "http://your.rpc.url"
block_id.tag = "latest"
Then, instead of repeating them inside the attribute, you can reference them by the given name of the config declared
in Scarb.toml:
#[fork("TESTNET")] #[fuzzer]
Enables fuzzing for a given test case.
Read more about test case fuzzing here.
Usage
Mark the test as fuzzed test, and configure the fuzzer itself. Configures how many runs will be performed, and the starting seed (for repeatability).
#[fuzzer(runs: 10, seed: 123)]Any parameter of fuzzer attribute can be omitted:
#[fuzzer]
#[fuzzer(runs: 10)]
#[fuzzer(seed: 123)]And will be filled in with default values in that case (default runs value is 256).
⚠️ Warning
Please note, that the test function needs to have some parameters in order for fuzzer to have something to fuzz. Otherwise it will fail to execute and crash the runner.
#[disable_predeployed_contracts]
Disables predeployment of default contracts in the test case. Currently predeployed contracts are:
STRKETH
#[test_case]
Generates multiple test cases from a single function by providing different sets of arguments.
Read more about parametrized tests here.
Usage
You can define multiple test cases by specifying different sets of arguments using the #[test_case] attribute.
#[test]
#[test_case(1, 2, 3)]
#[test_case(3, 4, 7)]
fn test_small_sum(a: felt252, b: felt252, expected: felt252) {
assert_eq!(a + b, expected);
}Test cases can also be named for better identification in the test reports.
#[test]
#[test_case(name: "one_plus_two", 1, 2, 3)]
#[test_case(name: "three_plus_four", 3, 4, 7)]
fn test_small_sum(a: u32, b: u32, expected: u32) {
assert_eq!(a + b, expected);
}Testing Smart Contracts
ℹ️ Info
To use the library functions designed for testing smart contracts, you need to add
snforge_stdpackage as a dependency in yourScarb.tomlusing the appropriate version.[dev-dependencies] snforge_std = "0.62.1"
Using unit testing as much as possible is a good practice, as it makes your test suites run faster. However, when writing smart contracts, you often want to test their interactions with the blockchain state and with other contracts.
The Test Contract
Let's consider a simple smart contract with two methods.
#[starknet::interface]
pub trait ISimpleContract<TContractState> {
fn increase_balance(ref self: TContractState, amount: felt252);
fn get_balance(self: @TContractState) -> felt252;
}
#[starknet::contract]
pub mod SimpleContract {
use starknet::storage::{StoragePointerReadAccess, StoragePointerWriteAccess};
#[storage]
struct Storage {
balance: felt252,
}
#[abi(embed_v0)]
pub impl SimpleContractImpl of super::ISimpleContract<ContractState> {
// Increases the balance by the given amount
fn increase_balance(ref self: ContractState, amount: felt252) {
self.balance.write(self.balance.read() + amount);
}
// Gets the balance.
fn get_balance(self: @ContractState) -> felt252 {
self.balance.read()
}
}
}Note that the name after mod will be used as the contract name for testing purposes. If multiple
contracts in your project share the same name, you can pass the full module path (e.g.
my_package::module::SimpleContract) to declare instead of the bare name to unambiguously
select the contract you want.
Writing Tests
Let's write a test that will deploy the SimpleContract contract and call some functions.
use snforge_std::{ContractClassTrait, DeclareResultTrait, declare};
use testing_smart_contracts_writing_tests::{
ISimpleContractDispatcher, ISimpleContractDispatcherTrait,
};
#[test]
fn call_and_invoke() {
// First declare and deploy a contract
let contract = declare("SimpleContract").unwrap().contract_class();
// Alternatively we could use `deploy_syscall` here
let (contract_address, _) = contract.deploy(@array![]).unwrap();
// Create a Dispatcher object that will allow interacting with the deployed contract
let dispatcher = ISimpleContractDispatcher { contract_address };
// Call a view function of the contract
let balance = dispatcher.get_balance();
assert(balance == 0, 'balance == 0');
// Call a function of the contract
// Here we mutate the state of the storage
dispatcher.increase_balance(100);
// Check that transaction took effect
let balance = dispatcher.get_balance();
assert(balance == 100, 'balance == 100');
}$ snforge test
Output:
Collected 1 test(s) from testing_smart_contracts_writing_tests package
Running 0 test(s) from src/
Running 1 test(s) from tests/
[PASS] testing_smart_contracts_writing_tests_integrationtest::simple_contract::call_and_invoke (l1_gas: ~0, l1_data_gas: ~192, l2_gas: ~513510)
Tests: 1 passed, 0 failed, 0 ignored, 0 filtered out
Passing Constructor Arguments
The previous example was a basic one. However, sometimes you may need to pass arguments to contract's constructor. This can be done in two ways:
- With manual serialization
- With
deploy_for_testfunction (available since Cairo 2.12)
Let's compare both approaches.
Test Contract
Below contract simulates a basic shopping cart. Its constructor takes initial products which are vector of Product structs.
#[derive(Copy, Debug, Drop, Serde, starknet::Store)]
pub struct Product {
pub name: felt252,
pub price: u64,
pub quantity: u64,
}
#[starknet::interface]
pub trait IShoppingCart<TContractState> {
fn get_products(self: @TContractState) -> Array<Product>;
}
#[starknet::contract]
pub mod ShoppingCart {
use starknet::storage::{MutableVecTrait, StoragePointerReadAccess, Vec, VecTrait};
use super::Product;
#[storage]
struct Storage {
products: Vec<Product>,
}
#[constructor]
fn constructor(ref self: ContractState, initial_products: Array<Product>) {
for product in initial_products {
self.products.push(product);
}
}
#[abi(embed_v0)]
impl ShoppingCartImpl of super::IShoppingCart<ContractState> {
fn get_products(self: @ContractState) -> Array<Product> {
let mut products = array![];
for i in 0..self.products.len() {
products.append(self.products.at(i).read());
}
products
}
}
}Deployment with deploy_for_test
deploy_for_test is an utility function that simplifies the deployment process by automatically handling serialization of constructor parameters.
use deployment_with_constructor_args::Product;
use deployment_with_constructor_args::ShoppingCart::deploy_for_test;
use snforge_std::{DeclareResult, DeclareResultTrait, declare};
use starknet::deployment::DeploymentParams;
use starknet::storage::StorableStoragePointerReadAccess;
#[test]
fn test_initial_cart_non_empty_with_deploy_for_test() {
// 1. Declare contract
let declare_result: DeclareResult = declare("ShoppingCart").unwrap();
let class_hash = declare_result.contract_class().class_hash;
// 2. Create deployment parameters
let deployment_params = DeploymentParams { salt: 0, deploy_from_zero: true };
// 3. Create initial products
let initial_products = array![
Product { name: 'Bread', price: 5, quantity: 2 },
Product { name: 'Milk', price: 2, quantity: 4 },
Product { name: 'Eggs', price: 3, quantity: 12 },
];
// 4. Use `deploy_for_test` to deploy the contract
// It automatically handles serialization of constructor parameters
let (_contract_address, _) = deploy_for_test(*class_hash, deployment_params, initial_products)
.expect('Deployment failed');
}Deployment with Manual Serialization
In this case we need to manually serialize the constructor parameters and pass them as calldata to the deploy function.
use deployment_with_constructor_args::Product;
use snforge_std::{ContractClassTrait, DeclareResult, DeclareResultTrait, declare};
use starknet::storage::StorableStoragePointerReadAccess;
#[test]
fn test_initial_cart_non_empty_with_serialization() {
// 1. Declare contract
let declare_result: DeclareResult = declare("ShoppingCart").unwrap();
let contract = declare_result.contract_class();
// 2. Create deployment parameters
let initial_products = array![
Product { name: 'Bread', price: 5, quantity: 2 },
Product { name: 'Milk', price: 2, quantity: 4 },
Product { name: 'Eggs', price: 3, quantity: 12 },
];
// 3. Create calldata
let mut calldata = ArrayTrait::new();
// 4. Serialize initial products
initial_products.serialize(ref calldata);
// 5. Deploy the contract
let (_contract_address, _) = contract.deploy(@calldata).unwrap();
}Handling Errors
Sometimes we want to test contracts functions that can panic, like testing that function that verifies caller address
panics on invalid address. For that purpose Starknet also provides a SafeDispatcher, that returns a Result instead of
panicking.
First, let's add a new, panicking function to our contract.
#[starknet::interface]
pub trait IPanicContract<TContractState> {
fn do_a_panic(self: @TContractState);
fn do_a_string_panic(self: @TContractState);
}
#[starknet::contract]
pub mod PanicContract {
use core::array::ArrayTrait;
#[storage]
struct Storage {}
#[abi(embed_v0)]
pub impl PanicContractImpl of super::IPanicContract<ContractState> {
// Panics
fn do_a_panic(self: @ContractState) {
panic(array!['PANIC', 'DAYTAH']);
}
fn do_a_string_panic(self: @ContractState) {
// A macro which allows panicking with a ByteArray (string) instance
panic!("This is panicking with a string, which can be longer than 31 characters");
}
}
}If we called this function in a test, it would result in a failure.
use snforge_std::{ContractClassTrait, DeclareResultTrait, declare};
use testing_smart_contracts_handling_errors::{
IPanicContractDispatcher, IPanicContractDispatcherTrait,
};
#[test]
fn failing() {
let contract = declare("PanicContract").unwrap().contract_class();
let (contract_address, _) = contract.deploy(@array![]).unwrap();
let dispatcher = IPanicContractDispatcher { contract_address };
dispatcher.do_a_panic();
}$ snforge test
Output:
Collected 2 test(s) from testing_smart_contracts_handling_errors package
Running 2 test(s) from tests/
[FAIL] testing_smart_contracts_handling_errors_integrationtest::panic::failing
Failure data:
(0x50414e4943 ('PANIC'), 0x444159544148 ('DAYTAH'), 0x454e545259504f494e545f4641494c4544 ('ENTRYPOINT_FAILED'))
[PASS] testing_smart_contracts_handling_errors_integrationtest::handle_panic::handling_string_errors (l1_gas: ~0, l1_data_gas: ~96, l2_gas: ~280000)
Running 0 test(s) from src/
Tests: 1 passed, 1 failed, 0 ignored, 0 filtered out
Failures:
testing_smart_contracts_handling_errors_integrationtest::panic::failing
SafeDispatcher
Using SafeDispatcher we can test that the function in fact panics with an expected message.
Safe dispatcher is a special kind of dispatcher that allows using the contract without automatically unwrapping the result, thereby making possible to catch the error like shown below.
use snforge_std::{ContractClassTrait, DeclareResultTrait, declare};
use testing_smart_contracts_safe_dispatcher::{
IPanicContractSafeDispatcher, IPanicContractSafeDispatcherTrait,
};
#[test]
#[feature("safe_dispatcher")]
fn handling_errors() {
let contract = declare("PanicContract").unwrap().contract_class();
let (contract_address, _) = contract.deploy(@array![]).unwrap();
let safe_dispatcher = IPanicContractSafeDispatcher { contract_address };
match safe_dispatcher.do_a_panic() {
Result::Ok(_) => panic!("Entrypoint did not panic"),
Result::Err(panic_data) => {
assert(*panic_data.at(0) == 'PANIC', *panic_data.at(0));
assert(*panic_data.at(1) == 'DAYTAH', *panic_data.at(1));
},
};
}Now the test passes as expected.
$ snforge test
Output:
Collected 1 test(s) from testing_smart_contracts_safe_dispatcher package
Running 0 test(s) from src/
Running 1 test(s) from tests/
[PASS] testing_smart_contracts_safe_dispatcher_integrationtest::safe_dispatcher::handling_errors (l1_gas: ~0, l1_data_gas: ~96, l2_gas: ~280000)
Tests: 1 passed, 0 failed, 0 ignored, 0 filtered out
📝 Note
It is not possible to catch errors that cause immediate termination of execution, e.g. calling a contract with a nonexistent address. A full list of such errors can be found here.
Similarly, you can handle the panics which use ByteArray as an argument (like an assert! or panic! macro)
// Necessary utility function import
use snforge_std::byte_array::try_deserialize_bytearray_error;
use snforge_std::{ContractClassTrait, DeclareResultTrait, declare};
use testing_smart_contracts_handling_errors::{
IPanicContractSafeDispatcher, IPanicContractSafeDispatcherTrait,
};
#[test]
#[feature("safe_dispatcher")]
fn handling_string_errors() {
let contract = declare("PanicContract").unwrap().contract_class();
let (contract_address, _) = contract.deploy(@array![]).unwrap();
let safe_dispatcher = IPanicContractSafeDispatcher { contract_address };
match safe_dispatcher.do_a_string_panic() {
Result::Ok(_) => panic!("Entrypoint did not panic"),
Result::Err(panic_data) => {
let str_err = try_deserialize_bytearray_error(panic_data.span()).expect('wrong format');
assert(
str_err == "This is panicking with a string, which can be longer than 31 characters",
'wrong string received',
);
},
};
}You also could skip the de-serialization of the panic_data, and not use try_deserialize_bytearray_error, but this way you can actually use assertions on the ByteArray that was used to panic.
📝 Note
To operate with
SafeDispatcherit's required to annotate its usage with#[feature("safe_dispatcher")].There are 3 options:
- module-level declaration
#[feature("safe_dispatcher")] mod my_module;- function-level declaration
#[feature("safe_dispatcher")] fn my_function() { ... }- directly before the usage
#[feature("safe_dispatcher")] let result = safe_dispatcher.some_function();
Expecting Test Failure
Sometimes the test code failing can be a desired behavior.
Instead of manually handling it, you can simply mark your test as #[should_panic(...)].
See here for more details.
Testing Contracts' Internals
Sometimes, you want to test a function that uses Starknet context such as block number, timestamp or storage access.
Since every test is treated like a contract (with the address test_address), you can use the aforementioned pattern to test:
- functions which are not available through the interface (but your contract uses them)
- functions which are internal
- functions performing specific operations on the contracts' storage or context data
- library calls directly in the tests
Utilities For Testing Internals
contract_state_for_testing() - State of Test Contract
This function is generated by the #[starknet::contract] macro.
It can be used to test functions that accept the state as an argument.
In the example below, we will use the following contract:
#[starknet::interface]
pub trait IContract<TContractState> {
fn get_balance_at(self: @TContractState, address: starknet::ContractAddress) -> u64;
}
#[starknet::contract]
pub mod Contract {
use starknet::ContractAddress;
use starknet::storage::{
Map, StorageMapReadAccess, StorageMapWriteAccess, StoragePointerReadAccess,
};
#[storage]
pub struct Storage {
pub balances: Map<ContractAddress, u64>,
}
#[abi(embed_v0)]
impl ContractImpl of super::IContract<ContractState> {
fn get_balance_at(self: @ContractState, address: ContractAddress) -> u64 {
self.balances.read(address)
}
}
#[generate_trait]
pub impl InternalImpl of InternalTrait {
fn _internal_set_balance(ref self: ContractState, address: ContractAddress, balance: u64) {
self.balances.write(address, balance);
}
}
}Modifying the state of an existing contract
There is a special interact_with_state cheatcode dedicated for using contract_state_for_testing with a deployed contract.
By using this function, the state will be modified for the provided contract address.
// 0. Import necessary structs and traits
use snforge_std::{ContractClassTrait, DeclareResultTrait, declare, interact_with_state};
use starknet::ContractAddress;
use starknet::storage::{StorageMapReadAccess, StorageMapWriteAccess};
use testing_contract_internals::contract::Contract::InternalTrait;
use testing_contract_internals::contract::{Contract, IContractDispatcher, IContractDispatcherTrait};
fn deploy_contract() -> starknet::ContractAddress {
let contract = declare("Contract").unwrap().contract_class();
let (contract_address, _) = contract.deploy(@array![]).unwrap();
contract_address
}
#[test]
fn test_storage() {
// 1. Deploy your contract
let contract_address = deploy_contract();
let dispatcher = IContractDispatcher { contract_address };
let contract_to_modify: ContractAddress = 0x123.try_into().unwrap();
assert(dispatcher.get_balance_at(contract_to_modify) == 0, 'Wrong balance');
// 2. Use `interact_with_state` to access and modify the contract's storage
interact_with_state(
contract_address,
|| {
// 3. Get access to the contract's state
let mut state = Contract::contract_state_for_testing();
// 4. Read from storage
let current_balance = state.balances.read(contract_to_modify);
// 5. Write to storage
state.balances.write(contract_to_modify, current_balance + 100);
},
);
assert(dispatcher.get_balance_at(contract_to_modify) == 100, 'Wrong balance');
}
#[test]
fn test_internal_function() {
// 1. Deploy your contract
let contract_address = deploy_contract();
let dispatcher = IContractDispatcher { contract_address };
let contract_to_modify: ContractAddress = 0x456.try_into().unwrap();
assert(dispatcher.get_balance_at(contract_to_modify) == 0, 'Wrong balance');
// 2. Use `interact_with_state` to call contract's internal function
interact_with_state(
contract_address,
|| {
// 3. Get access to the contract's state
let mut state = Contract::contract_state_for_testing();
// 4. Call internal function
state._internal_set_balance(contract_to_modify, 200);
},
);
assert(dispatcher.get_balance_at(contract_to_modify) == 200, 'Wrong balance');
}⚠️ Warning
When using
contract_state_for_testingwithout theinteract_with_statecheatcode, the storage is modified in the context of thetest_addresscontract. Therefore, it is not recommended to usecontract_state_for_testingwithout the cheatcode, as it can lead to unexpected results.
snforge_std::test_address() - Address of Test Contract
That function returns the contract address of the test. It is useful, when you want to:
- Mock the context (
cheat_caller_address,cheat_block_timestamp,cheat_block_number, ...) - Spy for events emitted in the test
Example usages:
1. Mocking the context info
Example for cheat_block_number, same can be implemented for cheat_caller_address/cheat_block_timestamp/elect etc.
use core::box::BoxTrait;
use core::result::ResultTrait;
use snforge_std::{start_cheat_block_number, stop_cheat_block_number, test_address};
use starknet::ContractAddress;
#[test]
fn test_cheat_block_number_test_state() {
let test_address: ContractAddress = test_address();
let old_block_number = starknet::get_block_info().unbox().block_number;
start_cheat_block_number(test_address, 234);
let new_block_number = starknet::get_block_info().unbox().block_number;
assert(new_block_number == 234, 'Wrong block number');
stop_cheat_block_number(test_address);
let new_block_number = starknet::get_block_info().unbox().block_number;
assert(new_block_number == old_block_number, 'Block num did not change back');
}2. Spying for events
You can use both starknet::emit_event_syscall, and the spies will capture the events,
emitted in a #[test] function, if you pass the test_address() as a spy parameter (or spy on all events).
Given the emitting contract implementation:
#[starknet::interface]
pub trait IEmitter<TContractState> {
fn emit_event(ref self: TContractState);
}
#[starknet::contract]
pub mod Emitter {
#[event]
#[derive(Drop, starknet::Event)]
pub enum Event {
ThingEmitted: ThingEmitted,
}
#[derive(Drop, starknet::Event)]
pub struct ThingEmitted {
pub thing: felt252,
}
#[storage]
struct Storage {}
#[external(v0)]
pub fn emit_event(ref self: ContractState) {
self.emit(Event::ThingEmitted(ThingEmitted { thing: 420 }));
}
}You can implement this test:
use core::array::ArrayTrait;
use snforge_std::{
ContractClassTrait, Event, EventSpy, EventSpyAssertionsTrait, EventSpyTrait, declare,
spy_events, test_address,
};
use testing_contract_internals::spying_for_events::Emitter;
#[test]
fn test_expect_event() {
let contract_address = test_address();
let mut spy = spy_events();
let mut testing_state = Emitter::contract_state_for_testing();
Emitter::emit_event(ref testing_state);
spy
.assert_emitted(
@array![
(
contract_address,
Emitter::Event::ThingEmitted(Emitter::ThingEmitted { thing: 420 }),
),
],
)
}You can also use the starknet::emit_event_syscall directly in the tests:
use core::array::ArrayTrait;
use core::result::ResultTrait;
use snforge_std::{
ContractClassTrait, Event, EventSpy, EventSpyAssertionsTrait, EventSpyTrait, declare,
spy_events, test_address,
};
use starknet::syscalls::emit_event_syscall;
use starknet::{ContractAddress, SyscallResultTrait};
#[test]
fn test_expect_event() {
let contract_address = test_address();
let mut spy = spy_events();
emit_event_syscall(array![1234].span(), array![2345].span()).unwrap_syscall();
spy
.assert_emitted(
@array![(contract_address, Event { keys: array![1234], data: array![2345] })],
);
assert(spy.get_events().events.len() == 1, 'There should no more events');
}Using Library Calls With the Test State Context
Using the above utilities, you can avoid deploying a mock contract, to test a library_call with a LibraryCallDispatcher.
For contract implementation:
#[starknet::interface]
pub trait ILibraryContract<TContractState> {
fn get_value(self: @TContractState) -> felt252;
fn set_value(ref self: TContractState, number: felt252);
}
#[starknet::contract]
pub mod LibraryContract {
use starknet::storage::{StoragePointerReadAccess, StoragePointerWriteAccess};
#[storage]
struct Storage {
value: felt252,
}
#[external(v0)]
pub fn get_value(self: @ContractState) -> felt252 {
self.value.read()
}
#[external(v0)]
pub fn set_value(ref self: ContractState, number: felt252) {
self.value.write(number);
}
}We use the SafeLibraryDispatcher like this:
use snforge_std::{DeclareResultTrait, declare};
use starknet::syscalls::library_call_syscall;
use starknet::{ClassHash, ContractAddress};
use testing_contract_internals::using_library_calls::{
ILibraryContractSafeDispatcherTrait, ILibraryContractSafeLibraryDispatcher,
};
#[test]
fn test_library_calls() {
let class_hash = declare("LibraryContract").unwrap().contract_class().class_hash.clone();
let lib_dispatcher = ILibraryContractSafeLibraryDispatcher { class_hash };
let value = lib_dispatcher.get_value().unwrap();
assert(value == 0, 'Incorrect state');
lib_dispatcher.set_value(10).unwrap();
let value = lib_dispatcher.get_value().unwrap();
assert(value == 10, 'Incorrect state');
}📝 Note
Library calls don't trigger cheat spans progression. As a result, the cheatcode is still in effect when making subsequent library calls.
⚠️ Warning
This library call will write to the
test_addressmemory segment, so it can potentially overwrite the changes you make to the memory throughcontract_state_for_testingobject and vice-versa.
Using Cheatcodes
ℹ️ Info To use cheatcodes you need to add
snforge_stdpackage as a dependency in yourScarb.tomlusing the appropriate version.[dev-dependencies] snforge_std = "0.62.1"
When testing smart contracts, often there are parts of code that are dependent on a specific blockchain state. Instead of trying to replicate these conditions in tests, you can emulate them using cheatcodes.
⚠️ Warning
These examples make use of
assert_macros, so it's recommended to get familiar with them first. Learn more aboutassert_macros
The Test Contract
In this tutorial, we will be using the following Starknet contract:
#[starknet::interface]
pub trait ICheatcodeChecker<TContractState> {
fn increase_balance(ref self: TContractState, amount: felt252);
fn get_balance(self: @TContractState) -> felt252;
fn get_block_number_at_construction(self: @TContractState) -> u64;
fn get_block_timestamp_at_construction(self: @TContractState) -> u64;
}
#[starknet::contract]
pub mod CheatcodeChecker {
use core::box::BoxTrait;
use starknet::get_caller_address;
use starknet::storage::{StoragePointerReadAccess, StoragePointerWriteAccess};
#[storage]
struct Storage {
balance: felt252,
blk_nb: u64,
blk_timestamp: u64,
}
#[constructor]
fn constructor(ref self: ContractState) {
// store the current block number
self.blk_nb.write(starknet::get_block_info().unbox().block_number);
// store the current block timestamp
self.blk_timestamp.write(starknet::get_block_info().unbox().block_timestamp);
}
#[abi(embed_v0)]
impl ICheatcodeCheckerImpl of super::ICheatcodeChecker<ContractState> {
// Increases the balance by the given amount
fn increase_balance(ref self: ContractState, amount: felt252) {
assert_is_allowed_user();
self.balance.write(self.balance.read() + amount);
}
// Gets the balance.
fn get_balance(self: @ContractState) -> felt252 {
self.balance.read()
}
// Gets the block number
fn get_block_number_at_construction(self: @ContractState) -> u64 {
self.blk_nb.read()
}
// Gets the block timestamp
fn get_block_timestamp_at_construction(self: @ContractState) -> u64 {
self.blk_timestamp.read()
}
}
fn assert_is_allowed_user() {
// checks if caller is '123'
let address = get_caller_address();
assert(address.into() == 123, 'user is not allowed');
}
}Writing Tests
We can try to create a test that will increase and verify the balance.
use snforge_std::{ContractClassTrait, DeclareResultTrait, declare};
use using_cheatcodes::{ICheatcodeCheckerDispatcher, ICheatcodeCheckerDispatcherTrait};
#[test]
fn call_and_invoke() {
let contract = declare("CheatcodeChecker").unwrap().contract_class();
let (contract_address, _) = contract.deploy(@array![]).unwrap();
let dispatcher = ICheatcodeCheckerDispatcher { contract_address };
let balance = dispatcher.get_balance();
assert(balance == 0, 'balance == 0');
dispatcher.increase_balance(100);
let balance = dispatcher.get_balance();
assert(balance == 100, 'balance == 100');
}This test fails, which means that increase_balance method panics as we expected.
$ snforge test
Output:
Collected 1 test(s) from using_cheatcodes package
Running 0 test(s) from src/
Running 1 test(s) from tests/
[FAIL] using_cheatcodes_tests::call_and_invoke
Failure data:
(0x75736572206973206e6f7420616c6c6f776564 ('user is not allowed'), 0x454e545259504f494e545f4641494c4544 ('ENTRYPOINT_FAILED'))
Tests: 0 passed, 1 failed, 0 ignored, 0 filtered out
Failures:
using_cheatcodes_tests::call_and_invoke
Our user validation is not letting us call the contract, because the default caller address is not 123.
Using Cheatcodes in Tests
By using cheatcodes, we can change various properties of transaction info, block info, etc.
For example, we can use the start_cheat_caller_address cheatcode to change the caller
address, so it passes our validation.
Cheating an Address
use snforge_std::{ContractClassTrait, DeclareResultTrait, declare, start_cheat_caller_address};
use using_cheatcodes_cheat_address::{ICheatcodeCheckerDispatcher, ICheatcodeCheckerDispatcherTrait};
#[test]
fn call_and_invoke() {
let contract = declare("CheatcodeChecker").unwrap().contract_class();
let (contract_address, _) = contract.deploy(@array![]).unwrap();
let dispatcher = ICheatcodeCheckerDispatcher { contract_address };
let balance = dispatcher.get_balance();
assert(balance == 0, 'balance == 0');
// Change the caller address to 123 when calling the contract at the `contract_address` address
start_cheat_caller_address(contract_address, 123.try_into().unwrap());
dispatcher.increase_balance(100);
let balance = dispatcher.get_balance();
assert(balance == 100, 'balance == 100');
}The test will now pass without an error
$ snforge test
Output:
Collected 1 test(s) from using_cheatcodes_cheat_address package
Running 0 test(s) from src/
Running 1 test(s) from tests/
[PASS] using_cheatcodes_cheat_address_tests::call_and_invoke (l1_gas: ~0, l1_data_gas: ~288, l2_gas: ~600000)
Tests: 1 passed, 0 failed, 0 ignored, 0 filtered out
Cancelling the Cheat
Most cheatcodes come with corresponding start_ and stop_ functions that can be used to start and stop the state
change.
In case of the start_cheat_caller_address, we can cancel the address change
using stop_cheat_caller_address.
We will demonstrate its behavior using SafeDispatcher to show when exactly the fail occurs:
use snforge_std::{
ContractClassTrait, DeclareResultTrait, declare, start_cheat_caller_address,
stop_cheat_caller_address,
};
use using_cheatcodes_cancelling_cheat::{
ICheatcodeCheckerSafeDispatcher, ICheatcodeCheckerSafeDispatcherTrait,
};
#[test]
#[feature("safe_dispatcher")]
fn call_and_invoke() {
let contract = declare("CheatcodeChecker").unwrap().contract_class();
let (contract_address, _) = contract.deploy(@array![]).unwrap();
let dispatcher = ICheatcodeCheckerSafeDispatcher { contract_address };
let balance = dispatcher.get_balance().unwrap();
assert(balance == 0, 'balance == 0');
// Change the caller address to 123 when calling the contract at the `contract_address` address
start_cheat_caller_address(contract_address, 123.try_into().unwrap());
// Call to method with caller restriction succeeds
dispatcher.increase_balance(100).expect('First call failed!');
let balance = dispatcher.get_balance();
assert_eq!(balance, Result::Ok(100));
// Cancel the cheat
stop_cheat_caller_address(contract_address);
// The call fails now
dispatcher.increase_balance(100).expect('Second call failed!');
let balance = dispatcher.get_balance();
assert_eq!(balance, Result::Ok(100));
}$ snforge test
Output:
Collected 1 test(s) from using_cheatcodes_cancelling_cheat package
Running 1 test(s) from tests/
[FAIL] using_cheatcodes_cancelling_cheat_tests::call_and_invoke
Failure data:
0x5365636f6e642063616c6c206661696c656421 ('Second call failed!')
Running 0 test(s) from src/
Tests: 0 passed, 1 failed, 0 ignored, 0 filtered out
Failures:
using_cheatcodes_cancelling_cheat_tests::call_and_invoke
We see that the second increase_balance fails since we cancelled the cheatcode.
Cheating Addresses Globally
In case you want to cheat the caller address for all contracts, you can use the global cheatcode which has the _global suffix. Note, that we don't specify target, nor the span, because this cheatcode type works globally and indefinitely.
use snforge_std::{
ContractClassTrait, DeclareResultTrait, declare, start_cheat_caller_address_global,
stop_cheat_caller_address_global,
};
use using_cheatcodes_others::{ICheatcodeCheckerDispatcher, ICheatcodeCheckerDispatcherTrait};
#[test]
fn call_and_invoke_global() {
let contract = declare("CheatcodeChecker").unwrap().contract_class();
let (contract_address_a, _) = contract.deploy(@array![]).unwrap();
let (contract_address_b, _) = contract.deploy(@array![]).unwrap();
let dispatcher_a = ICheatcodeCheckerDispatcher { contract_address: contract_address_a };
let dispatcher_b = ICheatcodeCheckerDispatcher { contract_address: contract_address_b };
let balance_a = dispatcher_a.get_balance();
let balance_b = dispatcher_b.get_balance();
assert_eq!(balance_a, 0);
assert_eq!(balance_b, 0);
// Change the caller address to 123, both targets a and b will be affected
// global cheatcodes work indefinitely until stopped
start_cheat_caller_address_global(123.try_into().unwrap());
dispatcher_a.increase_balance(100);
dispatcher_b.increase_balance(100);
let balance_a = dispatcher_a.get_balance();
let balance_b = dispatcher_b.get_balance();
assert_eq!(balance_a, 100);
assert_eq!(balance_b, 100);
// Cancel the cheat
stop_cheat_caller_address_global();
}Cheating the Constructor
Most of the cheatcodes like cheat_caller_address, mock_call, cheat_block_timestamp, cheat_block_number do work in the constructor of the contracts.
Let's say, that you have a contract that saves the caller address (deployer) in the constructor, and you want it to be pre-set to a certain value.
To cheat_caller_address the constructor, you need to start_cheat_caller_address before it is invoked, with the right address. To achieve this, you need to precalculate the address of the contract by using the precalculate_address function of ContractClassTrait on the declared contract, and then use it in start_cheat_caller_address as an argument:
use snforge_std::{
ContractClassTrait, DeclareResultTrait, declare, start_cheat_block_number,
start_cheat_block_timestamp,
};
use using_cheatcodes_others::{ICheatcodeCheckerDispatcher, ICheatcodeCheckerDispatcherTrait};
#[test]
fn call_and_invoke() {
let contract = declare("CheatcodeChecker").unwrap().contract_class();
// Precalculate the address to obtain the contract address before the constructor call (deploy)
let contract_address = contract.precalculate_address(@array![]);
// Change the block number and timestamp before the call to contract.deploy
start_cheat_block_number(contract_address, 0x420_u64);
start_cheat_block_timestamp(contract_address, 0x2137_u64);
// Deploy as normally
contract.deploy(@array![]).unwrap();
// Construct a dispatcher with the precalculated address
let dispatcher = ICheatcodeCheckerDispatcher { contract_address };
let block_number = dispatcher.get_block_number_at_construction();
let block_timestamp = dispatcher.get_block_timestamp_at_construction();
assert_eq!(block_number, 0x420_u64);
assert_eq!(block_timestamp, 0x2137_u64);
}Setting Cheatcode Span
Sometimes it's useful to have a cheatcode work only for a certain number of target calls.
That's where CheatSpan comes in handy.
enum CheatSpan {
Indefinite: (),
TargetCalls: NonZero<usize>,
}To set span for a cheatcode, use cheat_caller_address / cheat_block_timestamp / cheat_block_number / etc.
cheat_caller_address(contract_address, new_caller_address, CheatSpan::TargetCalls(1))Calling a cheatcode with CheatSpan::TargetCalls(N) is going to activate the cheatcode for N calls to a specified contract address, after which it's going to be automatically canceled.
Of course the cheatcode can still be canceled before its CheatSpan goes down to 0 - simply call stop_cheat_caller_address on the target manually.
ℹ️ Info
Using
start_cheat_caller_addressis equivalent to usingcheat_caller_addresswithCheatSpan::Indefinite.
To better understand the functionality of CheatSpan, here's a full example:
use snforge_std::{CheatSpan, ContractClassTrait, DeclareResultTrait, cheat_caller_address, declare};
use starknet::ContractAddress;
use using_cheatcodes_others::{
ICheatcodeCheckerSafeDispatcher, ICheatcodeCheckerSafeDispatcherTrait,
};
#[test]
#[feature("safe_dispatcher")]
fn call_and_invoke() {
let contract = declare("CheatcodeChecker").unwrap().contract_class();
let (contract_address, _) = contract.deploy(@array![]).unwrap();
let safe_dispatcher = ICheatcodeCheckerSafeDispatcher { contract_address };
let balance = safe_dispatcher.get_balance().unwrap();
assert_eq!(balance, 0);
// Function `increase_balance` from HelloStarknet contract
// requires the caller_address to be 123
let spoofed_caller: ContractAddress = 123.try_into().unwrap();
// Change the caller address for the contract_address for a span of 2 target calls (here, calls
// to contract_address)
cheat_caller_address(contract_address, spoofed_caller, CheatSpan::TargetCalls(2));
// Call #1 should succeed
let call_1_result = safe_dispatcher.increase_balance(100);
assert!(call_1_result.is_ok());
// Call #2 should succeed
let call_2_result = safe_dispatcher.increase_balance(100);
assert!(call_2_result.is_ok());
// Call #3 should fail, as the cheat_caller_address cheatcode has been canceled
let call_3_result = safe_dispatcher.increase_balance(100);
assert_eq!(call_3_result, Result::Err(array!['user is not allowed']));
let balance = safe_dispatcher.get_balance().unwrap();
assert_eq!(balance, 200);
}📝 Note
Library calls don't trigger cheat spans progression. As a result, the cheatcode is still in effect when making subsequent library calls.
Cheating ERC-20 Token balance
If you want to cheat the balance of an ERC-20 token (STRK, ETH or custom one), you can use the set_balance cheatcode.
ℹ️ Info
STRK and ETH are predeployed in every test case by default, so you can use them without any additional setup. The predeployment can be disabled by the
#[disable_predeployed_contracts]attribute.
Below is a basic example of setting and reading STRK balance:
use snforge_std::{Token, TokenImpl, TokenTrait, set_balance};
use starknet::syscalls::call_contract_syscall;
use starknet::{ContractAddress, SyscallResultTrait};
#[test]
fn set_balance_strk() {
// Example user address, whose balance we want to set
let user_address: ContractAddress = 0x123.try_into().unwrap();
set_balance(user_address, 1_000_000, Token::STRK);
// Read the balance
let balance = call_contract_syscall(
Token::STRK.contract_address().into(),
selector!("balance_of"),
array![user_address.into()].span(),
)
.unwrap_syscall();
assert(balance == array![1_000_000, 0].span(), 'Invalid balance');
}You can also use CustomToken (see Token docs). It needs contract_address and balances_variable_selector (which refers to storage variable, holding the mapping of balances -> amounts):
use snforge_std::{
ContractClassTrait, CustomToken, DeclareResultTrait, Token, TokenImpl, TokenTrait, declare,
set_balance,
};
use starknet::syscalls::call_contract_syscall;
use starknet::{ContractAddress, SyscallResultTrait};
fn deploy_contract(name: ByteArray, constructor_calldata: Array<felt252>) -> ContractAddress {
let contract = declare(name).unwrap().contract_class();
let (contract_address, _) = contract.deploy(@constructor_calldata).unwrap();
contract_address
}
#[test]
fn set_balance_custom_token() {
// Deploy your own token with ERC20 contract
let constructor_calldata = array![
'CustomToken ', // Token name
'CTKN', // Token symbol
18, // Decimals
999_000_000, // Initial supply (u256 high)
0, // Initial supply (u256 low)
1234 // Recipient address
];
let token_contract_address = deploy_contract("ERC20", constructor_calldata);
// Example user address, whose balance we want to set
let user_address: ContractAddress = 0x123.try_into().unwrap();
// Define custom token
let token = Token::Custom(
CustomToken {
contract_address: token_contract_address,
// In this example, we assume that the balances variable is named `balances`
balances_variable_selector: selector!("balances"),
},
);
set_balance(user_address, 1_000_000, token);
// Read the balance
let balance = call_contract_syscall(
token.contract_address().into(),
selector!("balance_of"),
array![user_address.into()].span(),
)
.unwrap_syscall();
assert(balance == array![1_000_000, 0].span(), 'Invalid balance');
}Testing events
Examples are based on the following SpyEventsChecker contract implementation:
#[starknet::interface]
pub trait ISpyEventsChecker<TContractState> {
fn emit_one_event(ref self: TContractState, some_data: felt252);
}
#[starknet::contract]
pub mod SpyEventsChecker {
#[storage]
struct Storage {}
#[event]
#[derive(Drop, starknet::Event)]
pub enum Event {
FirstEvent: FirstEvent,
}
#[derive(Drop, starknet::Event)]
pub struct FirstEvent {
pub some_data: felt252,
}
#[external(v0)]
pub fn emit_one_event(ref self: ContractState, some_data: felt252) {
self.emit(FirstEvent { some_data });
}
}Asserting emission with assert_emitted method
This is the simpler way, in which you don't have to fetch the events explicitly. See the below code for reference:
use snforge_std::{
declare, ContractClassTrait, DeclareResultTrait, spy_events,
EventSpyAssertionsTrait // Add for assertions on the EventSpy
};
use testing_events::contract::{
ISpyEventsCheckerDispatcher, ISpyEventsCheckerDispatcherTrait, SpyEventsChecker,
};
#[test]
fn test_simple_assertions() {
let contract = declare("SpyEventsChecker").unwrap().contract_class();
let (contract_address, _) = contract.deploy(@array![]).unwrap();
let dispatcher = ISpyEventsCheckerDispatcher { contract_address };
let mut spy = spy_events(); // Ad. 1
dispatcher.emit_one_event(123);
spy
.assert_emitted(
@array![ // Ad. 2
(
contract_address,
SpyEventsChecker::Event::FirstEvent(
SpyEventsChecker::FirstEvent { some_data: 123 },
),
),
],
);
}Let's go through the code:
- After contract deployment, we created the spy using
spy_eventscheatcode. From this moment all emitted events will be spied. - Asserting is done using the
assert_emittedmethod. It takes an array snapshot of(ContractAddress, event)tuples we expect that were emitted.
📝 Note We can pass events defined in the contract and construct them like in the
self.emitmethod!
Asserting lack of event emission with assert_not_emitted
In cases where you want to test an event was not emitted, use the assert_not_emitted function.
It works similarly as assert_emitted with the only difference that it panics if an event was emitted during the execution.
Given the example above, we can check that a different FirstEvent was not emitted:
spy.assert_not_emitted(@array![
(
contract_address,
SpyEventsChecker::Event::FirstEvent(
SpyEventsChecker::FirstEvent { some_data: 456 }
)
)
]);Note that both the event name and event data are checked.
If a function emitted an event with the same name but a different payload, the assert_not_emitted function will pass.
Asserting the events manually
If you wish to assert the data manually, you can do that on the Events structure.
Simply call get_events() on your EventSpy and access events field on the returned Events value.
Then, you can access the events and assert data by yourself.
use snforge_std::{
declare, ContractClassTrait, DeclareResultTrait, spy_events, EventSpyAssertionsTrait,
EventSpyTrait, // Add for fetching events directly
Event, // A structure describing a raw `Event`
IsEmitted // Trait for checking if a given event was ever emitted
};
use starknet::ContractAddress;
use testing_events::contract::{
ISpyEventsCheckerDispatcher, ISpyEventsCheckerDispatcherTrait, SpyEventsChecker,
};
#[test]
fn test_complex_assertions() {
let contract = declare("SpyEventsChecker").unwrap().contract_class();
let (contract_address, _) = contract.deploy(@array![]).unwrap();
let dispatcher = ISpyEventsCheckerDispatcher { contract_address };
let mut spy = spy_events(); // Ad 1.
dispatcher.emit_one_event(123);
let events = spy.get_events(); // Ad 2.
assert(events.events.len() == 1, 'There should be one event');
let expected_event = SpyEventsChecker::Event::FirstEvent(
SpyEventsChecker::FirstEvent { some_data: 123 },
);
assert!(events.is_emitted(contract_address, @expected_event)); // Ad 3.
let expected_events: Array<(ContractAddress, Event)> = array![
(contract_address, expected_event.into()),
];
assert!(events.events == expected_events); // Ad 4.
let (from, event) = events.events.at(0); // Ad 5.
assert(from == @contract_address, 'Emitted from wrong address');
assert(event.keys.len() == 1, 'There should be one key');
assert(event.keys.at(0) == @selector!("FirstEvent"), 'Wrong event name'); // Ad 6.
assert(event.data.len() == 1, 'There should be one data');
}Let's go through important parts of the provided code:
- After contract deployment we created the spy with
spy_eventscheatcode. From this moment all events emitted by theSpyEventsCheckercontract will be spied. - We have to call
get_eventsmethod on the created spy to fetch our events and get theEventsstructure. - We can check if certain event was emitted.
- Emitted events can be explicitly compared.
- To get our particular event, we need to access the
eventsproperty and get the event under an index. Sinceeventsis an array holding a tuple ofContractAddressandEvent, we unpack it usinglet (from, event). - If the event is emitted by calling
self.emitmethod, its hashed name is saved under thekeys.at(0)(this way Starknet handles events)
📝 Note To assert the
nameproperty we have to hash a string with theselector!macro.
Filtering Events
Sometimes, when you assert the events manually, you might not want to get all the events, but only ones from
a particular address. You can address that by using the method emitted_by on the Events structure.
use snforge_std::{
declare, ContractClassTrait, DeclareResultTrait, spy_events, EventSpyAssertionsTrait,
EventSpyTrait, Event,
EventsFilterTrait // Add for filtering the Events object (result of `get_events`)
};
use testing_events::contract::{
ISpyEventsCheckerDispatcher, ISpyEventsCheckerDispatcherTrait, SpyEventsChecker,
};
#[test]
fn test_assertions_with_filtering() {
let contract = declare("SpyEventsChecker").unwrap().contract_class();
let (first_address, _) = contract.deploy(@array![]).unwrap();
let (second_address, _) = contract.deploy(@array![]).unwrap();
let first_dispatcher = ISpyEventsCheckerDispatcher { contract_address: first_address };
let second_dispatcher = ISpyEventsCheckerDispatcher { contract_address: second_address };
let mut spy = spy_events();
first_dispatcher.emit_one_event(123);
second_dispatcher.emit_one_event(234);
second_dispatcher.emit_one_event(345);
let events_from_first_address = spy.get_events().emitted_by(first_address);
let events_from_second_address = spy.get_events().emitted_by(second_address);
let (from_first, event_from_first) = events_from_first_address.events.at(0);
assert(from_first == @first_address, 'Emitted from wrong address');
assert(event_from_first.data.at(0) == @123.into(), 'Data should be 123');
let (from_second_one, event_from_second_one) = events_from_second_address.events.at(0);
assert(from_second_one == @second_address, 'Emitted from wrong address');
assert(event_from_second_one.data.at(0) == @234.into(), 'Data should be 234');
let (from_second_two, event_from_second_two) = events_from_second_address.events.at(1);
assert(from_second_two == @second_address, 'Emitted from wrong address');
assert(event_from_second_two.data.at(0) == @345.into(), 'Data should be 345');
}events_from_first_address has events emitted by the first contract only.
Similarly, events_from_second_address has events emitted by the second contract.
Asserting Events Emitted With emit_event_syscall
Events emitted with emit_event_syscall could have nonstandard (not defined anywhere) keys and data.
They can also be asserted with spy.assert_emitted method.
Let's extend our SpyEventsChecker with emit_event_with_syscall method:
#[starknet::interface]
pub trait ISpySyscallEventsChecker<TContractState> {
fn emit_one_event(ref self: TContractState, some_data: felt252);
fn emit_event_with_syscall(ref self: TContractState, some_key: felt252, some_data: felt252);
}
#[starknet::contract]
pub mod SpySyscallEventsChecker {
// ...
// Rest of the implementation identical to `SpyEventsChecker`
use core::starknet::SyscallResultTrait;
use core::starknet::syscalls::emit_event_syscall;
#[external(v0)]
pub fn emit_event_with_syscall(ref self: ContractState, some_key: felt252, some_data: felt252) {
emit_event_syscall(array![some_key].span(), array![some_data].span()).unwrap_syscall();
}
}And add a test for it:
use snforge_std::{
ContractClassTrait, DeclareResultTrait, Event, EventSpyAssertionsTrait, EventSpyTrait,
EventsFilterTrait, declare, spy_events,
};
use testing_events::syscall::{
ISpySyscallEventsCheckerDispatcher, ISpySyscallEventsCheckerDispatcherTrait,
};
#[test]
fn test_nonstandard_events() {
let contract = declare("SpySyscallEventsChecker").unwrap().contract_class();
let (contract_address, _) = contract.deploy(@array![]).unwrap();
let dispatcher = ISpySyscallEventsCheckerDispatcher { contract_address };
let mut spy = spy_events();
dispatcher.emit_event_with_syscall(123, 456);
spy.assert_emitted(@array![(contract_address, Event { keys: array![123], data: array![456] })]);
}Using Event struct from the snforge_std library we can easily assert nonstandard events.
This also allows for testing the events you don't have the code of, or you don't want to import those.
Events and ABI Stability
The testing approach where event structs from the contract are used may lead to accidental breaking changes in the contracts ABI.
For example, removing a #[key] attribute from this event would not lead to any code changes in the event tests.
#[derive(Drop, starknet::Event)]
pub struct FirstEvent {
#[key]
pub some_key: felt252,
pub some_data: felt252,
}A recommended solution to this problem is using the base snforge_std::Event struct in tests.
use snforge_std::{
declare, ContractClassTrait, DeclareResultTrait, spy_events,
EventSpyAssertionsTrait, // Add for assertions on the EventSpy
Event // Import the base Event
};
use testing_events::contract::{
ISpyEventsCheckerDispatcher, ISpyEventsCheckerDispatcherTrait, SpyEventsChecker,
};
#[test]
fn test_simple_assertions() {
let contract = declare("SpyEventsChecker").unwrap().contract_class();
let (contract_address, _) = contract.deploy(@array![]).unwrap();
let dispatcher = ISpyEventsCheckerDispatcher { contract_address };
let mut spy = spy_events();
dispatcher.emit_one_event(123);
let mut keys = array![];
keys.append(selector!("FirstEvent")); // Append the name of the event to keys
let mut data = array![];
data.append(123); // Append the expected data
let expected = Event { keys, data }; // Instantiate the Event
spy.assert_emitted(@array![ // Assert
(contract_address, expected)]);
}Testing messages to L1
There exists a functionality allowing you to spy on messages sent to L1, similar to spying events.
Check the appendix for an exact API, structures and traits reference
Asserting messages to L1 is much simpler, since they are not wrapped with any structures in Cairo code (they are a plain felt252 array and an L1 address).
In snforge they are expressed with a structure:
/// Raw message to L1 format (as seen via the RPC-API), can be used for asserting the sent messages.
struct MessageToL1 {
/// An ethereum address where the message is destined to go
to_address: starknet::EthAddress,
/// Actual payload which will be delivered to L1 contract
payload: Array<felt252>
}Similarly, you can use snforge library and call spy_messages_to_l1() to initiate a spy:
use snforge_std::{spy_messages_to_l1};
#[test]
fn test_spying_l1_messages() {
let mut spy = spy_messages_to_l1();
// ...
}With the spy ready to use, you can execute some code, and make the assertions:
- Either with the spy directly by using
assert_sent/assert_not_sentmethods fromMessageToL1SpyAssertionsTraittrait:
use snforge_std::{
ContractClassTrait, DeclareResultTrait, MessageToL1, MessageToL1SpyAssertionsTrait, declare,
spy_messages_to_l1,
};
use starknet::EthAddress;
use testing_messages_to_l1::{IMessageSenderDispatcher, IMessageSenderDispatcherTrait};
#[test]
fn test_spying_l1_messages() {
let mut spy = spy_messages_to_l1();
let contract = declare("MessageSender").unwrap().contract_class();
let (contract_address, _) = contract.deploy(@array![]).unwrap();
let dispatcher = IMessageSenderDispatcher { contract_address };
let receiver_address: felt252 = 0x2137;
dispatcher.greet_ethereum(receiver_address);
let expected_payload = array!['hello'];
let receiver_l1_address: EthAddress = receiver_address.try_into().unwrap();
spy
.assert_sent(
@array![
(
contract_address, // Message sender
MessageToL1 { // Message content (receiver and payload)
to_address: receiver_l1_address, payload: expected_payload,
},
),
],
);
}- Or use the messages' contents directly via
get_messages()method of theMessageToL1SpyTrait:
use snforge_std::{
ContractClassTrait, DeclareResultTrait, MessageToL1, MessageToL1FilterTrait,
MessageToL1SpyAssertionsTrait, MessageToL1SpyTrait, declare, spy_messages_to_l1,
};
use starknet::EthAddress;
use testing_messages_to_l1::{IMessageSenderDispatcher, IMessageSenderDispatcherTrait};
#[test]
fn test_spying_l1_messages_details() {
let mut spy = spy_messages_to_l1();
let contract = declare("MessageSender").unwrap().contract_class();
let (contract_address, _) = contract.deploy(@array![]).unwrap();
let dispatcher = IMessageSenderDispatcher { contract_address };
let receiver_address: felt252 = 0x2137;
let receiver_l1_address: EthAddress = receiver_address.try_into().unwrap();
dispatcher.greet_ethereum(receiver_address);
let messages = spy.get_messages();
// Use filtering optionally on MessagesToL1 instance
let messages_from_specific_address = messages.sent_by(contract_address);
let messages_to_specific_address = messages_from_specific_address.sent_to(receiver_l1_address);
// Get the messages from the MessagesToL1 structure
let (from, message) = messages_to_specific_address.messages.at(0);
// Assert the sender
assert!(*from == contract_address, "Sent from wrong address");
// Assert the MessageToL1 fields
assert!(*message.to_address == receiver_l1_address, "Wrong L1 address of the receiver");
assert!(message.payload.len() == 1, "There should be 3 items in the data");
assert!(*message.payload.at(0) == 'hello', "Expected \"hello\" in payload");
}Testing Scarb Workspaces
snforge supports Scarb Workspaces.
To make sure you know how workspaces work,
check Scarb documentation here.
Workspaces With Root Package
When running snforge test in a Scarb workspace with a root package, it will only run tests inside the root package.
For a project structure like this
$ tree . -L 3
Output:
.
├── Scarb.toml
├── crates
│ ├── addition_docs
│ │ ├── Scarb.toml
│ │ ├── src
│ │ └── tests
│ └── fibonacci_docs
│ ├── Scarb.toml
│ └── src
├── tests
│ └── test.cairo
└── src
└── lib.cairo
only the tests in ./src and ./tests folders will be executed.
$ snforge test
Output:
Collected 3 test(s) from hello_workspaces_docs package
Running 1 test(s) from src/
[PASS] hello_workspaces_docs::tests::test_simple (l1_gas: ~0, l1_data_gas: ~0, l2_gas: ~40000)
Running 2 test(s) from tests/
[FAIL] hello_workspaces_docs_integrationtest::test_failing::test_failing
Failure data:
0x6661696c696e6720636865636b ('failing check')
[FAIL] hello_workspaces_docs_integrationtest::test_failing::test_another_failing
Failure data:
0x6661696c696e6720636865636b ('failing check')
Tests: 1 passed, 2 failed, 0 ignored, 0 filtered out
Failures:
hello_workspaces_docs_integrationtest::test_failing::test_failing
hello_workspaces_docs_integrationtest::test_failing::test_another_failing
To select the specific package to test, pass a --package package_name (or -p package_name for short) flag.
You can also run snforge test from the package directory to achieve the same effect.
$ snforge test --package addition_docs
Output:
Collected 5 test(s) from addition_docs package
Running 4 test(s) from tests/
[PASS] addition_docs_integrationtest::nested::test_nested::test_two (l1_gas: ~0, l1_data_gas: ~0, l2_gas: ~40000)
[PASS] addition_docs_integrationtest::nested::test_nested::test_two_and_two (l1_gas: ~0, l1_data_gas: ~0, l2_gas: ~40000)
[PASS] addition_docs_integrationtest::nested::simple_case (l1_gas: ~0, l1_data_gas: ~0, l2_gas: ~40000)
[PASS] addition_docs_integrationtest::nested::contract_test (l1_gas: ~0, l1_data_gas: ~0, l2_gas: ~40000)
Running 1 test(s) from src/
[PASS] addition_docs::tests::it_works (l1_gas: ~0, l1_data_gas: ~0, l2_gas: ~40000)
Tests: 5 passed, 0 failed, 0 ignored, 0 filtered out
You can also pass --workspace flag to run tests for all packages in the workspace.
$ snforge test --workspace
Output:
Collected 5 test(s) from addition_docs package
Running 4 test(s) from tests/
[PASS] addition_docs_integrationtest::nested::test_nested::test_two (l1_gas: ~0, l1_data_gas: ~0, l2_gas: ~40000)
[PASS] addition_docs_integrationtest::nested::simple_case (l1_gas: ~0, l1_data_gas: ~0, l2_gas: ~40000)
[PASS] addition_docs_integrationtest::nested::test_nested::test_two_and_two (l1_gas: ~0, l1_data_gas: ~0, l2_gas: ~40000)
[PASS] addition_docs_integrationtest::nested::contract_test (l1_gas: ~0, l1_data_gas: ~0, l2_gas: ~40000)
Running 1 test(s) from src/
[PASS] addition_docs::tests::it_works (l1_gas: ~0, l1_data_gas: ~0, l2_gas: ~40000)
Tests: 5 passed, 0 failed, 0 ignored, 0 filtered out
Collected 6 test(s) from fibonacci_docs package
Running 2 test(s) from src/
[PASS] fibonacci_docs::tests::it_works (l1_gas: ~0, l1_data_gas: ~0, l2_gas: ~40000)
[PASS] fibonacci_docs::tests::contract_test (l1_gas: ~0, l1_data_gas: ~0, l2_gas: ~40000)
Running 4 test(s) from tests/
[FAIL] fibonacci_docs_tests::abc::efg::failing_test
Failure data:
0x0 ('')
[PASS] fibonacci_docs_tests::abc::efg::efg_test (l1_gas: ~0, l1_data_gas: ~0, l2_gas: ~40000)
[PASS] fibonacci_docs_tests::lib_test (l1_gas: ~0, l1_data_gas: ~0, l2_gas: ~40000)
[PASS] fibonacci_docs_tests::abc::abc_test (l1_gas: ~0, l1_data_gas: ~0, l2_gas: ~40000)
Tests: 5 passed, 1 failed, 0 ignored, 0 filtered out
Collected 3 test(s) from hello_workspaces_docs package
Running 1 test(s) from src/
[PASS] hello_workspaces_docs::tests::test_simple (l1_gas: ~0, l1_data_gas: ~0, l2_gas: ~40000)
Running 2 test(s) from tests/
[FAIL] hello_workspaces_docs_integrationtest::test_failing::test_another_failing
Failure data:
0x6661696c696e6720636865636b ('failing check')
[FAIL] hello_workspaces_docs_integrationtest::test_failing::test_failing
Failure data:
0x6661696c696e6720636865636b ('failing check')
Tests: 1 passed, 2 failed, 0 ignored, 0 filtered out
Failures:
fibonacci_docs_tests::abc::efg::failing_test
hello_workspaces_docs_integrationtest::test_failing::test_another_failing
hello_workspaces_docs_integrationtest::test_failing::test_failing
Tests summary: 11 passed, 3 failed, 0 ignored, 0 filtered out
--package and --workspace flags are mutually exclusive, adding both of them to a snforge test command will result in an error.
Virtual Workspaces
Running snforge test command in a virtual workspace (a workspace without a root package)
outside any package will by default run tests for all the packages.
It is equivalent to running snforge test with the --workspace flag.
To select a specific package to test,
you can use the --package flag the same way as in regular workspaces or run snforge test from the package directory.
How Tests Are Collected
Snforge executes tests, but it does not compile them directly.
Instead, it compiles tests by internally running scarb build --test command.
The snforge_scarb_plugin dependency, which is included with snforge_std dependency makes all functions
marked with #[test] executable and indicates to Scarb they should be compiled.
Without the plugin, no snforge tests can be compiled, that's why snforge_std dependency is always required in all
snforge projects.
Thanks to that, Scarb collects all functions marked with #[test]
from valid locations and compiles
them into tests that are executed by snforge.
[[test]] Target
Under the hood, Scarb utilizes the [[test]] target mechanism to compile the tests. More information about the
[[test]] target is available in
the Scarb documentation.
By default, [[test]]] target is implicitly configured and user does not have to define it.
See Scarb documentation
for more details about the mechanism.
Tests Organization
Test can be placed in both src and test directories. When adding tests to files in src you must wrap them in tests
module.
You can read more about tests organization in Scarb documentation.
Unit Tests
Test placed in src directory are often called unit tests.
For these test to function in snforge, they must be wrapped in a module marked with #[cfg(test)] attribute.
// src/example.rs
// ...
// This test is not in module marked with `#[cfg(test)]` so it won't work
#[test]
fn my_invalid_test() {
// ...
}
#[cfg(test)]
mod tests {
// This test is in module marked with `#[cfg(test)]` so it will work
#[test]
fn my_test() {
// ..
}
}Integration Tests
📝 Note
Thanks to Scarb's incremental compilation (enabled by default), the integration test layout usually recompiles faster than the unit test layout.
The main package and the test code are cached separately, so editing tests does not invalidate the main package's build cache.
Integration tests are placed in tests directory.
This directory is a special directory in Scarb.
Tests do not have to be wrapped in #[cfg(test)] and each file is treated as a separate module.
// tests/example.rs
// ...
// This test is in `tests` directory
// so it works without being in module with `#[cfg(test)]`
#[test]
fn my_test_1() {
// ..
}Modules and lib.cairo
As written above, each file in tests directory is treated as a separate module
$ tree
Output:
tests/
├── module1.cairo <-- is collected
├── module2.cairo <-- is collected
└── module3.cairo <-- is collected
Scarb will collect each file and compile it as a
separate test target.
Each of these targets will be run separately by snforge.
However, it is also possible to define lib.cairo file in tests.
This stops files in tests from being treated as separate modules.
Instead, Scarb will only create a single test target for that lib.cairo file.
Only tests that are reachable from this file will be collected and compiled.
// tests/lib.cairo
mod module1;
mod module2;$ tree
Output:
tests/
├── lib.cairo
├── module1.cairo <-- is collected
├── module2.cairo <-- is collected
└── module3.cairo <-- is not collected
How Contracts Are Collected
snforge supports two mechanisms for collecting contracts used in tests.
- By default, optimized collection mechanism is used.
- If running
snforge testwith--no-optimizationflag, the old collection mechanism is used.
Differences Between Collection Mechanisms
| Feature | Old Mechanism | Optimised Mechanism |
|---|---|---|
Using contracts from /src | ✅ | ✅ |
Using contracts from /tests | ❌ | ✅ |
Using contracts from modules marked with #[cfg(test)] | ❌ | ✅ |
| Using contracts from dependencies | ✅ | ✅ |
| Contracts more closely resemble ones from real network | ✅ | ❌ |
| Less compilation steps required (faster compilation) | ❌ | ✅ |
Additional compilation step required (scarb build) | ✅ | ❌ |
How Contracts Are Collected
For the declare to work, snforge must collect and call build on
contracts in the package. By default, snforge will combine test
collection and contract collection steps.
When running snforge test, snforge will, under the hood, call the scarb build --test command. This command builds
all the test and contracts along them. Snforge collects these contracts and makes them available for declaring in tests.
Contracts are collected from both src and tests directory, including modules marked with #[cfg(test)].
Internally, snforge collects contracts from all [[test]] targets compiled by Scarb.
You can read more about that in test collection documentation.
Collection Order
When multiple [[test]] targets are present, snforge will first try to collect contracts from integration test-type
target. If integration is not present, snforge will first collect contracts from the first encountered [[test]]
target.
After collecting from initial [[test]] target, snforge will collect contracts from any other encountered targets.
No specific order of collection is guaranteed.
📝 Note
If multiple contracts with the same name are present, snforge will use the first encountered implementation and will not collect others.
Using External Contracts in Tests
To use contract from dependencies in tests, Scarb.toml must be updated to include these contracts under
[[target.starknet-contract]].
[[target.starknet-contract]]
build-external-contracts = ["path::to::Contract1", "other::path::to::Contract2"]
For more information about build-external-contracts,
see Scarb documentation.
How Contracts Are Collected
When you call snforge test, one of the things that snforge does is that it calls Scarb, particularly scarb build.
It makes Scarb build all contracts from your package and save them to the target/{current_profile} directory
(read more on Scarb website).
Then, snforge loads compiled contracts from the package your tests are located, allowing you to declare the contracts
in
tests.
Only contracts from src/ directory are loaded. Contracts from /tests and modules marked with #[cfg(test)] are not
build or collected. To create contracts to be specifically used in tests, Scarb conditional compilation can be used.
⚠️ Warning
Make sure to define
[[target.starknet-contract]]section in yourScarb.toml, otherwise Scarb won't build your contracts.
Using External Contracts In Tests
If you wish to use contracts from your dependencies inside your tests (e.g. an ERC20 token, an account contract),
you must first make Scarb build them. You can do that by using build-external-contracts key in Scarb.toml,
e.g.:
[[target.starknet-contract]]
build-external-contracts = ["openzeppelin::account::account::Account"]
For more information about build-external-contracts,
see Scarb documentation.
Gas and VM Resources Estimation
snforge supports gas and VM resources estimation for each individual test case.
It does not calculate the final transaction fee, for details on how fees are calculated, please refer to fee mechanism in Starknet documentation.
Gas Estimation
Single Test
When the test passes with no errors, estimated gas is displayed this way:
[PASS] tests::simple_test (l1_gas: ~1, l1_data_gas: ~1, l2_gas: ~1)
This gas calculation is based on the collected Sierra gas or VM resources (that you can display additionally on demand), storage updates, events and l1 <> l2 messages.
Gas Report
For individual tests, more detailed L2 gas usage can be displayed by passing the --gas-report flag.
This will generate a table that shows gas statistics for each contract and function.
$ snforge test --gas-report
Output:
Collected 1 test(s) from hello_starknet package
Running 1 test(s) from tests/
[PASS] hello_starknet_integrationtest::test_contract::test_increase_balance (l1_gas: ~0, l1_data_gas: ~192, l2_gas: ~998280)
╭------------------------+-------+-------+-------+---------+---------╮
| HelloStarknet Contract | | | | | |
+====================================================================+
| Function Name | Min | Max | Avg | Std Dev | # Calls |
|------------------------+-------+-------+-------+---------+---------|
| get_balance | 13340 | 13340 | 13340 | 0 | 4 |
|------------------------+-------+-------+-------+---------+---------|
| increase_balance | 25540 | 61240 | 37440 | 16829 | 3 |
╰------------------------+-------+-------+-------+---------+---------╯
📝 Note
Gas report data calculation ignores state changes, the cost of declared classes, Starknet OS overhead, L1 handler payload length and calldata payload length.
Fuzzed Tests
While using the fuzzing feature additional gas statistics will be displayed:
[PASS] tests::fuzzing_test (runs: 256, l1_gas: {max: ~126, min: ~1, mean: ~65, std deviation: ~37}, l1_data_gas: {max: ~96, min: ~96, mean: ~96, std deviation: ~0}, l2_gas: {max: ~1888390, min: ~1852630, mean: ~1881888, std deviation: ~9322}})
📝 Note
Starknet-Foundry uses blob-based gas calculation formula in order to calculate gas usage. For details on the exact formula, see the docs.
Resources Estimation
It is possible to enable more detailed breakdown of resources, on which the gas calculations are based on.
Depending on --tracked-resource, vm resources or sierra gas will be displayed (by default, Sierra gas is used).
To learn more about the tracked resource flag, see --tracked-resource.
Usage
In order to run tests with this feature, run the test command with the --detailed-resources flag:
$ snforge test --detailed-resources
Output:
Collected 2 test(s) from hello_starknet package
Running 2 test(s) from tests/
[PASS] hello_starknet_integrationtest::test_contract::test_cannot_increase_balance_with_zero_value (l1_gas: ~0, l1_data_gas: ~96, l2_gas: ~406680)
sierra gas: 406680
syscalls: (CallContract: 2, Deploy: 1, StorageRead: 1)
events: (count: 0, keys: 0, data size: 0)
messages: (l2 to l1: 0, l1 handler: 0)
[PASS] hello_starknet_integrationtest::test_contract::test_increase_balance (l1_gas: ~0, l1_data_gas: ~192, l2_gas: ~511980)
sierra gas: 511980
syscalls: (CallContract: 3, StorageRead: 3, StorageWrite: 1, Deploy: 1)
events: (count: 0, keys: 0, data size: 0)
messages: (l2 to l1: 0, l1 handler: 0)
Running 0 test(s) from src/
Tests: 2 passed, 0 failed, 0 ignored, 0 filtered out
Analyzing the results
Normally in transaction receipt (or block explorer transaction details), you would see some additional OS resources that starknet-foundry does not include for a test (since it's not a normal transaction per-se):
Not included in the gas/resource estimations
- Fee transfer costs
- Transaction type related resources - in real Starknet additional cost depending on the transaction type (e.g.,
Invoke/Declare/DeployAccount) is added - Declaration gas costs (CASM/Sierra bytecode or ABIs)
- Call validation gas costs (if you did not call
__validate__endpoint explicitly) - Client side proving costs (when using
proof_factsinInvoketransaction)
Included in the gas/resource estimations
- Cost of syscalls (additional steps or builtins needed for syscalls execution)
Coverage
Coverage reporting allows developers to gain comprehensive insights into how their code is executed.
With cairo-coverage, you can generate a coverage report that can later be analyzed for detailed coverage statistics.
Prerequisites
cairo-coverage relies on debug information provided by Scarb.
To generate the necessary debug information, you need to have Scarb.toml file with the following Cairo compiler configuration:
[profile.dev.cairo]
unstable-add-statements-code-locations-debug-info = true
unstable-add-statements-functions-debug-info = true
inlining-strategy = "avoid"
📝 Note
That
unstable-add-statements-code-locations-debug-info = trueandunstable-add-statements-functions-debug-info = truewill slow down the compilation and cause it to use more system memory. It will also make the compilation artifacts larger. So it is only recommended to add these flags when you need their functionality.
For more information about these sections, please refer to the Scarb documentation.
Installation and usage
In order to run coverage report with cairo-coverage you need to install it first.
Please refer to the instructions provided in the README for guidance:
https://github.com/software-mansion/cairo-coverage#installation
Usage details and limitations are also described there - make sure to check it out as well.
Integration with cairo-coverage
snforge is able to produce a file with a trace for each passing test (excluding fuzz tests).
All you have to do is use the --save-trace-data flag:
$ snforge test --save-trace-data
The files with traces will be saved to snfoundry_trace directory. Each one of these files can then be used as an input
for the cairo-coverage.
If you want snforge to call cairo-coverage on generated files automatically, use --coverage flag:
$ snforge test --coverage
This will generate a coverage report in the coverage directory named coverage.lcov.
Passing arguments to cairo-coverage
You can pass additional arguments to cairo-coverage by using the -- separator. Everything after -- will be passed
to cairo-coverage:
$ snforge test --coverage -- --include macros
📝 Note
Running
snforge test --helpwon't show info aboutcairo-coverageflags. To see them, runcairo-coverage --help.
Coverage report
cairo-coverage generates coverage data as an .lcov file. A summary report with aggregated data can be produced by one of many tools that accept the lcov format.
In this example we will use the genhtml tool from the lcov package to generate an HTML report.
Run the following command in the directory containing your coverage.lcov file:
$ genhtml -o coverage_report coverage.lcov
You can now open the index.html file in the coverage_report directory to see the generated coverage report.
Fork Testing
snforge supports testing in a forked environment.
Forking allows using state and contracts from a real instance Starknet network, including Mainnet and Sepolia.
Each test can fork the state of a specified real
network and perform actions on top of it.
📝 Note
Actions are performed on top of the
forkedstate which means real network is not affected.
Test Contract
We will demonstrate fork testing on an example of the Pokemons contract deployed on Sepolia network.
We are going to use a free, open RPC endpoint - Zan.
We first need to define the contract's interface along with all the structures used by its externals:
#[derive(Clone, Debug, PartialEq, Drop, Serde, starknet::Store)]
pub struct Pokemon {
pub name: ByteArray,
pub element: Element,
pub likes: felt252,
pub owner: starknet::ContractAddress,
}
#[derive(Copy, Debug, PartialEq, Drop, Serde, starknet::Store)]
pub enum Element {
#[default]
Fire,
Water,
Grass,
}
#[starknet::interface]
pub trait IPokemonGallery<TContractState> {
fn like(ref self: TContractState, name: ByteArray);
fn all(self: @TContractState) -> Array<Pokemon>;
fn pokemon(self: @TContractState, name: ByteArray) -> Option<Pokemon>;
fn liked(self: @TContractState) -> Array<Pokemon>;
}Fork Configuration
There are two ways of configuring a fork:
- by specifying
urland block-related parameters in the#[fork(...)]attribute - or by providing a fork name defined in your
Scarb.tomlto the#[fork(...)]attribute
📝 Note Using fork tests means
snforgewill make (often multiple) requests to the configured RPC URL. These requests are relatively slow as they happen over the network.
snforgecan cache these requests automatically in its cache directory but only ifblock_hashorblock_numberis provided. Usingblock_tag, especially"latest"disables the caching functionality.
Configure a Fork in the Attribute
It is possible to pass url and only one of block_number, block_hash, block_tag arguments to the fork attribute:
url— RPC URLblock_number— number of a block which fork will be pinned toblock_hash— hash of block which fork will be pinned toblock_tag— tag of block which fork will be pinned to. Currently onlylatestis supported
📝 Note
block_hashandblock_numbercan be provided as a decimal or hex number.
Once such a configuration is passed, it is possible to use state and contracts defined on the specified network.
We are going to test a basic scenario:
- Obtain a dispatcher generated by the
#[starknet::interface] - Instantiate it with a real contract address present in the forked state
- Call a method modifying the contract's state
- Make some assertion about the changed state
Example uses of all methods:
block_number
// import dispatcher generated by the interface we wrote
use fork_testing::{IPokemonGalleryDispatcher, IPokemonGalleryDispatcherTrait};
// take an address of a real network contract
const CONTRACT_ADDRESS: felt252 =
0x0522dc7cbe288037382a02569af5a4169531053d284193623948eac8dd051716;
#[test]
#[fork(url: "https://api.zan.top/public/starknet-sepolia/rpc/v0_10", block_number: 77864)]
fn test_using_forked_state() {
// instantiate the dispatcher
let dispatcher = IPokemonGalleryDispatcher {
contract_address: CONTRACT_ADDRESS.try_into().unwrap(),
};
// call the mutating method
dispatcher.like("Charizard");
// check if the contract's state has changed
let pokemon = dispatcher.pokemon("Charizard");
assert!(pokemon.is_some());
assert_eq!(pokemon.unwrap().likes, 1);
}block_hash
use fork_testing::{IPokemonGalleryDispatcher, IPokemonGalleryDispatcherTrait};
const CONTRACT_ADDRESS: felt252 =
0x0522dc7cbe288037382a02569af5a4169531053d284193623948eac8dd051716;
#[test]
#[fork(
url: "https://api.zan.top/public/starknet-sepolia/rpc/v0_10",
block_hash: 0x0690f8d584b52c2798d76b3346217a516778abee9b1bd8e400beb4f05dd9a4e7,
)]
fn test_using_forked_state() {
let dispatcher = IPokemonGalleryDispatcher {
contract_address: CONTRACT_ADDRESS.try_into().unwrap(),
};
dispatcher.like("Charizard");
let pokemon = dispatcher.pokemon("Charizard");
assert!(pokemon.is_some());
assert_eq!(pokemon.unwrap().likes, 1);
}block_tag
use fork_testing::{IPokemonGalleryDispatcher, IPokemonGalleryDispatcherTrait};
const CONTRACT_ADDRESS: felt252 =
0x0522dc7cbe288037382a02569af5a4169531053d284193623948eac8dd051716;
#[test]
#[fork(url: "https://api.zan.top/public/starknet-sepolia/rpc/v0_10", block_tag: latest)]
fn test_using_forked_state() {
let dispatcher = IPokemonGalleryDispatcher {
contract_address: CONTRACT_ADDRESS.try_into().unwrap(),
};
dispatcher.like("Charizard");
let pokemon = dispatcher.pokemon("Charizard");
assert!(pokemon.is_some());
assert_eq!(pokemon.unwrap().likes, 1);
}Configure Fork in Scarb.toml
Although passing named arguments works fine, you have to copy-paste it each time you want to use the same fork in tests.
snforge solves this issue by allowing fork configuration inside the Scarb.toml file.
[[tool.snforge.fork]]
name = "SEPOLIA_LATEST"
url = "https://api.zan.top/public/starknet-sepolia/rpc/v0_10"
block_id.tag = "latest"
From this moment forks can be set using their name in the fork attribute.
use fork_testing::{IPokemonGalleryDispatcher, IPokemonGalleryDispatcherTrait};
const CONTRACT_ADDRESS: felt252 =
0x0522dc7cbe288037382a02569af5a4169531053d284193623948eac8dd051716;
#[test]
#[fork("SEPOLIA_LATEST")]
fn test_using_forked_state() {
let dispatcher = IPokemonGalleryDispatcher {
contract_address: CONTRACT_ADDRESS.try_into().unwrap(),
};
dispatcher.like("Charizard");
let pokemon = dispatcher.pokemon("Charizard");
assert!(pokemon.is_some());
assert_eq!(pokemon.unwrap().likes, 1);
}In some cases you may want to override block_id defined in the Scarb.toml file.
You can do it by passing block_number, block_hash, block_tag arguments to the fork attribute.
use fork_testing::{IPokemonGalleryDispatcher, IPokemonGalleryDispatcherTrait};
const CONTRACT_ADDRESS: felt252 =
0x0522dc7cbe288037382a02569af5a4169531053d284193623948eac8dd051716;
#[test]
#[fork("SEPOLIA_LATEST", block_number: 200000)]
fn test_using_forked_state() {
let dispatcher = IPokemonGalleryDispatcher {
contract_address: CONTRACT_ADDRESS.try_into().unwrap(),
};
dispatcher.like("Charizard");
let pokemon = dispatcher.pokemon("Charizard");
assert!(pokemon.is_some());
assert_eq!(pokemon.unwrap().likes, 1);
}Testing Forked Contracts
Once the fork is configured, the test will run on top of the forked state, meaning that it will have access to every contract deployed on the real network.
With that, you can now interact with any contract from the chain the same way you would in a standard test.
⚠️ Warning
Some cheats aren't supported and won't work for forked contracts written in Cairo 0. Only those cheats are going to have an effect:
caller_addressblock_numberblock_timestampsequencer_addressspy_eventsspy_messages_to_l1
Fuzz Testing
In many cases, a test needs to verify function behavior for multiple possible values. While it is possible to come up with these cases on your own, it is often impractical, especially when you want to test against a large number of possible arguments.
ℹ️ Info Currently,
snforgefuzzer only supports using randomly generated values. This way of fuzzing doesn't support any kind of value generation based on code analysis, test coverage or results of other fuzzer runs. In the future, more advanced fuzzing execution modes will be added.
Random Fuzzing
To convert a standard test into a random fuzz test, you need to add parameters to the test function
and include the #[fuzzer] attribute.
These arguments can then be used in the test body.
The test will be run many times against different randomly generated values.
fn sum(a: felt252, b: felt252) -> felt252 {
return a + b;
}
#[cfg(test)]
mod tests {
use super::sum;
#[test]
#[fuzzer]
fn test_sum(x: felt252, y: felt252) {
assert_eq!(sum(x, y), x + y);
}
}Then run snforge test like usual.
$ snforge test
Output:
Collected 2 test(s) from fuzz_testing package
Running 2 test(s) from src/
[PASS] fuzz_testing::with_parameters::tests::test_sum (runs: 22, (l1_gas: {max: ~0, min: ~0, mean: ~0, std deviation: ~0}, l1_data_gas: {max: ~0, min: ~0, mean: ~0, std deviation: ~0}, l2_gas: {max: ~1888390, min: ~1852630, mean: ~1881888, std deviation: ~9322}))
[PASS] fuzz_testing::basic_example::tests::test_sum (runs: 256, (l1_gas: {max: ~0, min: ~0, mean: ~0, std deviation: ~0}, l1_data_gas: {max: ~0, min: ~0, mean: ~0, std deviation: ~0}, l2_gas: {max: ~1888390, min: ~1828790, mean: ~1882058, std deviation: ~8807}))
Tests: 2 passed, 0 failed, 0 ignored, 0 filtered out
Fuzzer seed: [..]
Types Supported by the Fuzzer
Fuzzer currently supports generating values for these types out of the box:
felt252u8,u16,u32,u64,u128,u256i8,i16,i32,i64,i128ByteArray
To use other types, you can either derive or manually implement the Fuzzable trait.
Providing non-fuzzable types will result in a compilation error.
Deriving Fuzzable
For structs and enums whose fields already implement Fuzzable, you can use #[derive(Fuzzable)] to generate the implementation automatically:
#[cfg(test)]
#[derive(Debug, Drop, Fuzzable)]
struct Point {
x: u64,
y: u64,
}The macro requires all field/variant types to implement Fuzzable. For generic types, it automatically adds the +snforge_std::fuzzable::Fuzzable<T> and +core::fmt::Debug<T> constraints for each type parameter.
Manual Fuzzable Implementation
For types that need custom fuzzing logic, implement the trait manually — see the Fuzzable appendix for details.
Fuzzer Configuration
It is possible to configure the number of runs of the random fuzzer as well as its seed for a specific test case:
fn sum(a: felt252, b: felt252) -> felt252 {
return a + b;
}
#[cfg(test)]
mod tests {
use super::sum;
#[test]
#[fuzzer(runs: 22, seed: 38)]
fn test_sum(x: felt252, y: felt252) {
assert_eq!(sum(x, y), x + y);
}
}It can also be configured globally, via command line arguments:
$ snforge test --fuzzer-runs 1234 --fuzzer-seed 1111
Or in Scarb.toml file:
# ...
[tool.snforge]
fuzzer_runs = 1234
fuzzer_seed = 1111
# ...
Direct Storage Access
In some instances, it's not possible for contracts to expose API that we'd like to use in order to initialize
the contracts before running some tests. For those cases snforge exposes storage-related cheatcodes,
which allow manipulating the storage directly (reading and writing).
In order to obtain the variable address that you'd like to write to, or read from, you need to use either:
selector!macro - if the variable is not a mappingmap_entry_addressfunction in tandem withselector!- for key-value pair of a map variablestarknet::storage_access::storage_address_from_base
📝 Note
For more user friendly access to storage, consider using the
interact_with_statecheatcode.
Example: Felt-only storage
This example uses only felts for simplicity.
- Exact storage fields
use snforge_std::{ContractClassTrait, DeclareResultTrait, declare, load, map_entry_address, store};
#[test]
fn test_store_and_load_plain_felt() {
let (contract_address, _) = declare("SimpleStorageContract")
.unwrap()
.contract_class()
.deploy(@array![])
.unwrap();
// load existing value from storage
let loaded = load(
contract_address, // an existing contract which owns the storage
selector!("plain_felt"), // field marking the start of the memory chunk being read from
1 // length of the memory chunk (seen as an array of felts) to read
);
assert_eq!(loaded, array![0x2137_felt252]);
// overwrite it with a new value
store(
contract_address, // storage owner
selector!("plain_felt"), // field marking the start of the memory chunk being written to
array![420].span() // array of felts to write
);
// load again and check if it changed
let loaded = load(contract_address, selector!("plain_felt"), 1);
assert_eq!(loaded, array![420]);
}- Map entries
use snforge_std::{ContractClassTrait, DeclareResultTrait, declare, load, map_entry_address, store};
#[test]
fn test_store_and_load_map_entries() {
let (contract_address, _) = declare("SimpleStorageContract")
.unwrap()
.contract_class()
.deploy(@array![])
.unwrap();
// load an existing map entry
let loaded = load(
contract_address,
map_entry_address(
selector!("mapping"), // start of the read memory chunk
array!['some_key'].span() // map key
),
1 // length of the read memory chunk
);
assert_eq!(loaded, array!['some_value']);
// write other value in place of the previous one
store(
contract_address,
map_entry_address(
selector!("mapping"), // storage variable name
array!['some_key'].span() // map key
),
array!['some_other_value'].span(),
);
let loaded = load(
contract_address,
map_entry_address(
selector!("mapping"), // start of the read memory chunk
array!['some_key'].span() // map key
),
1 // length of the read memory chunk
);
assert_eq!(loaded, array!['some_other_value']);
// load value written under non-existing key
let loaded = load(
contract_address,
map_entry_address(selector!("mapping"), array!['non_existing_field'].span()),
1,
);
assert_eq!(loaded, array![0]);
}Example: Complex structures in storage
This example uses a complex key and value, with default derived serialization methods (via #[derive(starknet::Store)]).
We use a contract along with helper structs:
use core::hash::LegacyHash;
// Required for lookup of complex_mapping values
// This is consistent with `map_entry_address`, which uses pedersen hashing of keys
impl StructuredKeyHash of LegacyHash<MapKey> {
fn hash(state: felt252, value: MapKey) -> felt252 {
let state = LegacyHash::<felt252>::hash(state, value.a);
LegacyHash::<felt252>::hash(state, value.b)
}
}
#[derive(Copy, Drop, Serde)]
pub struct MapKey {
pub a: felt252,
pub b: felt252,
}
// Serialization of keys and values with `Serde` to make usage of `map_entry_address` easier
impl MapKeyIntoSpan of Into<MapKey, Span<felt252>> {
fn into(self: MapKey) -> Span<felt252> {
let mut serialized_struct: Array<felt252> = array![];
self.serialize(ref serialized_struct);
serialized_struct.span()
}
}
#[derive(Copy, Drop, Serde, starknet::Store)]
pub struct MapValue {
pub a: felt252,
pub b: felt252,
}
impl MapValueIntoSpan of Into<MapValue, Span<felt252>> {
fn into(self: MapValue) -> Span<felt252> {
let mut serialized_struct: Array<felt252> = array![];
self.serialize(ref serialized_struct);
serialized_struct.span()
}
}
#[starknet::interface]
pub trait IComplexStorageContract<TContractState> {}
#[starknet::contract]
mod ComplexStorageContract {
use starknet::storage::Map;
use super::{MapKey, MapValue};
#[storage]
struct Storage {
complex_mapping: Map<MapKey, MapValue>,
}
}And perform a test checking load and store behavior in context of those structs:
use direct_storage_access::complex_structures::{MapKey, MapValue};
use snforge_std::{ContractClassTrait, DeclareResultTrait, declare, load, map_entry_address, store};
#[test]
fn store_in_complex_mapping() {
let (contract_address, _) = declare("ComplexStorageContract")
.unwrap()
.contract_class()
.deploy(@array![])
.unwrap();
let k = MapKey { a: 111, b: 222 };
let v = MapValue { a: 123, b: 456 };
store(
contract_address,
map_entry_address( // uses Pedersen hashing under the hood for address calculation
selector!("mapping"), // storage variable name
k.into() // map key
),
v.into(),
);
// complex_mapping = {
// hash(k): 123,
// hash(k) + 1: 456
// ...
// }
let loaded = load(contract_address, map_entry_address(selector!("mapping"), k.into()), 2);
assert_eq!(loaded, array![123, 456]);
}⚠️ Warning
Complex data can often times be packed in a custom manner (see this pattern) to optimize costs. If that's the case for your contract, make sure to handle deserialization properly - standard methods might not work. Use those cheatcode as a last-resort, for cases that cannot be handled via contract's API!
Example: Using enums in storage
Enums use 0-based layout for serialization. For example, FirstVariantOfSomeEnum(100) will be serialized as [0, 100]. However, their Starknet storage layout is 1-based for most enums, especially for these with derived Store trait implementation. Therefore, FirstVariantOfSomeEnum(100) will be stored on Starknet as [1, 100].
Remember that this rule may not hold for enums that with manual Store trait implementation. The most notable example is Option, e.g. Option::None will be stored as [0] and Option::Some(100) will be stored as [1, 100].
Below is an example of a contract which can store Option<u256> values:
#[starknet::interface]
pub trait IEnumsStorageContract<TContractState> {
fn read_value(self: @TContractState, key: u256) -> Option<u256>;
}
#[starknet::contract]
pub mod EnumsStorageContract {
use starknet::storage::{Map, StoragePathEntry, StoragePointerReadAccess};
#[storage]
struct Storage {
example_storage: Map<u256, Option<u256>>,
}
#[abi(embed_v0)]
impl EnumsStorageContractImpl of super::IEnumsStorageContract<ContractState> {
fn read_value(self: @ContractState, key: u256) -> Option<u256> {
self.example_storage.entry(key).read()
}
}
}And a test which uses store and reads the value:
use direct_storage_access::using_enums::{
IEnumsStorageContractSafeDispatcher, IEnumsStorageContractSafeDispatcherTrait,
};
use snforge_std::{ContractClassTrait, DeclareResultTrait, declare, load, map_entry_address, store};
use starknet::ContractAddress;
fn deploy_contract(name: ByteArray) -> ContractAddress {
let contract = declare(name).unwrap().contract_class();
let (contract_address, _) = contract.deploy(@ArrayTrait::new()).unwrap();
contract_address
}
#[test]
fn test_store_and_read() {
let contract_address = deploy_contract("EnumsStorageContract");
let safe_dispatcher = IEnumsStorageContractSafeDispatcher { contract_address };
let mut keys = ArrayTrait::new();
let key: u256 = 1;
key.serialize(ref keys);
let value: Option<u256> = Option::Some((100));
let felt_value: felt252 = value.unwrap().try_into().unwrap();
// Serialize Option enum according to its 1-based storage layout
let serialized_value = array![1, felt_value];
let storage_address = map_entry_address(selector!("example_storage"), keys.span());
store(
target: contract_address,
storage_address: storage_address,
serialized_value: serialized_value.span(),
);
let read_value = safe_dispatcher.read_value(key).expect('Failed to read value');
assert_eq!(read_value, value);
}snforge test test_store_and_read
Output:
Collected 1 test(s) from direct_storage_access package
Running 1 test(s) from tests/
[PASS] direct_storage_access_tests::using_enums::test_store_and_read (gas: ~233)
Running 0 test(s) from src/
Tests: 1 passed, 0 failed, 0 ignored, 4 filtered out
📝 Note
The
loadcheatcode will return zeros for memory you haven't written into yet (it is a default storage value for Starknet contracts' storage).
Example with storage_address_from_base
This example uses storage_address_from_base with entry's of the storage variable.
use direct_storage_access::felts_only::{
ISimpleStorageContractDispatcher, ISimpleStorageContractDispatcherTrait, SimpleStorageContract,
};
use snforge_std::{ContractClassTrait, DeclareResultTrait, declare, load, store};
use starknet::storage::{StorageAsPointer, StoragePathEntry};
use starknet::storage_access::storage_address_from_base;
#[test]
fn update_mapping() {
let key = 0;
let data = 100;
let (contract_address, _) = declare("SimpleStorageContract")
.unwrap()
.contract_class()
.deploy(@array![])
.unwrap();
let dispatcher = ISimpleStorageContractDispatcher { contract_address };
let mut state = SimpleStorageContract::contract_state_for_testing();
let storage_address = storage_address_from_base(
state.mapping.entry(key).as_ptr().__storage_pointer_address__.into(),
);
let storage_value: Span<felt252> = array![data.into()].span();
store(contract_address, storage_address.into(), storage_value);
let read_data = dispatcher.get_value(key.into());
assert_eq!(read_data, data, "Storage update failed")
}Profiling
Profiling is what allows developers to get more insight into how the transaction is executed. You can inspect the call tree, see how many resources are used for different parts of the execution, and more!
Integration with cairo-profiler
snforge is able to produce a file with a trace for each passing test (excluding fuzz tests).
All you have to do is use the --save-trace-data flag:
$ snforge test --save-trace-data
💡 Tip
You can choose which resource to track (cairo-steps or sierra-gas) using
--tracked-resourceflag Tracking sierra gas is only available for sierra 1.7.0+
The files with traces will be saved to snfoundry_trace directory. Each one of these files can then be used as an input
for the cairo-profiler.
If you want snforge to call cairo-profiler on generated files automatically, use --build-profile flag:
$ snforge test --build-profile
The files with profiling data will be saved to profile directory.
Passing arguments to cairo-profiler
You can pass additional arguments to cairo-profiler by using the -- separator. Everything after -- will be passed
to cairo-profiler:
$ snforge test --build-profile -- --show-inlined-functions
📝 Note
Running
snforge test --helpwon't show info aboutcairo-profilerflags. To see them, runsnforge test --build-profile -- --help.
Debugging
When a contract call fails, the error message alone may not always provide enough information to identify the root cause
of the issue. To aid in debugging, snforge offers the following features:
Live Debugging
💡 Tip
Make sure to check Cairo Debugger website for more information!
⚠️ Warning
Entering contract calls are currently not supported. Read more here.
From version 0.60.0 onwards, the snforge is integrated with Cairo Debugger,
which enables step-through, breakpoint-based debugging of tests.
Prerequisites
Live debugging relies on debug information provided by Scarb. To generate the necessary debug information, you need to have:
snforgeversion0.60.0or higher.- Scarb version
2.18.0or higher. Scarb.tomlfile with compiler configuration equivalent to the following one:
[profile.dev.cairo]
add-statements-code-locations-debug-info = true
add-statements-functions-debug-info = true
add-functions-debug-info = true
skip-optimizations = true
Debugging in VSCode
-
Open your Cairo project in VSCode.
-
Make sure the latest Cairo extension is installed.
-
Set breakpoints in your cairo files.
-
Use the extension's ▶ Debug Test code lens (displayed above each test function) to launch the debugger - it will invoke
snforgewith--launch-debuggerautomatically and start a debugging session.
Check this guide for details on how to use live debugging with VSCode.
Trace
Usage
📝 Note
Currently, the flow of execution trace is only available at the contract level. In future versions, it will also be available at the function level.
You can inspect the flow of execution for your tests using the --trace-verbosity or --trace-components flags when
running the snforge test command. This is useful for understanding how contracts are interacting with each other
during your tests, especially in complex nested scenarios.
Trace Components
The --trace-components flag allows you to specify which components of the trace you want to see. You can choose from:
contract-name: the name of the contract being calledentry-point-type: the type of the entry point being called (e.g.,External,L1Handler, etc.)calldata: the calldata of the call, transformed for displaycontract-address: the address of the contract being calledcaller-address: the address of the caller contractcall-type: the type of the call (e.g.,Call,Delegate, etc.)call-result: the result of the call, transformed for displayevents: raw events emitted by the call, shown as Starknetkeysanddatagas: estimated L2 gas consumed by the call
Example usage:
$ snforge test --trace-components contract-name call-result call-type
Output:
[test name] debugging_integrationtest::test_trace::test_debugging_trace_success
├─ [selector] execute_calls
│ ├─ [contract name] SimpleContract
│ ├─ [call type] Call
│ ├─ [call result] success: array![RecursiveCall { contract_address: ContractAddress([..]), payload: array![RecursiveCall { contract_address: ContractAddress([..]), payload: array![] }, RecursiveCall { contract_address: ContractAddress([..]), payload: array![] }] }, RecursiveCall { contract_address: ContractAddress([..]), payload: array![] }]
│ ├─ [selector] execute_calls
│ │ ├─ [contract name] SimpleContract
│ │ ├─ [call type] Call
│ │ ├─ [call result] success: array![RecursiveCall { contract_address: ContractAddress([..]), payload: array![] }, RecursiveCall { contract_address: ContractAddress([..]), payload: array![] }]
│ │ ├─ [selector] execute_calls
│ │ │ ├─ [contract name] SimpleContract
│ │ │ ├─ [call type] Call
│ │ │ └─ [call result] success: array![]
│ │ └─ [selector] execute_calls
│ │ ├─ [contract name] SimpleContract
│ │ ├─ [call type] Call
│ │ └─ [call result] success: array![]
│ └─ [selector] execute_calls
│ ├─ [contract name] SimpleContract
│ ├─ [call type] Call
│ └─ [call result] success: array![]
└─ [selector] fail
├─ [contract name] SimpleContract
├─ [call type] Call
└─ [call result] panic: (0x1, 0x2, 0x3, 0x4, 0x5)
Verbosity Levels
The --trace-verbosity flag accepts the following values:
minimal: shows test name, contract name, and selectorstandard: includes test name, contract name, selector, calldata, and call resultdetailed: displays the entire trace, including internal calls, caller addresses, emitted events, and panic reasons
Example usage:
$ snforge test --trace-verbosity standard
Output:
[test name] debugging_integrationtest::test_trace::test_debugging_trace_success
├─ [selector] execute_calls
│ ├─ [contract name] SimpleContract
│ ├─ [calldata] array![RecursiveCall { contract_address: ContractAddress([..]), payload: array![RecursiveCall { contract_address: ContractAddress([..]), payload: array![] }, RecursiveCall { contract_address: ContractAddress([..]), payload: array![] }] }, RecursiveCall { contract_address: ContractAddress([..]), payload: array![] }]
│ ├─ [call result] success: array![RecursiveCall { contract_address: ContractAddress([..]), payload: array![RecursiveCall { contract_address: ContractAddress([..]), payload: array![] }, RecursiveCall { contract_address: ContractAddress([..]), payload: array![] }] }, RecursiveCall { contract_address: ContractAddress([..]), payload: array![] }]
│ ├─ [selector] execute_calls
│ │ ├─ [contract name] SimpleContract
│ │ ├─ [calldata] array![RecursiveCall { contract_address: ContractAddress([..]), payload: array![] }, RecursiveCall { contract_address: ContractAddress([..]), payload: array![] }]
│ │ ├─ [call result] success: array![RecursiveCall { contract_address: ContractAddress([..]), payload: array![] }, RecursiveCall { contract_address: ContractAddress([..]), payload: array![] }]
│ │ ├─ [selector] execute_calls
│ │ │ ├─ [contract name] SimpleContract
│ │ │ ├─ [calldata] array![]
│ │ │ └─ [call result] success: array![]
│ │ └─ [selector] execute_calls
│ │ ├─ [contract name] SimpleContract
│ │ ├─ [calldata] array![]
│ │ └─ [call result] success: array![]
│ └─ [selector] execute_calls
│ ├─ [contract name] SimpleContract
│ ├─ [calldata] array![]
│ └─ [call result] success: array![]
└─ [selector] fail
├─ [contract name] SimpleContract
├─ [calldata] array![0x1, 0x2, 0x3, 0x4, 0x5]
└─ [call result] panic: (0x1, 0x2, 0x3, 0x4, 0x5)
Trace Output Explained
Here's what each tag in the trace represents:
| Tag | Description |
|---|---|
[test name] | The path to the test being executed, using the Cairo module structure. Indicates which test case produced this trace. |
[selector] | The name of the contract function being called. The structure shows nested calls when one function triggers another. |
[contract name] | The name of the contract where the selector (function) was invoked. Helps trace calls across contracts. |
[entry point type] | (In detailed view) Type of entry point used: External, Constructor, L1Handler. Useful to differentiate the context in which the call is executed. |
[calldata] | (In standard view and above) The arguments passed into the function call. |
[storage address] | (In detailed view) The storage address of the specific contract instance called. Helps identify which deployment is used if you're testing multiple. |
[caller address] | (In detailed view) The address of the account or contract that made this call. Important to identify who triggered the function. |
[call type] | (In detailed view) Call, Delegate. Describes how the function is being invoked. |
[call result] | (In standard view and above) The return value of the call, success or panic. |
[events] | (In detailed view) Raw Starknet events emitted by the call, shown as keys and data. |
[gas] | (In detailed view) L2 gas needed to execute the call. The calculation ignores state changes, calldata and signature lengths, L1 handler payload length and Starknet OS overhead. |
Backtrace
Prerequisites
Backtrace feature relies on debug information provided by Scarb. To generate the necessary debug information, you need to have:
- Scarb version
2.12.0or higher. Scarb.tomlfile with the following Cairo compiler configuration:
[profile.dev.cairo]
unstable-add-statements-code-locations-debug-info = true
unstable-add-statements-functions-debug-info = true
panic-backtrace = true
📝 Note
That
unstable-add-statements-code-locations-debug-info = trueandunstable-add-statements-functions-debug-info = truewill slow down the compilation and cause it to use more system memory. It will also make the compilation artifacts larger. So it is only recommended to add these flags when you need their functionality.
Usage
If your test or contract call fails and a backtrace can be generated, snforge will prompt you to run the operation again with the
SNFORGE_BACKTRACE=1 environment variable (if it’s not already configured). For example, you may see failure data like
this:
$ snforge test
Output:
Failure data:
(0x417373657274206661696c6564 ('Assert failed'), 0x454e545259504f494e545f4641494c4544 ('ENTRYPOINT_FAILED'), 0x454e545259504f494e545f4641494c4544 ('ENTRYPOINT_FAILED'))
note: run with `SNFORGE_BACKTRACE=1` environment variable to display a backtrace
To enable backtrace, simply set the SNFORGE_BACKTRACE=1 environment variable and rerun the operation.
When enabled, the backtrace will display the call tree of the execution, including the specific line numbers in test code and contracts where the errors occurred. Here's an example of what you might see:
$ SNFORGE_BACKTRACE=1 snforge test
Output:
Failure data:
(0x417373657274206661696c6564 ('Assert failed'), 0x454e545259504f494e545f4641494c4544 ('ENTRYPOINT_FAILED'), 0x454e545259504f494e545f4641494c4544 ('ENTRYPOINT_FAILED'))
stack backtrace:
in contract 'InnerContract':
0: core::panic_with_const_felt252
at [..]lib.cairo:360:5
1: core::panic_with_const_felt252
at [..]lib.cairo:360:5
2: backtrace_panic::InnerContract::__wrapper__InnerContract__inner
at [..]lib.cairo:32:5
in contract 'OuterContract':
0: backtrace_panic::OuterContract::__wrapper__OuterContract__outer
at [..]lib.cairo:13:5
in test 'backtrace_panic::Test::test_contract_panics':
0: (inlined) backtrace_panic::IOuterContractDispatcherImpl::outer
at [..]lib.cairo:1:1
1: backtrace_panic::Test::test_contract_panics
at [..]lib.cairo:59:9
2: backtrace_panic::Test::test_contract_panics__snforge_internal_test_generated
at [..]lib.cairo:50:5
Advanced Configuration
For the most detailed backtrace information, you can add skip-optimizations = true to your Scarb.toml (requires Scarb >= 2.14.0).
This skips as much compiler optimizations as possible, keeping the compiled code closer to the original and allowing snforge to provide more complete and accurate backtrace information.
[cairo]
skip-optimizations = true
Learn more about this option in the Scarb documentation.
⚠️ Warning: Setting
skip-optimizations = truemay result in faster compilation, but much slower execution of the compiled code. If you need to deploy your contracts on Starknet, you should never compile them with this field set totrue.
Inlining
The single optimization that matters most for backtraces is inlining, which is enabled by default.
Therefore, inlined backtrace frames either disappear or collapse into a single (inlined) entry.
If you want fuller backtraces without turning off every optimization, you can target inlining directly with the inlining-strategy field.
Setting it to "avoid" makes the compiler inline only functions annotated with #[inline(always)]:
[profile.dev.cairo]
inlining-strategy = "avoid"
📝 Note: Setting
skip-optimizations = truealready impliesinlining-strategy = "avoid".
Example
$ SNFORGE_BACKTRACE=1 snforge test
Output:
Failure data:
(0x417373657274206661696c6564 ('Assert failed'), 0x454e545259504f494e545f4641494c4544 ('ENTRYPOINT_FAILED'), 0x454e545259504f494e545f4641494c4544 ('ENTRYPOINT_FAILED'))
stack backtrace:
in contract 'InnerContract':
0: core::array_inline_macro
at [..]lib.cairo:346:11
1: core::assert
at [..]lib.cairo:373:9
2: backtrace_panic::InnerContract::inner_call
at [..]lib.cairo:40:9
3: backtrace_panic::InnerContract::unsafe_new_contract_state
at [..]lib.cairo:29:5
4: backtrace_panic::InnerContract::__wrapper__InnerContract__inner
at [..]lib.cairo:32:5
in contract 'OuterContract':
0: core::starknet::SyscallResultTraitImpl::unwrap_syscall
at [..]starknet.cairo:135:52
1: backtrace_panic::IInnerContractDispatcherImpl::inner
at [..]lib.cairo:22:1
2: backtrace_panic::OuterContract::OuterContract::outer
at [..]lib.cairo:17:13
3: backtrace_panic::OuterContract::__wrapper__OuterContract__outer
at [..]lib.cairo:13:5
in test 'backtrace_panic::Test::test_contract_panics':
0: core::starknet::SyscallResultTraitImpl::unwrap_syscall
at [..]starknet.cairo:135:52
1: backtrace_panic::IOuterContractDispatcherImpl::outer
at [..]lib.cairo:1:1
2: backtrace_panic::Test::test_contract_panics
at [..]lib.cairo:59:9
3: backtrace_panic::Test::test_contract_panics__snforge_internal_test_generated
at [..]lib.cairo:50:5
⚠️ Note: Disabling inlining gives fuller backtraces, but
snforgecan currently sometimes render wrong frames when inlining is disabled.
Oracles
⚠️ Warning
Oracles are fully supported starting from Scarb 2.13.1. Using oracles in Starknet Foundry with older versions of Scarb is not supported and may result in unexpected behavior.
An oracle is an external process (like a script, binary, or web service) that exposes custom logic or data to a Cairo program at runtime. You use it to perform tasks the Cairo VM can't, such as accessing real-world data or executing complex, non-provable computations.
Starknet Foundry supports oracles in snforge tests. This feature allows your tests to interact with the outside world
in ways that aren't possible in the standard Starknet execution environment or with snforge_std cheatcodes.
Using oracles
The oracle library provides a type-safe interface for interacting with external
oracles in Cairo applications. Invoking oracles via this package is the recommended way, as it provides a well-tested,
secure, and maintainable interface for oracle interactions.
The documentation for this package provides a bird's-eye overview, guidelines, and instructions on how to invoke oracles from Cairo code.
In the oracle repository there is also an end-to-end example showcasing the feature. It implements a simple Cairo executable script that invokes an oracle written in Rust that runs as a child process.
Runtime
snforge ships with the same oracle runtime used by scarb execute. The bundled version is fixed
at the time of a Starknet Foundry release and may differ from the one used by your currently running Scarb version. For
details on behaviour, protocol, and configuration, see Scarb’s documentation.
Parametrized Testing
Sometimes, you want to run the same test logic with different inputs. Instead of duplicating code into separate test functions, you can use parameterized tests.
Parameterized tests allow you to define multiple test cases for a single function by attaching the
#[test_case] attribute.
Each test case provides its own set of arguments, and snforge will automatically generate separate test instances for them.
Basic Example
To turn a regular test into a parameterized one, add the #[test_case(...)] attribute above it.
You can provide any valid Cairo expressions as arguments.
Below is a simple example which checks addition of two numbers.
fn sum(x: felt252, y: felt252) -> felt252 {
return x + y;
}
#[test]
#[test_case(1, 2, 3)]
#[test_case(3, 4, 7)]
fn test_sum(x: felt252, y: felt252, expected: felt252) {
assert_eq!(sum(x, y), expected);
}Now run:
$ snforge test
Output:
Collected 2 test(s) from parametrized_testing_basic package
Running 0 test(s) from src/
Running 2 test(s) from tests/
[PASS] parametrized_testing_basic_integrationtest::example::test_sum_1_2_3 ([..])
[PASS] parametrized_testing_basic_integrationtest::example::test_sum_3_4_7 ([..])
Tests: 2 passed, 0 failed, 0 ignored, [..] filtered out
Naming Test Cases
Each parameterized test gets its own generated name. There are two ways to control it:
-
Unnamed test case - the name is generated based on the function name and the arguments provided.
#[test_case(1, 2, 3)] fn test_sum(x: felt252, y: felt252, expected: felt252) { assert_eq!(sum(x, y), expected); }This will generate a test named
test_sum_1_2_3. -
Named test case - you can provide a custom name for the test case using the
nameparameter.#[test_case(name: "one_plus_two", 1, 2, 3)] fn test_sum(x: felt252, y: felt252, expected: felt252) { assert_eq!(sum(x, y), expected); }This will generate a test named
test_sum_one_plus_two.
📝 Note For unnamed test cases, it's possible that two different input values of the same type can generate the same test case name. In such cases we emit a diagnostic error. To resolve it, simply provide an explicit
namefor the case.
Advanced Example
Now let's look at an addvanced example which uses structs as parameters.
#[derive(Copy, Drop)]
struct User {
pub name: felt252,
pub age: u8,
}
#[generate_trait]
impl UserImpl of UserTrait {
fn is_adult(self: @User) -> bool {
return *self.age >= 18_u8;
}
}
#[test]
#[test_case(User { name: 'Alice', age: 20 }, true)]
#[test_case(User { name: 'Bob', age: 14 }, false)]
#[test_case(User { name: 'Josh', age: 18 }, true)]
fn test_is_adult(user: User, expected: bool) {
assert_eq!(user.is_adult(), expected);
}Now run:
$ snforge test
Output:
Collected 3 test(s) from parametrized_testing_advanced package
Running 3 test(s) from tests/
[PASS] parametrized_testing_advanced_integrationtest::example::test_is_adult_user_name_alice_age_20_true ([..])
[PASS] parametrized_testing_advanced_integrationtest::example::test_is_adult_user_name_josh_age_18_true ([..])
[PASS] parametrized_testing_advanced_integrationtest::example::test_is_adult_user_name_bob_age_14_false ([..])
Running 0 test(s) from src/
Tests: 3 passed, 0 failed, 0 ignored, [..] filtered out
Combining With Fuzzer Attribute
#[test_case] can be freely combined with the #[fuzzer] attribute.
Below is an example in which we will fuzz the test but also run the specific defined cases.
fn sum(x: felt252, y: felt252) -> felt252 {
return x + y;
}
#[test]
#[test_case(1, 2)]
#[test_case(3, 4)]
#[fuzzer(runs: 10)]
fn test_sum(x: felt252, y: felt252) {
assert_eq!(sum(x, y), x + y);
}Now run:
$ snforge test
Output:
Collected 3 test(s) from parametrized_testing_fuzzer package
Running 3 test(s) from tests/
[PASS] parametrized_testing_fuzzer_integrationtest::example::test_sum_1_2 ([..])
[PASS] parametrized_testing_fuzzer_integrationtest::example::test_sum_3_4 ([..])
[PASS] parametrized_testing_fuzzer_integrationtest::example::test_sum ([..])
Running 0 test(s) from src/
Tests: 3 passed, 0 failed, 0 ignored, 0 filtered out
Fuzzer seed: [..]
Tests Partitioning
When your test suite contains a large number of tests (especially fuzz tests), it can be helpful to split them into partitions and run each partition separately, for example in parallel CI jobs.
snforge supports this via the --partition <INDEX>/<TOTAL> flag.
When this flag is provided, snforge will divide all collected tests into TOTAL partitions and run only the partition with the given INDEX (1-based).
Example
Let's consider package a with the following 7 tests:
#[test]
fn test_a() {
assert_eq!(1 + 1, 2);
}
#[test]
fn test_b() {
assert_eq!(1 + 1, 2);
}
#[test]
fn test_c() {
assert_eq!(1 + 1, 2);
}
#[test]
fn test_d() {
assert_eq!(1 + 1, 2);
}
#[test]
fn test_e() {
assert_eq!(1 + 1, 2);
}
#[test]
fn test_f() {
assert_eq!(1 + 1, 2);
}
#[test]
fn test_g() {
assert_eq!(1 + 1, 2);
}Running snforge test --partition 1/2 will run tests test_a, test_c, test_e, test_g (4 tests), while running snforge test --partition 2/2 will run tests test_b, test_d, test_f (3 tests).
$ snforge test --partition 1/2
Output:
Running partition run: 1/2
Collected 4 test(s) from tests_partitioning package
Running 4 test(s) from tests/
[PASS] tests_partitioning_integrationtest::example::test_a ([..])
[PASS] tests_partitioning_integrationtest::example::test_e ([..])
[PASS] tests_partitioning_integrationtest::example::test_c ([..])
[PASS] tests_partitioning_integrationtest::example::test_g ([..])
Running 0 test(s) from src/
Tests: 4 passed, 0 failed, 0 ignored, 0 filtered out
Finished partition run: 1/2, included 4 out of total 7 tests
See example GitHub Actions workflow demonstrating partitioned test execution here.
sncast Overview
Starknet Foundry sncast is a command line tool for performing Starknet RPC calls. With it, you can easily interact with Starknet contracts!
⚠️ Warning Currently, support is only provided for accounts that use the default signature based on the Stark curve.
How to Use sncast
To use sncast, run the sncast command followed by a subcommand (see available commands):
$ sncast <subcommand>
If snfoundry.toml is present and configured with [sncast.default], url, accounts-file and account name will be taken from it.
You can, however, overwrite their values by supplying them as flags directly to sncast cli.
💡 Info Some transactions (like declaring, deploying or invoking) require paying a fee, and they must be signed.
Examples
General Example
Let's use sncast to call a contract's function:
$ sncast \
call \
--network sepolia \
--contract-address 0x522dc7cbe288037382a02569af5a4169531053d284193623948eac8dd051716 \
--function "pokemon" \
--arguments '"Charizard"' \
--block-id latest
Output:
Success: Call completed
Response: [0x0, 0x0, 0x43686172697a617264, 0x9, 0x0, 0x0, 0x41a78e741e5af2fec34b695679bc6891742439f7afb8484ecd7766661ad02bf]
📝 Note In the above example we supply
sncastwith--accountflag. Ifsnfoundry.tomlis present, and have this property set, value provided using this flags will override value fromsnfoundry.toml. Learn more aboutsnfoundry.tomlconfiguration here.
Network and RPC Providers
The --network flag supports the following networks:
- mainnet - Connects to Starknet mainnet using a free RPC provider
- sepolia - Connects to Starknet Sepolia testnet using a free RPC provider
- devnet - Attempts to auto-detect running starknet-devnet instance
📝 Note When using mainnet or sepolia,
sncastwill randomly select one of the free RPC providers. When using free providers you may experience rate limits and other unexpected behavior.
For devnet, sncast will try to detect running starknet-devnet instance and connect to it, but detection is not guaranteed. If sncast is unable to detect your devnet instance, provide the --url directly.
If using sncast extensively, we recommend getting access to a dedicated RPC node and providing its URL to sncast with
--url flag.
📝 Note You can configure URLs for predefined networks (used by the
--networkflag) insnfoundry.tomlprofiles. Read more in snfoundry.toml Reference.
Arguments
Some sncast commands (namely call, deploy and invoke) allow passing arguments to perform an action with on the blockchain.
Under the hood sncast always sends request with a serialized form of arguments, but it can be passed in
human-readable form thanks to the calldata transformation feature present in sncast.
In the example above we called a function with a deserialized argument: '"Charizard"', passed using --arguments flag.
⚠️ Warning
sncastwill not verify the serialized calldata. Any errors caused by passing improper calldata in a serialized form will originate from the network. Basic static analysis is possible only when passing expressions - see calldata transformation.
Using Serialized Calldata
The same result can be achieved by passing serialized calldata, which is a list of hexadecimal-encoded field elements.
For example, this is equivalent to using the --calldata option with the following value: 0x0 0x43686172697a617264 0x9.
To obtain the serialized form of the wished data, you can write a Cairo program that calls Serde::serialize on subsequent arguments and displays the results.
Read more about it in the Cairo documentation.
How to Use --wait Flag
Let's invoke a transaction and wait for it to be ACCEPTED_ON_L2.
$ sncast --account my_account \
--wait \
deploy \
--network sepolia \
--class-hash 0x0227f52a4d2138816edf8231980d5f9e6e0c8a3deab45b601a1fcee3d4427b02 \
Output:
Transaction hash: [..]
Waiting for transaction to be received. Retries left: 11
Waiting for transaction to be received. Retries left: 10
Waiting for transaction to be received. Retries left: 9
Waiting for transaction to be received. Retries left: 8
Waiting for transaction to be received. Retries left: 7
Received transaction. Status: Pre confirmed
Received transaction. Status: Pre confirmed
Received transaction. Status: Pre confirmed
Received transaction. Status: Pre confirmed
Received transaction. Status: Pre confirmed
Received transaction. Status: Pre confirmed
Success: Deployment completed
Contract Address: 0x0[..]
Transaction Hash: 0x0[..]
To see deployment details, visit:
contract: https://voyager.online/search/[..]
transaction: https://voyager.online/search/[..]
As you can see command waited for the transaction until it was ACCEPTED_ON_L2.
After setting up the --wait flag, command waits 60 seconds for a transaction to be received and (another not specified
amount of time) to be included in the block.
📝 Note By default, all commands don't wait for transactions.
sncast 101
This page showcases the standard usage of various sncast commands.
For more in-depth explanation, please follow other guides from "sncast Overview".
Create and Deploy an Account
First, create an account contract ready for deployment. This generates the account details but doesn't put it on the network yet.
$ sncast account create \
--name my_account \
--network sepolia
Output:
Success: Account created
Address: 0x[..]
Account successfully created but it needs to be deployed. The estimated deployment fee is [..] STRK. Prefund the account to cover deployment transaction fee
After prefunding the account, run:
sncast account deploy --network sepolia --name my_account
After creating an account, send enough STRK tokens to the address to cover the price of the
account deployment.
In the output of account create command, you can find the estimated deployment fee.
💡 Tip On Sepolia, this free faucet can be used to fund the account.
Then, deploy the account using the command that was provided in output, below After prefunding the account, run:
$ sncast account deploy \
--network sepolia \
--name my_account
Output:
Success: Account deployed
Transaction Hash: 0x[..]
To see invocation details, visit:
transaction: https://sepolia.voyager.online/tx/0x[..]
Finally, you can check the account balance:
$ sncast --account my_account balance --network sepolia
Output:
Balance: [..] fri
Read more about accounts here
💡 Tip Existing accounts can be imported to
sncastas well. See Importing Accounts for more information.
Calling a Contract
Calling a contract doesn't require an account
$ sncast call \
--contract-address 0x00cd8f9ab31324bb93251837e4efb4223ee195454f6304fcfcb277e277653008 \
--function get \
--arguments '0x123' \
--network sepolia
Output:
Success: Call completed
Response: 0x0
Response Raw: [0x0]
Read more about calling contracts here
Sending a Transaction
To send a transaction, invoke a contract.
📝 Note
--accountargument must be passed before invoke subcommand. This is the same for other commands that send transactions as well.
$ sncast \
--account my_account \
invoke \
--contract-address 0x00cd8f9ab31324bb93251837e4efb4223ee195454f6304fcfcb277e277653008 \
--function put \
--arguments '0x123, 100' \
--network sepolia
💡 Tip
--argumentsflag supports various kinds of Cairo types including structs--arguments 'MyStruct { a: 1, b: 2 }and enums--arguments MyEnum::Variant1.See Calldata Transformation for more details.
Output:
Success: Invoke completed
Transaction Hash: 0x[..]
To see invocation details, visit:
transaction: https://sepolia.voyager.online/tx/0x[..]
Read more about sending transactions here
Declare a Contract
sncast uses scarb to build contracts and can find contracts by their names (part after mod for
#[starknet::contract]).
To declare a contract, simply pass it name to sncast.
💡 Tip There is no need to run
scarb buildbefore declaration.sncastwill do that automatically
Create a project
snforge new my_project
From inside the my_project directory run
$ sncast \
--account my_account \
declare \
--contract-name HelloStarknet \
--network sepolia
Output:
Success: Declaration completed
Contract Address: 0x0[..]
Transaction Hash: 0x0[..]
To see declaration details, visit:
class: https://sepolia.voyager.online/class/0x[..]
transaction: https://sepolia.voyager.online/tx/0x[..]
To deploy a contract of this class, run:
sncast --account my_account deploy --class-hash 0x[..] --network sepolia
Read more about declaring contracts here
Deploy a Contract
Provide a class hash of your contract obtained from declaring it. It's the part after class_hash:.
$ sncast \
--account my_account \
deploy \
--class-hash 0x06813150c8b6256546fe2324b49f85021a207b6a383fc207d587f4bfacec00d8 \
--network sepolia
Output:
Success: Deployment completed
Contract Address: 0x0[..]
Transaction Hash: 0x0[..]
To see deployment details, visit:
contract: https://sepolia.voyager.online/contract/0x[..]
transaction: https://sepolia.voyager.online/tx/0x[..]
Read more about deploying contracts here
🔎 Tip Instead of passing
--class-hash, you can also pass--contract-nameto automatically run declare under the hood. See documentation for more details.
Creating And Deploying Accounts
Account is required to perform interactions with Starknet (only calls can be done without it). Starknet Foundry sncast
supports
entire account management flow with the sncast account create and sncast account deploy commands.
Difference between those two commands is that the first one creates account information (private key, address and more) and the second one deploys it to the network. After deployment, account can be used to interact with Starknet.
To remove an account from the accounts file, you can use sncast account delete. Please note this only removes the
account information stored locally - this will not remove the account from Starknet.
💡 Info Accounts creation and deployment is supported for
- OpenZeppelin
- Ready (with guardian set to 0)
- Braavos
Examples
Creating an Account
Do the following to start interacting with the Starknet:
Create account with the sncast account create command
$ sncast \
account create \
--network sepolia \
--name new_account
Output:
Success: Account created
Address: 0x[..]
Account successfully created but it needs to be deployed. The estimated deployment fee is [..] STRK. Prefund the account to cover deployment transaction fee
After prefunding the account, run:
sncast --accounts-file [..]accounts.json account deploy --url [..] --name new_account
To see account creation details, visit:
account: https://sepolia.voyager.online/contract/[..]
For a detailed CLI description, see account create command reference.
See more advanced use cases below or jump directly to the section here.
Prefund generated address with tokens
To deploy an account in the next step, you need to prefund it with STRK tokens (read more about them here). You can do it both by sending tokens from another starknet account or by bridging them with StarkGate.
💡 Info When deploying on a Sepolia test network, you can also fund your account with artificial tokens via the Starknet Faucet
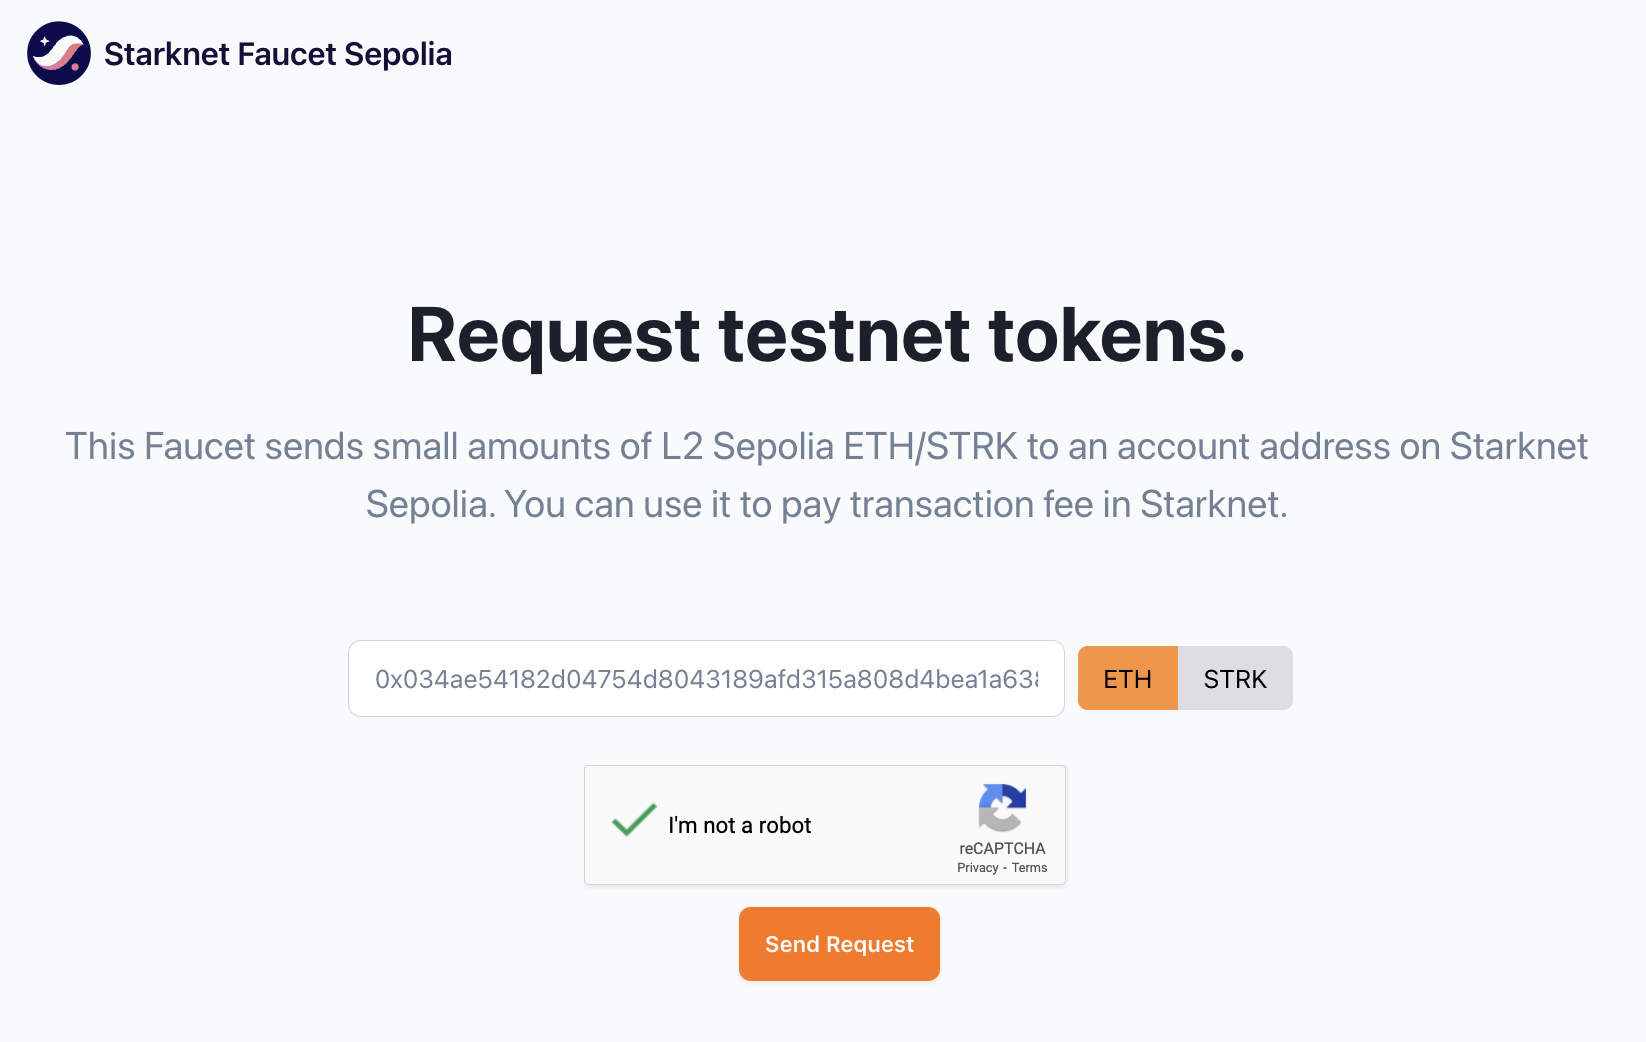
Deploy account with the sncast account deploy command
$ sncast \
account deploy \
--network sepolia \
--name new_account
Output:
Success: Account deployed
Transaction Hash: 0x[..]
To see invocation details, visit:
transaction: https://sepolia.voyager.online/tx/[..]
For a detailed CLI description, see account deploy command reference.
Managing Accounts
If you created an account with sncast account create it by default it will be saved in
~/.starknet_accounts/starknet_open_zeppelin_accounts.json file which we call default accounts file in the following
sections.
account import
To import an account to the default accounts file, use the account import command.
$ sncast \
account import \
--network sepolia \
--name my_imported_account \
--address 0x3a0bcb72428d8056cc7c2bbe5168ddfc844db2737dda3b4c67ff057691177e1 \
--private-key 0x2 \
--type oz
account list
List all accounts saved in accounts file, grouped based on the networks they are defined on.
$ sncast account list
Output:
Available accounts (at [..]):
- new_account:
network: alpha-sepolia
public key: [..]
address: [..]
salt: [..]
class hash: [..]
deployed: false
legacy: false
type: OpenZeppelin
- my_account:
network: alpha-sepolia
public key: 0x48234b9bc6c1e749f4b908d310d8c53dae6564110b05ccf79016dca8ce7dfac
address: 0x6f4621e7ad43707b3f69f9df49425c3d94fdc5ab2e444bfa0e7e4edeff7992d
deployed: true
type: OpenZeppelin
You can specify a custom location for the accounts file with the --accounts-file or -f flag.
There is also possibility to show private keys with the --display-private-keys or -p flag.
account delete
Delete an account from accounts-file and its associated Scarb profile. If you pass this command, you will be asked to
confirm the deletion.
$ sncast account delete \
--name new_account \
--network-name alpha-sepolia
Advanced Use Cases
Custom Account Contract
By default, sncast creates/deploys an account
using OpenZeppelin's account contract class hash.
It is possible to create an account using custom openzeppelin, ready or braavos contract declared to starknet. This can
be achieved
with --class-hash flag:
$ sncast \
account create \
--name new_account_2 \
--network sepolia \
--class-hash 0x05b4b537eaa2399e3aa99c4e2e0208ebd6c71bc1467938cd52c798c601e43564
--type oz
account create With Salt Argument
Instead of random generation, salt can be specified with --salt.
$ sncast \
account create \
--network sepolia \
--name another_account_3 \
--salt 0x1
Additional features provided with account import/create
Specifying --accounts-file
Account information such as private_key, class_hash, address etc. will be saved to the file specified by
--accounts-file argument,
if not provided, the default accounts file will be used.
Specifying --add-profile
When the --add-profile flag is used, the profile
is automatically created for the account.
Simply use the --profile argument followed by the account name in subsequent requests.
Using Ledger Hardware Wallet
Accounts can be created and deployed using a Ledger hardware wallet as the signer. Pass --ledger-path (or --ledger-account-id as a shorthand) to the account create subcommand with an EIP-2645 derivation path.
$ sncast \
account create \
--ledger-path "m//starknet'/sncast'/0'/1'/0" \
--network sepolia \
--name my_ledger_account
$ sncast \
account create \
--ledger-account-id 1 \
--network sepolia \
--name my_ledger_account
The public key is read from the device at the specified path and the account address is calculated from it. The path is saved in the accounts file, so subsequent commands only need --account:
$ sncast \
--account my_ledger_account \
account deploy \
--network sepolia
A signing confirmation will appear on the Ledger device. See Ledger Hardware Wallet for full details.
Using Keystore and Starkli Account
Accounts created and deployed with starkli can be used by specifying the
--keystore argument.
💡 Info When passing the
--keystoreargument,--accountargument must be a path to the starkli account JSON file.
$ sncast \
--keystore keystore.json \
--account account.json \
declare \
--network sepolia \
--contract-name my_contract \
Creating an Account With Starkli-Style Keystore
It is possible to create an openzeppelin account with keystore in a similar way starkli does.
$ sncast \
--keystore my_key.json \
--account my_account.json \
account create \
--network sepolia
The command above will generate a keystore file containing the private key, as well as an account file containing the openzeppelin account info that can later be used with starkli.
Account Balance
sncast allows you to check the balance of your account using the sncast get balance command.
Basic Example
$ sncast --account my_account get balance --network devnet
Output:
Balance: [..] fri
By default, it shows the balance in STRK tokens. Other possible tokens can be specified using the --token flag, read more here.
Checking Balance of a Custom Token
You can check the balance of a custom token by providing the --token-address flag followed by the token's contract address.
📝 Note
Token address must be a valid ERC-20 token contract.
$ sncast --account user1 get balance \
--token-address <YOUR_TOKEN_ADDRESS> \
--network sepolia
Output:
Balance: [..]
Read more about sncast get balance command here.
Importing Accounts
You can export your private key from wallet (Ready) and import it into the file holding the accounts info (~/.starknet_accounts/starknet_open_zeppelin_accounts.json by default).
⚠️ Warning
Never share your private key! Anyone with access to your private key can access your account and funds. You are doing this at your own risk.
Exporting Your Private Key
This section shows how to export your private key from specific wallets.
Examples
Ready (formerly Argent)
-
Open the Ready app > Settings.

-
Click on the current account.
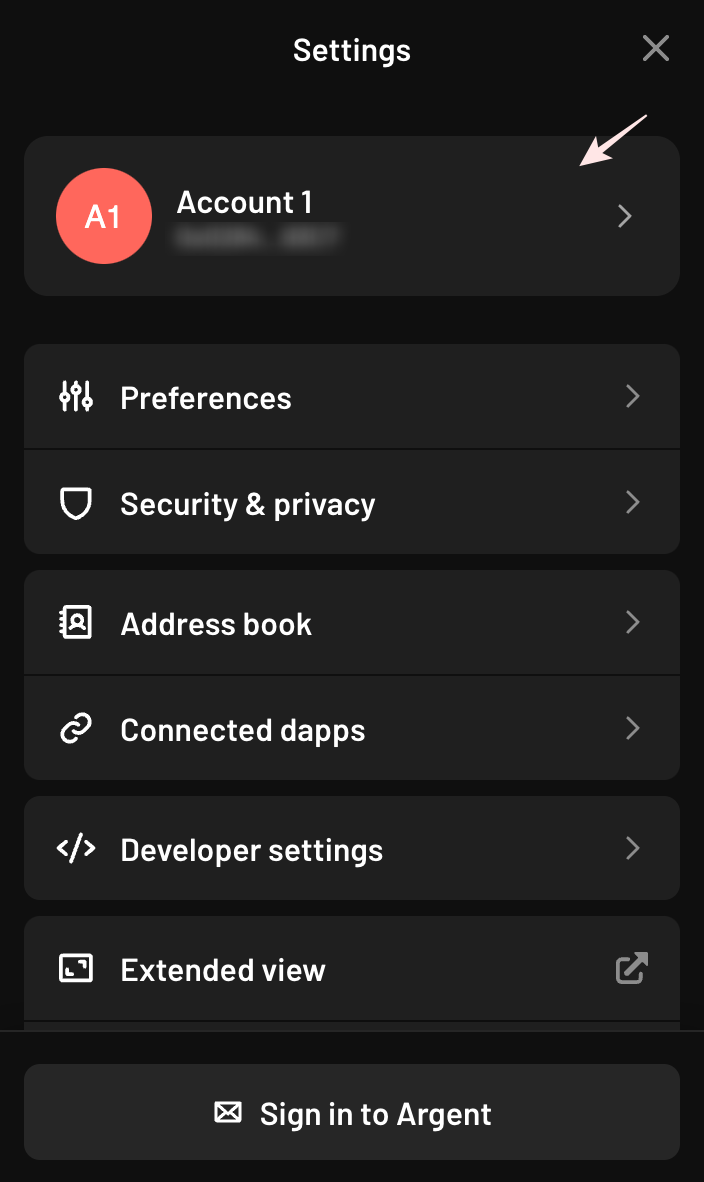
-
Click on "Export private key".
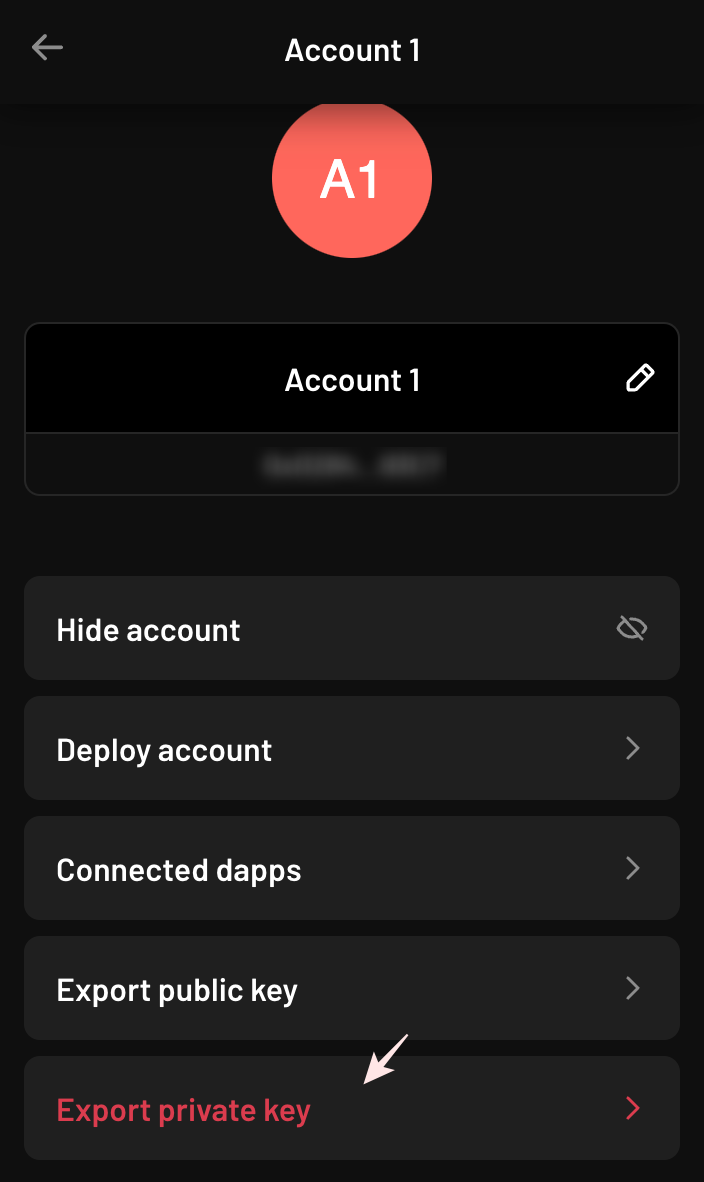
-
Enter your password.
-
Copy your private key.

Braavos
-
Open the Braavos app > Wallet settings.
-
Click on "Privacy & Security".
-
Click on "Export private key".
-
Enter your password.
-
Copy your private key.
Importing an Account
Examples
General Example
To import an account into the file holding the accounts info (~/.starknet_accounts/starknet_open_zeppelin_accounts.json by default), use the account import command.
$ sncast \
account import \
--network sepolia \
--name account_123 \
--address 0x1 \
--private-key 0x2 \
--type oz
📝 Note The
--namecan be omitted as this is optional. A default name will be generated for the account.
Passing Private Key in an Interactive
If you don't want to pass the private key in the command (because of safety aspect), you can skip --private-key flag. You will be prompted to enter the private key in interactive mode.
$ sncast \
account import \
--network sepolia \
--name account_123 \
--address 0x1 \
--type oz
Output:
Type in your private key and press enter:
Ready (formerly Argent)
To import Ready account, set the --type flag to ready.
$ sncast \
account import \
--network sepolia \
--name account_ready \
--address 0x1 \
--private-key 0x2 \
--type ready
Braavos
To import Braavos account, set the --type flag to braavos.
$ sncast \
account import \
--network sepolia \
--name account_braavos \
--address 0x1 \
--private-key 0x2 \
--type braavos
OpenZeppelin
To import OpenZeppelin account, set the --type flag to oz or open_zeppelin.
$ sncast \
account import \
--network sepolia \
--name account_oz \
--address 0x1 \
--private-key 0x2 \
--type oz
Ledger Hardware Wallet
To import an account whose signing key lives on a Ledger device, pass --ledger-path (or --ledger-account-id as a shorthand) instead of --private-key. The public key is read directly from the device.
$ sncast \
account import \
--network sepolia \
--name account_ledger \
--address 0x1 \
--ledger-path "m//starknet'/sncast'/0'/1'/0" \
--type oz
$ sncast \
account import \
--network sepolia \
--name account_ledger \
--address 0x1 \
--ledger-account-id 1 \
--type oz
Declaring New Contracts
Starknet provides a distinction between contract class and instance. This is similar to the difference between writing the code of a class MyClass {} and creating a new instance of it let myInstance = MyClass() in object-oriented programming languages.
Declaring a contract is a necessary step to have your contract available on the network. Once a contract is declared, it then can be deployed and then interacted with.
For a detailed CLI description, see declare command reference.
Examples
General Example
📝 Note Building a contract before running
declareis not required. Starknet Foundrysncastbuilds a contract during declaration under the hood using Scarb.
First make sure that you have created a Scarb.toml file for your contract (it should be present in project directory or one of its parent directories).
Then run:
$ sncast --account my_account \
declare \
--network sepolia \
--contract-name HelloSncast
Output:
Success: Declaration completed
Contract Address: 0x0[..]
Transaction Hash: 0x0[..]
To see declaration details, visit:
class: https://voyager.online/search/[..]
transaction: https://voyager.online/search/[..]
To deploy a contract of this class, run:
sncast --account my_account deploy --class-hash 0x[..] --network sepolia
📝 Note Contract name is a part after the
modkeyword in your contract file. It may differ from package name defined inScarb.tomlfile.
📝 Note
--contract-namealso accepts a module tree path such ashello_sncast::contracts::HelloSncastorcontracts::HelloSncast. Use the full path when more than one contract in the package shares the same contract name.
📝 Note In the above example we supply
sncastwith--accountand--networkflags. Ifsnfoundry.tomlis present, and has the properties set, values provided using these flags will override values fromsnfoundry.toml. Learn more aboutsnfoundry.tomlconfiguration here.
💡 Info Transaction fee limit can be set either as a single upper bound by
--max-feeor broken down into individual resource components using--l1-gas,--l1-gas-price,--l2-gas,--l2-gas-price,--l1-data-gas, and--l1-data-gas-price.--max-feeand the individual resource flags are mutually exclusive. Any individual resource flag that is not provided will be estimated automatically
Declaring an Already Compiled Contract
When you already have a compiled contract (Sierra file) and want to declare it directly, use declare-from with --sierra-file option.
Example
$ sncast --account my_account \
declare-from \
--sierra-file target/dev/hello_Hello.contract_class.json \
--network sepolia
Declaring a Contract by Fetching It From a Different Starknet Instance
In some cases, you may need to declare a contract that was already compiled elsewhere and reuse the exact same class hash across multiple networks. This is especially important for some contracts, e.g. Universal Deployer Contract (UDC), which must preserve the same class hash across mainnet, testnets, and appchains.
Compiling a contract locally with a different Cairo compiler version may result in a different class hash.
To avoid this, you can use the declare-from which allows you to declare a contract by providing its class hash and the source network where it is already declared.
Example
Let's consider a basic contract, which is already declared on Sepolia network.
To declare it on another network, e.g. local devnet, run:
$ sncast --account my_account \
declare-from \
--class-hash 0xaf50866d04d9cf46f474deb90eecf0dd3e5ad4477b96d25c1dadb7205c9218 \
--source-network sepolia \
--url http://127.0.0.1:5055/rpc
Output:
Success: Declaration completed
Class Hash: 0xaf50866d04d9cf46f474deb90eecf0dd3e5ad4477b96d25c1dadb7205c9218
Transaction Hash: 0x[..]
Deploying New Contracts
Overview
Starknet Foundry sncast supports deploying smart contracts to a given network with the sncast deploy command.
It works by invoking a Universal Deployer Contract, which deploys the contract with the given class hash and constructor arguments.
For contract to be deployed on starknet, it must be declared first.
It can be done with the declare command or by using the --contract-name
flag in the deploy command.
For detailed CLI description, see deploy command reference.
Usage Examples
General Example
After declaring your contract, you can deploy it the following way:
$ sncast \
--account my_account \
deploy \
--network sepolia \
--class-hash 0x0227f52a4d2138816edf8231980d5f9e6e0c8a3deab45b601a1fcee3d4427b02
Output:
Success: Deployment completed
Contract Address: 0x0[..]
Transaction Hash: 0x0[..]
To see deployment details, visit:
contract: https://sepolia.voyager.online/contract/[..]
transaction: https://sepolia.voyager.online/tx/[..]
💡 Info Transaction fee limit can be set either as a single upper bound by
--max-feeor broken down into individual resource components using--l1-gas,--l1-gas-price,--l2-gas,--l2-gas-price,--l1-data-gas, and--l1-data-gas-price.--max-feeand the individual resource flags are mutually exclusive. Any individual resource flag that is not provided will be estimated automatically
Deploying Contract With Constructor
For such a constructor in the declared contract
#[constructor]
fn constructor(ref self: ContractState, first: felt252, second: u256) {
...
}you have to pass constructor calldata to deploy it.
$ sncast deploy \
--class-hash 0x02e93ad9922ac92f3eed232be8ca2601fe19f843b7af8233a2e722c9975bc4ea \
--constructor-calldata 0x1 0x2 0x3
Output:
Success: Deployment completed
Contract Address: 0x0[..]
Transaction Hash: 0x0[..]
To see deployment details, visit:
contract: https://sepolia.voyager.online/contract/[..]
transaction: https://sepolia.voyager.online/tx/[..]
📝 Note Although the constructor has only two params you have to pass more because u256 is serialized to two felts. It is important to know how types are serialized because all values passed as constructor calldata are interpreted as a field elements (felt252).
Deploying by Contract Name
Instead of providing the --class-hash of an already declared contract, you can pass the name of the
contract from a Scarb project by providing the --contract-name flag.
Under the hood, if the passed contract was never declared to starknet, it will run the declare
command first and then execute the contract deployment.
--contract-name also accepts module tree path such as hello_sncast::contracts::HelloSncast or contracts::HelloSncast.
Use the full path when more than one contract in the package shares the same contract name.
📝 Note When passing
--contract-nameflag,sncastmust wait for the declare transaction to be completed first. The contract might wait for a few seconds before executing the deployment.
📝 Note If fee arguments are provided to the method, same fee arguments will be used for each transaction separately. That is, the total fee paid for the operation will be 2 times the fee limits provided.
For better control over fee, use
declareanddeploywith--class-hashseparately.
$ sncast deploy \
--contract-name HelloSncast
Output:
Success: Deployment completed
Contract Address: 0x0[..]
Class Hash: 0x0[..]
Declare Transaction Hash: 0x0[..]
Deploy Transaction Hash: 0x0[..]
To see deployment details, visit:
contract: [..]
class: [..]
deploy transaction: [..]
declare transaction: [..]
Passing salt Argument
Salt is a parameter which modifies contract's address, if not passed it will be automatically generated.
$ sncast deploy \
--class-hash 0x0227f52a4d2138816edf8231980d5f9e6e0c8a3deab45b601a1fcee3d4427b02 \
--salt 0x123
Output:
Success: Deployment completed
Contract Address: 0x0[..]
Transaction Hash: 0x0[..]
To see deployment details, visit:
contract: https://sepolia.voyager.online/contract/[..]
transaction: https://sepolia.voyager.online/tx/[..]
Passing unique Argument
Unique is a parameter which modifies contract's salt with the deployer address.
It can be passed even if the salt argument was not provided.
$ sncast deploy \
--class-hash 0x0227f52a4d2138816edf8231980d5f9e6e0c8a3deab45b601a1fcee3d4427b02 \
--unique
Output:
Success: Deployment completed
Contract Address: 0x0[..]
Transaction Hash: 0x0[..]
Details:
contract: https://sepolia.voyager.online/contract/[..]
transaction: https://sepolia.voyager.online/tx/[..]
Invoking Contracts
Overview
Starknet Foundry sncast supports invoking smart contracts on a given network with the sncast invoke command.
In most cases, you have to provide:
- Contract address
- Function name
- Function arguments
For detailed CLI description, see invoke command reference.
Examples
General Example
$ sncast \
--account my_account \
invoke \
--network sepolia \
--contract-address 0x522dc7cbe288037382a02569af5a4169531053d284193623948eac8dd051716 \
--function "add" \
--arguments 'pokemons::model::PokemonData {'\
'name: "Magmar",'\
'element: pokemons::model::Element::Fire'\
'}'
Output:
Success: Invoke completed
Transaction Hash: [..]
To see invocation details, visit:
transaction: https://sepolia.voyager.online/tx/[..]
💡 Info Transaction fee limit can be set either as a single upper bound by
--max-feeor broken down into individual resource components using--l1-gas,--l1-gas-price,--l2-gas,--l2-gas-price,--l1-data-gas, and--l1-data-gas-price.--max-feeand the individual resource flags are mutually exclusive. Any individual resource flag that is not provided will be estimated automatically
Invoking Function Without Arguments
Not every function accepts parameters. Here is how to call it.
$ sncast invoke \
--contract-address 0x0589a8b8bf819b7820cb699ea1f6c409bc012c9b9160106ddc3dacd6a89653cf \
--function "get_balance"
Output:
Success: Invoke completed
Transaction Hash: [..]
To see invocation details, visit:
transaction: https://sepolia.voyager.online/tx/[..]
Dry Run
sncast supports dry-running transaction commands before submitting them to the network. Use --dry-run to validate transaction logic and estimate fees without broadcasting the transaction.
Dry run is available for transaction commands such as:
Example
$ sncast \
--account my_account \
invoke \
--network sepolia \
--contract-address 0x522dc7cbe288037382a02569af5a4169531053d284193623948eac8dd051716 \
--function "add" \
--arguments 'pokemons::model::PokemonData {'\
'name: "Magmar",'\
'element: pokemons::model::Element::Fire'\
'}' \
--dry-run
Output:
Success: Dry run completed
Overall Fee: [..] Fri (~[..] STRK)
To include a detailed fee breakdown, add --detailed:
$ sncast invoke \
--network sepolia \
--contract-address 0x522dc7cbe288037382a02569af5a4169531053d284193623948eac8dd051716 \
--function "add" \
--arguments 'pokemons::model::PokemonData {'\
'name: "Magmar",'\
'element: pokemons::model::Element::Fire'\
'}' \
--dry-run \
--detailed
Output:
Success: Dry run completed
Overall Fee: [..] Fri (~[..] STRK)
L1 Gas Consumed: [..]
L1 Gas Price: [..]
L2 Gas Consumed: [..]
L2 Gas Price: [..]
L1 Data Gas Consumed: [..]
L1 Data Gas Price: [..]
Calling Contracts
Overview
Starknet Foundry sncast supports calling smart contracts on a given network with the sncast call command.
The basic inputs that you need for this command are:
- Contract address
- Function name
- Inputs to the function
For a detailed CLI description, see the call command reference.
Examples
General Example
$ sncast \
call \
--network sepolia \
--contract-address 0x522dc7cbe288037382a02569af5a4169531053d284193623948eac8dd051716 \
--function "balance_of" \
--arguments '0x0554d15a839f0241ba465bb176d231730c01cf89cdcb95fe896c51d4a6f4bb8f'
Output:
Success: Call completed
Response: 0_u256
Response Raw: [0x0, 0x0]
📝 Note Call does not require passing account-connected parameters (
accountandaccounts-file) because it doesn't create a transaction.
Passing block-id Argument
You can call a contract at the specific block by passing --block-id argument.
$ sncast call \
--network sepolia \
--contract-address 0x522dc7cbe288037382a02569af5a4169531053d284193623948eac8dd051716 \
--function "balance_of" \
--arguments '0x0554d15a839f0241ba465bb176d231730c01cf89cdcb95fe896c51d4a6f4bb8f' \
--block-id 77864
Output:
Success: Call completed
Response: 0_u256
Response Raw: [0x0, 0x0]
Performing Multicall
Multicall allows you to execute multiple calls in a single transaction. sncast comes with two interfaces:
sncast multicall executewhich allows executing multicall inline using a single command, by passing all calls as CLI arguments (seeexecutedocs)sncast multicall runwhich uses.tomlfile (seerundocs)
📝 Note Multicall executes only one transaction containing all the prepared calls. This means the fee is paid once.
Multicall with CLI arguments
You can prepare and execute multiple calls in a single transaction using CLI arguments. To separate different calls, use / as a delimiter.
📝 Note
Currently,
invokeanddeploycalls are supported. Their syntax is the same as forsncast invokeandsncast deploycommands (with additional id argument for deploy calls). For more details on the syntax of these calls, see the invoke and deploy command references.
Example
$ sncast multicall execute \
deploy --id map_contract --class-hash 0x02a09379665a749e609b4a8459c86fe954566a6beeaddd0950e43f6c700ed321 \
/ invoke --contract-address @map_contract --function put --calldata 0x1 0x2 \
/ invoke --contract-address @map_contract --function put --calldata 0x3 0x4
Output:
Success: Multicall completed
Transaction Hash: 0x[..]
To see invocation details, visit:
transaction: https://sepolia.voyager.online/tx/[..]
Using id references
Similarly in both sncast multicall execute and sncast multicall run, you can assign an identifier to a deploy call and then reference its output in later calls.
- In
deploycalls, set the id (--id <id>for CLI /id = "<id>"in TOML). - In later calls, reference it using
@<id>:- As the
contract addressininvokecalls - Inside
deploy/invokeinputs (constructor calldata / calldata), to reference outputs of previous calls
- As the
@alias interaction with @id
As other sncast commands, sncast multicall supports snfoundry.toml config aliases. See Aliases for more details.
Aliases can be used in both CLI-based (sncast multicall execute) and file-based (sncast multicall run) multicalls.
📝 Note
Aliases and multicall step ids share the same
@<name>syntax. If a multicall stepidand a config alias use the same name, the multicall stepidtakes precedence.
Given snfoundry.toml:
[sncast.default.aliases]
map = "0xcd8f9ab31324bb93251837e4efb4223ee195454f6304fcfcb277e277653008"
Example: Multicall with CLI
$ sncast multicall execute \
invoke --contract-address @map --function put --calldata 0x123 234
Example: Multicall with file
[[call]]
call_type = "invoke"
contract_address = "@map"
function = "put"
inputs = ["0x123", 234]
Multicall with file
You need to pass --path flag with a .toml file which contains desired operations that you want to execute.
You can also compose such config .toml file with the sncast multicall new command.
For a detailed CLI description, see the multicall command reference.
Example
Let's consider the following file:
[[call]]
call_type = "deploy"
class_hash = "0x076e94149fc55e7ad9c5fe3b9af570970ae2cf51205f8452f39753e9497fe849"
inputs = []
id = "map_contract"
unique = false
[[call]]
call_type = "invoke"
contract_address = "@map_contract"
function = "put"
inputs = ["0x123", 234] # Numbers can be used directly without quotes
After running sncast multicall run --path file.toml, a declared contract will be first deployed, and then its function put will be invoked.
💡 Info Inputs can be either strings (like
"0x123") or numbers (like234).
📝 Note For numbers larger than 2^63 - 1 (that can't fit into
i64), use string format (e.g.,"9223372036854775808") due to TOML parser limitations.
$ sncast multicall run --path multicall_example.toml
Output:
Success: Multicall completed
Transaction Hash: 0x[..]
To see invocation details, visit:
transaction: https://sepolia.voyager.online/tx/[..]
You can also generate multicall template with multicall new command, specifying output path.
$ sncast multicall new ./template.toml
Output:
Success: Multicall template created successfully
Path: ./template.toml
Content: [[call]]
call_type = "deploy"
class_hash = ""
inputs = []
id = ""
unique = false
[[call]]
call_type = "invoke"
contract_address = ""
function = ""
inputs = []
⚠️ Warning Trying to pass any existing file as an output for
multicall newwill result in error, as the command doesn't overwrite by default. You can use--overwriteflag to allow overwriting existing files.
Aliases
When you use commands like sncast call, sncast invoke, etc. you typically need to specify some felt values, for example --contract-address:
$ sncast call --contract-address 0xcd8f9ab31324bb93251837e4efb4223ee195454f6304fcfcb277e277653008 --function get --calldata 0x0 --block-id latest
Instead, you can define aliases for felt values (contract addresses, class hashes, etc.) in snfoundry.toml.
Then, you can pass them on CLI using the @alias syntax:
$ sncast call --contract-address @map --function get --calldata 0x0 --block-id latest
Defining aliases
- Open your preferred
snfoundry.tomlconfiguration file. For details onsnfoundry.tomlconfiguration, see Configuration.💡 Tip If you want your aliases globally available, you'll likely want to edit global config file, and add aliases to the default profile.
- Add an
[aliases]table under yoursncastprofile:
Values are felts in hex or decimal form.[sncast.default] network = "sepolia" [sncast.default.aliases] map = "0xcd8f9ab31324bb93251837e4efb4223ee195454f6304fcfcb277e277653008" map-class = "0x2a09379665a749e609b4a8459c86fe954566a6beeaddd0950e43f6c700ed321"
💡 Tip
Aliases follow the same rules as other
snfoundry.tomlsettings. That means you can define aliases in the global and local config files, and create the per-profile aliases, for example:[sncast.myprofile] network = "devnet" [sncast.myprofile.aliases] predeployed-account = "0x691a61b12a7105b1372cc377f135213c11e8400a546f6b0e7ea0296046690ce"Same as other
snfoundry.tomlsettings, aliases defined in higher-precedence config override lower-precedence ones.
Using aliases in CLI
Where a command accepts a felt argument that supports aliases, you can pass @alias instead of felt literal:
$ sncast call --contract-address @map --function get --calldata 0x0 --block-id latest
Listing aliases
Run sncast alias list to list aliases from the current effective config:
$ sncast alias list
Output:
map: 0xcd8f9ab31324bb93251837e4efb4223ee195454f6304fcfcb277e277653008
map-class: 0x2a09379665a749e609b4a8459c86fe954566a6beeaddd0950e43f6c700ed321
@alias interaction with multicall @id
See alias interaction with id.
Supported commands
Currently, aliases are supported for:
sncast call:--contract-address,--calldatasncast invoke:--contract-address,--calldatasncast deploy:--class-hash,--constructor-calldatasncast declare-from:--class-hashsncast account create:--class-hashsncast account import:--address,--class-hashsncast get balance:--token-addresssncast get nonce:<CONTRACT_ADDRESS>sncast get class-hash-at:<CONTRACT_ADDRESS>sncast verify:--class-hash,--contract-addresssncast utils serialize:--class-hash,--contract-addresssncast utils contract-address:--class-hash,--deployer-address,--constructor-calldatasncast multicall execute:--class-hash,--contract-address, and@<name>in--calldata(see multicall)sncast multicall run:class_hash,contract_address, and@<name>ininputs(see multicall)
Cairo Deployment Scripts
Overview
⚠️⚠️⚠️ Highly experimental code, a subject to change ⚠️⚠️⚠️
sncast can be used to run deployment scripts written in Cairo, using script run subcommand.
It aims to provide similar functionality to Foundry's forge script.
To start writing a deployment script in Cairo just add sncast_std as a dependency to you scarb package and make sure to
have a main function in the module you want to run. sncast_std docs can be found here.
Please note that sncast script is in development. While it is already possible to declare, deploy, invoke and call
contracts from within Cairo, its interface, internals and feature set can change rapidly each version.
⚠️⚠️ By default, the nonce for each transaction is being taken from the pre_confirmed block ⚠️⚠️
Some RPC nodes can be configured with higher poll intervals, which means they may return "older" nonces in pre_confirmed blocks, or even not be able to obtain pre_confirmed blocks at all. This might be the case if you get an error like "Invalid transaction nonce" when running a script, and you may need to manually set both nonce and max_fee for transactions.
Example:
let fee_settings = FeeSettingsTrait::estimate(); let declare_result = declare( "Map", fee_settings, Option::Some(nonce) ) .expect('declare failed');
Some of the planned features that will be included in future versions are:
- dispatchers support
- logging
- account creation/deployment
- multicall support
- dry running the scripts
and more!
State file
By default, when you run a script a state file containing information about previous runs will be created. This file can later be used to skip making changes to the network if they were done previously.
To determine if an operation (a function like declare, deploy or invoke) has to be sent to the network, the script will first check if such operation with given arguments already exists in state file. If it does, and previously ended with a success, its execution will be skipped. Otherwise, sncast will attempt to execute this function, and will write its status to the state file afterwards.
To prevent sncast from using the state file, you can set the --no-state-file flag.
A state file is typically named in a following manner:
{script name}_{network name}_state.json
Suggested directory structures
As sncast scripts are just regular scarb packages, there are multiple ways to incorporate scripts into your existing scarb workspace. Most common directory structures include:
1. scripts directory with all the scripts in the same workspace with cairo contracts (default for sncast script init)
$ tree
Output:
.
├── scripts
│ └── my_script
│ ├── Scarb.toml
│ └── src
│ ├── my_script.cairo
│ └── lib.cairo
├── src
│ ├── my_contract.cairo
│ └── lib.cairo
└── Scarb.toml
📝 Note You should add
scriptstomembersfield in your top-level Scarb.toml to be able to run the script from anywhere in the workspace - otherwise you will have to run the script from within its directory. To learn more consult Scarb documentation.
You can also have multiple scripts as separate packages, or multiple modules inside one package, like so:
1a. multiple scripts in one package
$ tree
Output:
.
├── scripts
│ └── my_script
│ ├── Scarb.toml
│ └── src
│ ├── my_script1.cairo
│ ├── my_script2.cairo
│ └── lib.cairo
├── src
│ ├── my_contract.cairo
│ └── lib.cairo
└── Scarb.toml
1b. multiple scripts as separate packages
$ tree
Output:
.
├── scripts
│ ├── Scarb.toml
│ ├── first_script
│ │ ├── Scarb.toml
│ │ └── src
│ │ ├── first_script.cairo
│ │ └── lib.cairo
│ └── second_script
│ ├── Scarb.toml
│ └── src
│ ├── second_script.cairo
│ └── lib.cairo
├── src
│ ├── my_contract.cairo
│ └── lib.cairo
└── Scarb.toml
1c. single script with flat directory structure
$ tree
Output:
.
├── Scarb.toml
├── scripts
│ ├── Scarb.toml
│ └── src
│ ├── my_script.cairo
│ └── lib.cairo
└── src
└── lib.cairo
2. scripts disjointed from the workspace with cairo contracts
$ tree
Output:
.
├── Scarb.toml
└── src
├── lib.cairo
└── my_script.cairo
In order to use this directory structure you must set any contracts you're using as dependencies in script's Scarb.toml,
and override build-external-contracts property to build those contracts. To learn more consult Scarb documentation.
This setup can be seen in action in Full Example below.
Examples
Initialize a script
To get started, a deployment script with all required elements can be initialized using the following command:
$ sncast script init my_script
For more details, see init command.
📝 Note To include a newly created script in an existing workspace, it must be manually added to the members list in the
Scarb.tomlfile, under the defined workspace. For more detailed information about workspaces, please refer to the Scarb documentation.
Minimal Example (Without Contract Deployment)
This example shows how to call an already deployed contract. Please find full example with contract deployment here.
use sncast_std::call;
// A real contract deployed on Sepolia network
const CONTRACT_ADDRESS: felt252 =
0x07e867f1fa6da2108dd2b3d534f1fbec411c5ec9504eb3baa1e49c7a0bef5ab5;
fn main() {
let call_result = call(
CONTRACT_ADDRESS.try_into().unwrap(), selector!("get_greeting"), array![],
)
.expect('call failed');
assert(*call_result.data[1] == 'Hello, Starknet!', *call_result.data[1]);
println!("{:?}", call_result);
}The script should be included in a Scarb package. The directory structure and config for this example looks like this:
$ tree
Output:
.
├── src
│ ├── my_script.cairo
│ └── lib.cairo
└── Scarb.toml
[package]
name = "my_script"
version = "0.1.0"
[dependencies]
starknet = ">=2.8.0"
sncast_std = "0.33.0"
To run the script, do:
$ sncast \
script run my_script
--network sepolia
Output:
CallResult { data: [0, 96231036770510887841935600920878740513, 16] }
command: script run
status: success
Full Example (With Contract Deployment)
This example script declares, deploys and interacts with an example MapContract:
#[starknet::interface]
pub trait IMapContract<State> {
fn put(ref self: State, key: felt252, value: felt252);
fn get(self: @State, key: felt252) -> felt252;
}
#[starknet::contract]
pub mod MapContract {
use starknet::storage::{Map, StorageMapReadAccess, StorageMapWriteAccess};
#[storage]
struct Storage {
storage: Map<felt252, felt252>,
}
#[abi(embed_v0)]
impl MapContractImpl of super::IMapContract<ContractState> {
fn put(ref self: ContractState, key: felt252, value: felt252) {
self.storage.write(key, value);
}
fn get(self: @ContractState, key: felt252) -> felt252 {
self.storage.read(key)
}
}
}We prepare a script:
use sncast_std::{DeclareResultTrait, FeeSettingsTrait, call, declare, deploy, get_nonce, invoke};
fn main() {
let fee_settings = FeeSettingsTrait::max_fee(999999999999999);
let salt = 0x3;
let declare_nonce = get_nonce('latest');
let declare_result = declare("MapContract", fee_settings, Option::Some(declare_nonce))
.expect('map declare failed');
let class_hash = declare_result.class_hash();
let deploy_nonce = get_nonce('pending');
let deploy_result = deploy(
*class_hash,
ArrayTrait::new(),
Option::Some(salt),
true,
fee_settings,
Option::Some(deploy_nonce),
)
.expect('map deploy failed');
assert(deploy_result.transaction_hash != 0, deploy_result.transaction_hash);
let invoke_nonce = get_nonce('pending');
let invoke_result = invoke(
deploy_result.contract_address,
selector!("put"),
array![0x1, 0x2],
fee_settings,
Option::Some(invoke_nonce),
)
.expect('map invoke failed');
assert(invoke_result.transaction_hash != 0, invoke_result.transaction_hash);
let call_result = call(deploy_result.contract_address, selector!("get"), array![0x1])
.expect('map call failed');
assert(call_result.data == array![0x2], *call_result.data.at(0));
}The script should be included in a Scarb package. The directory structure and config for this example looks like this:
$ tree
Output:
.
├── contracts
│ ├── Scarb.toml
│ └── src
│ └── lib.cairo
└── scripts
├── Scarb.toml
└── src
├── lib.cairo
└── map_script.cairo
[package]
name = "map_script"
version = "0.1.0"
[dependencies]
starknet = ">=2.8.0"
sncast_std = "0.33.0"
map = { path = "../contracts" }
[lib]
sierra = true
[[target.starknet-contract]]
build-external-contracts = [
"map::MapContract"
]
Please note that map contract was specified as the dependency. In our example, it resides in the filesystem. To generate the artifacts for it that will be accessible from the script you need to use the build-external-contracts property.
To run the script, do:
$ sncast \
--account example_user \
script run map_script \
--network sepolia
Output:
Class hash of the declared contract: 685896493695476540388232336434993540241192267040651919145140488413686992233
...
Deployed the contract to address: 2993684914933159551622723238457226804366654523161908704282792530334498925876
...
Invoke tx hash is: 2455538849277152825594824366964313930331085452149746033747086127466991639149
Call result: [2]
command: script run
status: success
As an idempotency feature is turned on by default, executing the same script once again ends with a success
and only call functions are being executed (as they do not change the network state):
$ sncast \
--account example_user \
script run map_script \
--network sepolia
Output:
Class hash of the declared contract: 1922774777685257258886771026518018305931014651657879651971507142160195873652
Deployed the contract to address: 3478557462226312644848472512920965457566154264259286784215363579593349825684
Invoke tx hash is: 1373185562410761200747829131886166680837022579434823960660735040169785115611
Call result: [2]
command: script run
status: success
whereas, when we run the same script once again with --no-state-file flag set, it fails (as the Map contract is already deployed):
$ sncast \
--account example_user \
script run map_script \
--network sepolia \
--no-state-file
Output:
Success: Script execution completed
Status: script panicked
0x6d6170206465706c6f79206661696c6564 ('map deploy failed')
Fee settings
Passing fee settings is possible in a few different ways:
Using auto estimation:
let fee_settings = FeeSettingsTrait::estimate();Manually setting the resource bounds (denoted in FRI):
let fee_settings = FeeSettingsTrait::resource_bounds(
100000, // l1 gas
10000000000000, // l1 gas price
1000000000, // l2 gas
100000000000000000000, // l2 gas price
100000, // l1 data gas
10000000000000, // l1 data gas price
);Specifying the maximum fee (denoted in FRI):
let fee_settings = FeeSettingsTrait::max_fee(100000000000000000000);Error handling
Each of declare, deploy, invoke, call functions return Result<T, ScriptCommandError>, where T is a corresponding response struct.
This allows for various script errors to be handled programmatically.
Script errors implement Debug trait, allowing the error to be printed to stdout.
Minimal example with assert! and println!
use sncast_std::call;
// Some nonexistent contract
const CONTRACT_ADDRESS: felt252 = 0x2137;
fn main() {
// This call fails
let call_result = call(
CONTRACT_ADDRESS.try_into().unwrap(), selector!("get_greeting"), array![],
);
// Make some assertion
assert!(call_result.is_err());
// Print the result error
println!("Received error: {:?}", call_result.unwrap_err());
}More on deployment scripts errors here.
Inspecting Transactions
Overview
Starknet Foundry sncast supports the inspection of transaction statuses on a given network with the sncast get tx-status command.
For a detailed CLI description, refer to the get tx-status command reference.
Usage Examples
Inspecting Transaction Status
You can track the details about the execution and finality status of a transaction in the given network by using the transaction hash as shown below:
$ sncast \
get tx-status \
0x07d2067cd7675f88493a9d773b456c8d941457ecc2f6201d2fe6b0607daadfd1 \
--network sepolia
Output:
Success: Transaction status retrieved
Finality Status: Accepted on L1
Execution Status: Succeeded
Verifying Contracts
Overview
Starknet Foundry sncast supports verifying Cairo contract classes with the sncast verify command by submitting the source code to a selected verification provider. Verification provides transparency, making the code accessible to users and aiding debugging tools.
The verification provider guarantees that the submitted source code aligns with the deployed contract class on the network by compiling the source code into Sierra bytecode and comparing it with the network-deployed Sierra bytecode.
For detailed CLI description, see verify command reference.
⚠️ Warning Please be aware that submitting the source code means it will be publicly exposed through the provider's APIs.
Verification Providers
Walnut
Walnut is a tool for step-by-step debugging of Starknet transactions. You can learn more about Walnut here walnut.dev. Note that Walnut requires you to specify the Starknet version in your Scarb.toml config file.
Voyager
Voyager is a Starknet block explorer that provides contract verification services. It allows you to verify your contracts and make their source code publicly available on the explorer. Voyager supports both mainnet and testnet (Sepolia) networks.
Examples
First, ensure that you have created a Scarb.toml file for your contract (it should be present in the project directory or one of its parent directories). Make sure the contract has already been deployed on the network.
Using Walnut
$ sncast \
verify \
--class-hash 0x031966c9fe618bcee61d267750b9d46e3d71469e571e331f35f0ca26efe306dc \
--contract-name SimpleBalance \
--verifier walnut \
--network sepolia
Output:
You are about to submit the entire workspace code to the third-party verifier at walnut.
Important: Make sure your project does not include sensitive information like private keys.
Are you sure you want to proceed? (Y/n): Y
Success: Verification completed
Contract successfully verified
Using Voyager
$ sncast \
verify \
--class-hash 0x031966c9fe618bcee61d267750b9d46e3d71469e571e331f35f0ca26efe306dc \
--contract-name SimpleBalance \
--verifier voyager \
--network sepolia
Output:
You are about to submit the entire workspace code to the third-party verifier at voyager.
Important: Make sure your project's Scarb.toml does not include sensitive information like private keys.
Are you sure you want to proceed? (Y/n): Y
Success: Verification completed
SimpleBalance submitted for verification, you can query the status at: https://sepolia-api.voyager.online/beta/class-verify/job/[..]
📝 Note Contract name is a part after the
modkeyword in your contract file. It may differ from package name defined inScarb.tomlfile.
📝 Note
--contract-namealso accepts a module tree path such ashello_sncast::contracts::HelloSncastorcontracts::HelloSncast. Use the full path when more than one contract in the package shares the same contract name.
Calldata Transformation
For the examples below, we will consider a dedicated contract - DataTransformerContract, defined
in data_transformer_contract project namespace.
It's declared on Sepolia network with class hash 0x02a9b456118a86070a8c116c41b02e490f3dcc9db3cad945b4e9a7fd7cec9168.
It has a few methods accepting different types and items defined in its namespace:
#[derive(Serde, Drop)]
pub struct SimpleStruct {
a: felt252,
}
#[derive(Serde, Drop)]
pub struct NestedStructWithField {
a: SimpleStruct,
b: felt252,
}
#[derive(Serde, Drop)]
pub enum Enum {
One: (),
Two: u128,
Three: NestedStructWithField,
}
#[starknet::interface]
pub trait IDataTransformerContract<TContractState> {
fn tuple_fn(self: @TContractState, a: (felt252, u8, Enum));
fn nested_struct_fn(self: @TContractState, a: NestedStructWithField);
fn complex_fn(
self: @TContractState,
arr: Array<Array<felt252>>,
one: u8,
two: i8,
three: ByteArray,
four: (felt252, u32),
five: bool,
six: u256,
);
}
#[starknet::contract]
pub mod DataTransformerContract {
use super::{Enum, NestedStructWithField};
#[storage]
struct Storage {}
#[abi(embed_v0)]
impl DataTransformerContractImpl of super::IDataTransformerContract<ContractState> {
fn tuple_fn(self: @ContractState, a: (felt252, u8, Enum)) {}
fn nested_struct_fn(self: @ContractState, a: NestedStructWithField) {}
fn complex_fn(
self: @ContractState,
arr: Array<Array<felt252>>,
one: u8,
two: i8,
three: ByteArray,
four: (felt252, u32),
five: bool,
six: u256,
) {}
}
}A default form of calldata passed to commands requiring it is a series of hex-encoded felts:
$ sncast call \
--network sepolia \
--contract-address 0x05075f6d418f7c53c6cdc21cbb5aca2b69c83b6fbcc8256300419a9f101c8b77 \
--function tuple_fn \
--calldata 0x10 0x3 0x0 \
--block-id latest
💡 Info
sncastdoesn't verify serialized calldata against the ABI.
Only expression transformation checks types and arities of functions called on chain.
Using --arguments
Instead of serializing calldata yourself, sncast allows passing it in a far more handy, human-readable form - as a
list of comma-separated Cairo expressions wrapped in single quotes. This can be achieved by using the --arguments
flag.
sncast will perform serialization automatically, based on an ABI of the contract
we interact with, following
the Starknet specification.
Basic example
We can write the same command as above, but with arguments:
$ sncast call \
--network sepolia \
--contract-address 0x05075f6d418f7c53c6cdc21cbb5aca2b69c83b6fbcc8256300419a9f101c8b77 \
--function tuple_fn \
--arguments '(0x10, 3, hello_sncast::data_transformer_contract::Enum::One)' \
--block-id latest
getting the same result. Note that the arguments must be:
- provided as a single string
- comma (
,) separated
📝 Note User-defined items such as enums and structs should be referred to depending on a way they are defined in ABI.
In general, paths to items have form:<project-name>::<module-path>::<item-name>.
Standalone Serialization
In case you just want to serialize a Cairo expression into calldata for use in other tools, scripts, etc., you can use the sncast serialize command.
$ sncast utils serialize \
--contract-address 0x00351c816183324878714973f3da1a43c1a40d661b8dac5cb69294cc333342ed \
--function nested_struct_fn \
--arguments 'NestedStructWithField { a: SimpleStruct { a: 0x24 }, b: 96 }' \
--network sepolia
Output:
Calldata: [0x24, 0x60]
Serialization can also be performed by passing the path to a file containing the contract ABI, instead of using --class-hash or --contract-address. This allows the command to run without making a network request to fetch the ABI.
$ sncast utils serialize \
--abi-file data_transformer_contract_abi.json \
--function nested_struct_fn \
--arguments 'NestedStructWithField { a: SimpleStruct { a: 0x24 }, b: 96 }' \
Output:
Calldata: [0x24, 0x60]
Supported Expressions
sncast supports most important Cairo corelib types:
bool- signed integers (
i8,i16,i32,i64,i128) - unsigned integers (
u8,u16,u32,u64,u96,u128,u256,u384,u512) felt252(numeric literals and'shortstrings')ByteArrayContractAddressClassHashStorageAddressEthAddressbytes31Array- usingarray![]macroSpan- usingarray![].span()macro and function callOption- usingOption::Some(value)orOption::NoneResult- usingResult::Ok(value)orResult::Err(value)
Numeric types (primitives and felt252) can be paseed with type suffix specified for example --arguments 420_u64.
📝 Note Only constant expressions are supported. Defining and referencing variables and calling functions (either builtin, user-defined or external) is not allowed.
More Complex Examples
complex_fn- different data types:
$ sncast call \
--network sepolia \
--contract-address 0x05075f6d418f7c53c6cdc21cbb5aca2b69c83b6fbcc8256300419a9f101c8b77 \
--function complex_fn \
--arguments \
'array![array![1, 2], array![3, 4, 5], array![6]],'\
'12,'\
'-128_i8,'\
'"Some string (a ByteArray)",'\
"('a shortstring', 32_u32),"\
'true,'\
'0xffffffffffffffffffffffffffffffffffffffffffffffffffffffffffffffff' \
--block-id latest
📝 Note In bash and similar shells indentation and whitespace matters when providing multiline strings with
\Remember not to indent any line and not to add whitespace before the
\character.
Alternatively, you can continue the single quote for multiple lines.
$ sncast call \
--network sepolia \
--contract-address 0x05075f6d418f7c53c6cdc21cbb5aca2b69c83b6fbcc8256300419a9f101c8b77 \
--function complex_fn \
--arguments 'array![array![1, 2], array![3, 4, 5], array![6]],
12,
-128_i8,
"Some string (a ByteArray)",
('\''a shortstring'\'', 32_u32),
true,
0xffffffffffffffffffffffffffffffffffffffffffffffffffffffffffffffff' \
--block-id latest
📝 Note In bash and similar shells any
'must be escaped correctly.This is also true for
"when using"to wrap the arguments instead of'.
nested_struct_fn- struct nesting:
$ sncast call \
--network sepolia \
--contract-address 0x05075f6d418f7c53c6cdc21cbb5aca2b69c83b6fbcc8256300419a9f101c8b77 \
--function nested_struct_fn \
--arguments \
'hello_sncast::data_transformer_contract::NestedStructWithField {'\
' a: hello_sncast::data_transformer_contract::SimpleStruct { a: 10 },'\
' b: 12'\
'}'\
--block-id latest
Block Explorers
When you use commands like sncast deploy, sncast declare, or sncast account create, sncast will display block explorer links in the output if the network supports it. These links allow you to quickly inspect the transaction, contract, or class on a public block explorer such as Voyager.
💡 Tip If you want to use a specific block explorer, see the
block-explorerconfiguration details.
When Are Explorer Links Shown?
Shown by Default
Public Networks: Explorer links are enabled by default for public networks (e.g., Sepolia, Mainnet) if the tool can detect a supported explorer for the network.
Hidden
Devnet: Explorer links are not shown for localhost or devnet URLs (e.g., http://localhost:5050/rpc or http://127.0.0.1:5050/rpc). This prevents confusion, as local network transactions are not visible in public explorers.
Disabling Explorer Links
You can turn off explorer links by setting show-explorer-links = false in your snfoundry.toml profile. See the snfoundry.toml appendix for details.
Environment Variable Override
It's possible to force explorer links to be shown by setting the environment variable SNCAST_FORCE_SHOW_EXPLORER_LINKS:
$ SNCAST_FORCE_SHOW_EXPLORER_LINKS=1
Example Output
Success: Deployment completed
Contract Address: 0x0...
Transaction Hash: 0x0...
To see deployment details, visit:
contract: https://sepolia.voyager.online/contract/0x0...
transaction: https://sepolia.voyager.online/tx/0x0...
Integration With Devnet
starknet-devnet is a local Starknet node used for development and testing. sncast provides inbuilt support for some of its features, making it easier to work with it.
Automatic Devnet Detection
You can use --network devnet to automatically detect and connect to a running starknet-devnet instance. sncast will look for running starknet-devnet processes, including those running in Docker/Podman containers, and automatically connect to them.
This eliminates the need to manually specify the URL when working with devnet.
Predeployed Accounts
When you start starknet-devnet, it automatically predeploys some contracts, including set of accounts with known details (read more about them here).
You can use these accounts directly in sncast without needing to import them.
They are available under specific names - devnet-1, devnet-2, ..., devnet-<N> (where N is the number of predeployed accounts, by default it's 10).
📝 Note
Devnet accounts can't be used together with
sepoliaandmainnetvalues for--networkflag.
Example
Let's invoke a contract using devnet-1 account.
$ sncast --account devnet-1 invoke \
--contract-address 0x0589a8b8bf819b7820cb699ea1f6c409bc012c9b9160106ddc3dacd6a89653cf \
--function "get_balance" --network devnet
Output:
Success: Invoke completed
Transaction Hash: [..]
To see invocation details, visit:
transaction: https://sepolia.voyager.online/tx/[..]
📝 Note
If you have an account named
devnet-1(or any other predeployed account name) in your accounts file,sncastwill prioritize using that one instead of the inbuilt devnet account.
Developer Functionalities
Logging
sncast supports emitting logs, including the logs from the requests sent to the network.
Logs can be enabled by setting SNCAST_LOG environment variable to desired log level.
For example, to enable logs with level debug and higher, run:
$ SNCAST_LOG="debug" sncast ...
Additional filtering can be set to the SNCAST_LOG environment variable,
see tracing-subscriber
documentation for more details.
⚠️ Warning
Logs can expose sensitive information, such as private keys. Never use logging in production environments.
Ledger Hardware Wallet
sncast supports Ledger hardware wallets as a signing device. Use it anywhere a signer is required, or run sncast ledger subcommands for device-specific operations.
Prerequisites
sncast communicates with the Starknet Ledger app running on your device (currently supported version: 2.4.0). Make sure the Starknet app is installed and open before running any sncast ledger commands.
📝 Note
As of this writing, the latest version of the Starknet Ledger app only supports blind signing a single hash. While not ideal, it's the most secure signer available.
Deciding on Wallet Paths
Before using the Ledger app, you must decide which wallet paths to use with your accounts.
The Starknet Ledger app requires EIP-2645 HD paths. Learn more about path management and best practices on the EIP-2645 HD Paths page.
Checking App Version
Checking the app version is a simple way to verify that sncast can communicate with your Ledger. With the Starknet app open on the device, run:
$ sncast ledger app-version
Output:
App Version: 2.4.0
Getting Public Key
Once you've decided on a path, you can read the corresponding public key from your device.
$ sncast ledger get-public-key --path "m//starknet'/sncast'/0'/1'/0"
📝 Note
Wherever a derivation path is accepted, you can also pass
--account-id(or--ledger-account-idfor account commands) instead. An account IDNexpands tom//starknet'/sncast'/0'/<N>'/0.
$ sncast ledger get-public-key --account-id 1
Output:
Public Key: 0x[..]
By default, the public key is shown on the Ledger device for manual confirmation. You can skip this confirmation with --no-display:
$ sncast ledger get-public-key --account-id 1 --no-display
Using Ledger as Signer
The most common use case is controlling Starknet accounts with Ledger. Pass --ledger-path or --ledger-account-id to account create or account import to bind the derivation path to the account.
Derivation Path Binding
When an account is created or imported using --ledger-path or --ledger-account-id, its derivation path is stored in the accounts file (ledger_path field). As a result, subsequent commands like invoke, declare, or deploy only require --account my_ledger_account, there's no need to specify --ledger-path again.
Creating and Deploying an Account
$ sncast \
account create \
--ledger-path "m//starknet'/sncast'/0'/1'/0" \
--network sepolia \
--name my_ledger_account
$ sncast \
account create \
--ledger-account-id 1 \
--network sepolia \
--name my_ledger_account
This fetches the public key from the Ledger device at the specified path and calculates the account address. Prefund the address with STRK tokens, then deploy:
$ sncast \
--account my_ledger_account \
account deploy \
--network sepolia
A signing confirmation will be shown on the Ledger device. Once approved, the deployment transaction is sent.
Importing an Existing Account
If you already have a deployed account managed by your Ledger, you can import it:
$ sncast \
account import \
--network sepolia \
--name my_ledger_account \
--address 0x1 \
--ledger-path "m//starknet'/sncast'/0'/1'/0" \
--type oz
$ sncast \
account import \
--network sepolia \
--name my_ledger_account \
--address 0x1 \
--ledger-account-id 1 \
--type oz
Sending Transactions
Once an account is set up, use it with any command that requires signing. A Ledger confirmation will appear on the device for each transaction:
$ sncast \
--account my_ledger_account \
invoke \
--network sepolia \
--contract-address 0x1 \
--function "transfer" \
--arguments '0x2, u256:100'
Output:
Ledger device will display a confirmation screen — approve it to continue...
Success: Invoke completed
Transaction Hash: 0x[..]
To see invocation details, visit:
transaction: https://sepolia.voyager.online/tx/[..]
Signing Raw Hashes
⚠️ Warning
Blind signing a raw hash could be dangerous. Make sure you ONLY sign hashes from trusted sources. If you're sending transactions, use Ledger as a signer instead of using this command.
You can sign a single raw hash with your Ledger device:
$ sncast ledger sign-hash \
--path "m//starknet'/sncast'/0'/1'/0" \
0x0111111111111111111111111111111111111111111111111111111111111111
$ sncast ledger sign-hash \
--account-id 1 \
0x0111111111111111111111111111111111111111111111111111111111111111
A confirmation screen will be displayed on the device. Once approved, the signature is printed to the console.
Output:
Hash signature:
r: 0x[..]
s: 0x[..]
EIP-2645 HD Paths
Ledger derives private keys using Hierarchical Deterministic Wallet derivation paths (HD paths). A single Ledger device can use an unlimited number of keys — any given combination of seed phrase + path always produces the same key pair.
Therefore, it's important to decide on, and document the HD paths used for your accounts. While it's trivial to use a key pair given an HD path, the reverse is not true — recovering which path corresponds to a given public key can be extremely difficult. Following established patterns (e.g. incrementing from zero) is strongly recommended.
The EIP-2645 Standard
If you've used hardware wallets before, you may be familiar with paths like m/44'/60'/0'/0/0. This format will not work with the Starknet Ledger app — it only accepts the EIP-2645 HD path format:
m/2645'/layer'/application'/eth_address_1'/eth_address_2'/index
where layer, application, eth_address_1, eth_address_2, and index are 31-bit unsigned numbers.
The sncast Extension
EIP-2645 paths in raw numeric form are difficult to read and write (e.g. m/2645'/1195502025'/355113700'/0'/0'/0). sncast provides two extensions to make them more user-friendly.
Using Non-Numerical Strings
The layer and application levels are defined in EIP-2645 as hashes of names. Instead of manually computing those hashes, sncast lets you write the names directly:
m/2645'/starknet'/sncast'/0'/0'/0
sncast automatically converts the string segments into their SHA-256-derived numeric values. The hash of "starknet" is 1195502025, so the two forms below are equivalent:
m/2645'/starknet'/sncast'/0'/0'/0
m/2645'/1195502025'/355113700'/0'/0'/0
📝 Note
String-based path segments are an extension of
sncastand are not understood by other HD wallet tools. To see the resolved derivation path stored for an account, usesncast account list, which always displays the canonical numeric form:$ sncast account list- my_ledger_account: ledger path: m/2645'/1195502025'/355113700'/0'/1'/0 ...
Omitting the 2645' Segment
Since sncast only works with EIP-2645 paths, the 2645' prefix can be omitted using the m// shorthand:
m//starknet'/sncast'/0'/0'/0
This is equivalent to m/2645'/starknet'/sncast'/0'/0'/0.
Path Validation Rules
sncast enforces these rules when parsing a derivation path:
- Must have exactly 6 levels after
m/ - The first level must be
2645'(or omitted viam//) - The
layer,application,eth_address_1, andeth_address_2levels must be hardened (marked with') - The
indexlevel must be a plain number (string names are not allowed here)
Path Management Best Practices
The single most important rule is to document the paths you've used, especially if you deviate from common patterns.
sncast recommends the following convention:
- Always use
m//starknet'/sncast'/as the prefix for levelslayerandapplication - Keep
eth_address_1fixed at0' - Start
eth_address_2at0'for your first account and increment it for each additional account - Keep
indexat0
Examples following this convention:
| Account | Path |
|---|---|
| First | m//starknet'/sncast'/0'/0'/0 |
| Second | m//starknet'/sncast'/0'/1'/0 |
| Third | m//starknet'/sncast'/0'/2'/0 |
️️️️📝 Note
Some guides suggest incrementing
indexinstead ofeth_address_2. This carries a small security risk: if any single private key in the set is compromised and the attacker obtains thexpubkey at theeth_address_2level, they can derive all sibling keys. Incrementingeth_address_2prevents this vulnerability.
Environment Setup
💡 Info This tutorial is only relevant if you wish to contribute to Starknet Foundry. If you plan to only use it as a tool for your project, you can skip this part.
Prerequisites
Rust
Install the latest stable Rust version. If you already have Rust installed make sure to upgrade it by running
$ rustup update
Scarb
You can read more about installing Scarb here.
Please make sure you're using Scarb installed via asdf - otherwise some tests may fail.
To verify, run:
$ which scarbthe result of which should be:
$HOME/.asdf/shims/scarbIf you previously installed scarb using an official installer, you may need to remove this installation or modify your PATH to make sure asdf installed one is always used.
cairo-profiler
You can read more
about installing cairo-profiler here.
❗️ Warning
If you haven't pushed your branch to the remote yet (you've been working only locally) some tests may fail, including:
e2e::running::simple_package_with_git_dependencyAfter pushing the branch to the remote, those tests should pass.
Starknet Devnet
Install starknet-devnet via asdf.
Universal sierra compiler
Install the latest universal-sierra-compiler version.
Running Tests
Tests can be run with:
$ cargo test
cargo test is the primary way to run tests locally.
❗️ Warning
cargo nextest runmay leave an orphanstarknet-devnetprocess in some scenarios. For local runs, prefercargo test. If you want to usenextest, find andkillorphan devnet process:$ ps aux | grep starknet-devnet | grep -v grep
Cairo Native
To develop Starknet Foundry with Cairo Native support, you need to enable the cairo-native feature in Cargo and
install the required dependencies.
LLVM
LLVM 19 is required to build forge with Cairo Native support and to run it.
macOS
On macOS in can be installed with
$ brew install llvm@19
Next, export the following environment variables:
LIBRARY_PATH=/opt/homebrew/lib
MLIR_SYS_190_PREFIX="$(brew --prefix llvm@19)"
LLVM_SYS_191_PREFIX="$(brew --prefix llvm@19)"
TABLEGEN_190_PREFIX="$(brew --prefix llvm@19)"
Linux
LLVM installation varies between distributions. See here and here for more details.
Next, export the following environment variables, note that the paths may differe depending on your distribution and installation method:
MLIR_SYS_190_PREFIX=/usr/lib/llvm-19
LLVM_SYS_191_PREFIX=/usr/lib/llvm-19
TABLEGEN_190_PREFIX=/usr/lib/llvm-19
Formatting and Lints
Starknet Foundry uses rustfmt for formatting. You can run the formatter with
$ cargo fmt
For linting, it uses clippy. You can run it with this command:
$ cargo clippy --all-targets --all-features -- --no-deps -W clippy::pedantic -A clippy::missing_errors_doc -A clippy::missing_panics_doc -A clippy::default_trait_access
Or using our defined alias
$ cargo lint
Spelling
Starknet Foundry uses typos for spelling checks.
You can run the checker with
$ typos
Some typos can be automatically fixed by running
$ typos -w
Contributing
Read the general contribution guideline here
Shell Snippets in Documentation
snforge and sncast snippets and their outputs present in the docs are automatically run and tested. Some of them need to be configured with specific values to work correctly.
Snippet configuration
To configure a snippet, you need to add a comment block right before it. The comment block should contain the configuration in JSON format. Example:
<!-- { "package_name": "hello_starknet", "ignored_output": true } -->
```shell
$ sncast \
account create \
--network sepolia \
--name my_first_account
```
<details>
<summary>Output:</summary>
```shell
Success: Account created
Address: 0x[..]
Account successfully created but it needs to be deployed. The estimated deployment fee is [..] STRK. Prefund the account to cover deployment transaction fee
To see account creation details, visit:
account: https://sepolia.voyager.online/contract/[..]
```
</details>
Available configuration options
ignored- if set totrue, the snippet will be ignored and not run.package_name- the name of the Scarb package in which the snippet should be run.ignored_output- if set totrue, the output of executed command will be ignored.replace_network- if set totrue, the snippet will replace the--networkargument with devnet used in tests.scarb_version- specifies the Scarb version required to run the snippet. If the current Scarb version does not match, the snippet will be ignored. The version should be in the format compatible with semver.
Snapshot tests
💡 Info This tutorial is only relevant if you wish to contribute to Starknet Foundry. If you plan to only use it as a tool for your project, you can skip this part.
Some Forge tests use insta to store expected test output. This allows us to test behavior across Scarb versions supported by Starknet Foundry.
Prefix
All snapshot tests must be prefixed with snap_ prefix.
As of writing of this document, these are the tests that use assert_cleaned_output!.
This allows us to explicitly run these on CI.
The check script
Locally, scripts/check_snapshots.sh script can be used to run snapshot tests (and fix snapshots).
Usage
To make sure snapshot tests pass for all currently supported Scarb versions, run:
./scripts/check_snapshots.sh
If some of the snapshot tests fail, run:
./scripts/check_snapshots.sh --fix
and review the newly generated snapshots.
Predeployed contracts
snforge provides a set of predeployed contracts for use in testing. To support this functionality, we maintain CASM of these contracts directly within our codebase. Because these contracts are subject to periodic updates, these files need to be updated. The list below details all predeployed contracts and the information required to keep them current.
Adding new predeployed contract
To add a new predeployed contract, you need to add a new subdirectory with the name of the contract to the crates/cheatnet/src/data/predeployed_contracts directory. Then, you need to add artifact files to this subdirectory. CASM files should be renamed to casm.json.
📝 Note
When adding a new predeployed contract, make sure the class matches the one deployed on mainnet.
Structure of predeployed_contracts directory should be as follows:
$ tree
.
├── ERC20Lockable
│ └── casm.json
├── ERC20Mintable
│ └── casm.json
└── <Other contract>
└── casm.json
Updating existing predeployed contracts
STRK and ETH
These contracts are sourced from the starkgate-contracts repository.
Current Build Configuration:
- Version:
v3.0.0 - Commit Hash:
07e11c3
| Token | Contract Name | Source Code (Cairo) | Class on Mainnet |
|---|---|---|---|
| STRK | ERC20Lockable | View Source | 0x02e7...98fc |
| ETH | ERC20Mintable | View Source | 0x00b4...4ec |
Steps to update STRK and ETH predeployed contracts:
-
Clone
starkgate-contractsrepository and checkoutv3.0.0tag.git clone https://github.com/starknet-io/starkgate-contracts cd starkgate-contracts git checkout v3.0.0 -
Enable CASM generation by adding the following lines to
Scarb.toml. This should be done insg_tokenandstrkpackages.... [[target.starknet-contract]] casm = true ... -
Adjust compiler configuration in workspace
Scarb.toml:... [profile.release.cairo] add-statements-code-locations-debug-info = true add-statements-functions-debug-info = true panic-backtrace = true ... -
Compile contracts with
scarbscarb --release build -
Visit
target/releasedirectory and copy relevant artifacts into relevantpredeployed_contractssubdirectories incheatnetcodebase.
snforge CLI Reference
snforge testsnforge newsnforge cleansnforge check-requirementssnforge completionssnforge optimize-inlining
You can check your version of snforge via snforge --version.
To display help run snforge --help.
snforge test
Run tests for a project in the current directory.
[TEST_FILTER]
Passing a test filter will only run tests with an absolute module tree path containing this filter.
--trace-verbosity <TRACE_VERBOSITY>
Sets the level of detail shown in execution traces.
Valid values:
minimal: Only test name, contract name, and selectorstandard: Includes calldata and call resultdetailed: Full trace, including nested calls, caller address, and panic reasons
Read more here.
--trace-components <TRACE_COMPONENTS>...
Selects specific trace elements to include in the execution flow output.
Available components:
contract-nameentry-point-typecalldatacontract-addresscaller-addresscall-typecall-resultgas
Read more here.
--run-native
This flag is only available if snforge was built with cairo-native feature enabled
Run contracts on cairo-native instead of the default cairo-vm.
Note: Only contracts execution through native is supported, test code itself will still run on cairo-vm.
-e, --exact
Will only run a test with a name exactly matching the test filter.
Test filter must be a whole qualified test name e.g. package_name::my_test instead of just my_test.
--skip <SKIP>
Skips any tests whose name contains the given SKIP string.
This flag may be used multiple times with different SKIP strings.
-x, --exit-first
Stop executing tests after the first failed test.
-p, --package <SPEC>
Packages to run this command on, can be a concrete package name (foobar) or a prefix glob (foo*).
-w, --workspace
Run tests for all packages in the workspace.
-r, --fuzzer-runs <FUZZER_RUNS>
Number of fuzzer runs.
-s, --fuzzer-seed <FUZZER_SEED>; SNFORGE_FUZZER_SEED (environment variable)
Seed for the fuzzer.
--ignored
Run only tests marked with #[ignore] attribute.
--include-ignored
Run all tests regardless of #[ignore] attribute.
--rerun-failed
Run tests that failed during the last run
--color <WHEN>
Control when colored output is used. Valid values:
auto(default): automatically detect if color support is available on the terminal.always: always display colors.never: never display colors.
--detailed-resources
Display additional info about used resources for passed tests.
--save-trace-data
Saves execution traces of test cases which pass and are not fuzz tests. You can use traces for profiling and coverage purposes.
--build-profile
Saves trace data and then builds profiles of test cases which pass and are not fuzz tests.
You need cairo-profiler installed on your system. You can set a custom path to cairo-profiler with CAIRO_PROFILER env variable. Profile can be read with pprof, more information: cairo-profiler, pprof
--coverage
Saves trace data and then generates coverage report of test cases which pass and are not fuzz tests.
You need cairo-coverage installed on your system. You can set a custom path to cairo-coverage with CAIRO_COVERAGE env variable.
--max-n-steps <MAX_N_STEPS>
Number of maximum steps during a single test. For fuzz tests this value is applied to each subtest separately.
-F, --features <FEATURES>
Comma separated list of features to activate.
--all-features
Activate all available features.
--no-default-features
Do not activate the default feature.
--no-optimization
Build contract artifacts in a separate starknet contract target.
Enabling this flag will slow down the compilation process, but the built contracts will more closely resemble the ones used on real networks. This is set to true when using Scarb version less than 2.8.3.
--tracked-resource
Set tracked resource for test execution. Impacts overall test gas cost. Valid values:
sierra-gas(default): track sierra gas, uses cairo nativeCallExecution(sierra gas consumption) to describe computation resources consumed by the test.cairo-steps: track cairo steps, uses vmExecutionResources(steps, builtins, memory holes) to describe resources consumed by the test. When this flag is passed, it overridestracked_resourcefromScarb.toml. To learn more about fee calculation formula (and the impact of tracking sierra gas on it) please consult starknet docs
--gas-report
Display a table of L2 gas breakdown for each contract and selector.
--max-threads <MAX_THREADS>
Maximum number of threads used for test execution, which corresponds to tests run in parallel. Defaults to the number of available CPU cores.
--partition <INDEX>/<TOTAL>
Divides tests into TOTAL partitions and runs partition INDEX (1-based), e.g. 1/4.
-P, --profile <PROFILE>
Specify the profile to use by name.
--release
Use Scarb release profile.
--dev
Use Scarb dev profile.
-h, --help
Print help.
SNFORGE_BACKTRACE (environment variable)
True values are 1.
When enabled, enables backtrace output on test failure. Read more here.
SNFORGE_DETERMINISTIC_OUTPUT (environment variable)
True values are 1, true, t, yes, y, and on.
False values are 0, false, f, no, n, and off.
When enabled, sorts test result outputs by test name, for reproducible outputs.
--launch-debugger
Launch the given test in debug mode, making snforge act as a debug adapter. It is meant for communication with a DAP client, not command line live debugging. Read more here and check out Cairo Debugger documentation.
snforge new
Create a new StarkNet Foundry project at the provided path that should either be empty or not exist.
<PATH>
Path to a location where the new project will be created.
-n, --name
Name of a package to create, defaults to the directory name.
-t, --template
Name of a template to use when creating a new project. Possible values:
balance-contract(default): Basic contract with example tests.cairo-program: Simple Cairo program with unit tests.erc20-contract: Includes an ERC-20 token contract and a contract that allows multiple transfers of a specific token.
--no-vcs
Do not initialize a new Git repository.
--overwrite
Try to create the project even if the specified directory is not empty, which can result in overwriting existing files
-h, --help
Print help.
snforge clean
Remove files generated by snforge.
all
Clean all generated directories
cache
Clean the cache directory.
ℹ️ Info
The default cache directory is
.snfoundry_cache, relative to the workspace root. You can override it with theSNFOUNDRY_CACHEenvironment variable, which must be an absolute path to a dedicated directory.
trace
Clean the snfoundry_trace directory.
coverage
Clean the coverage directory.
profile
Clean the profile directory.
-h, --help
Print help.
snforge check-requirements
Validate if all snforge requirements are installed.
-h, --help
Print help.
completions
Generates a completions script for the specified shell and writes it to stdout.
[SHELL]
Optional
If not specified, the script will be generated for the shell detected under via $SHELL variable.
Possible values: bash, elvish, fish, powershell, zsh
-h, --help
Print help.
snforge optimize-inlining
Find the optimal inlining-strategy value to minimize gas cost or contract size.
See Inlining Optimizer for a full guide.
<TEST_FILTER>
Fully qualified name of the test to run at each threshold. Must be used together with --exact.
--contracts <CONTRACTS>
Comma-delimited list of contract names or Cairo module paths
(e.g. MyContract,my_package::MyOther) to include in contract size checks.
Required.
--min-threshold <MIN_THRESHOLD>
Minimum inlining-strategy value to test. Default: 0.
--max-threshold <MAX_THRESHOLD>
Maximum inlining-strategy value to test. Default: 250.
--step <STEP>
Step size between tested thresholds. Must be greater than zero. Default: 25.
--max-contract-size <MAX_CONTRACT_SIZE>
Maximum allowed contract file size in bytes. Thresholds that produce contracts exceeding this value are
skipped. Default: 4089446.
--max-contract-felts <MAX_CONTRACT_FELTS>
Maximum allowed number of felts in a compiled contract. Thresholds that exceed this limit are
skipped. Default: 81920.
--gas
After the search completes, update Scarb.toml with the threshold that minimizes runtime gas cost.
Conflicts with --size.
--size
After the search completes, update Scarb.toml with the threshold that minimizes contract
bytecode L2 gas (a proxy for deployment cost).
Conflicts with --gas.
-e, --exact
Required. Run only the test whose name exactly matches TEST_FILTER.
--max-threads <MAX_THREADS>
Maximum number of threads used for test execution. Defaults to the number of available CPU cores.
-P, --profile <PROFILE>
Specify the Scarb profile to use by name.
--release
Use Scarb release profile.
--dev
Use Scarb dev profile.
-F, --features <FEATURES>
Comma separated list of features to activate.
--all-features
Activate all available features.
--no-default-features
Do not activate the default feature.
-h, --help
Print help.
Cheatcodes Reference
-
mock_call- mocks a number of contract calls to an entry point -
start_mock_call- mocks contract call to an entry point -
stop_mock_call- cancels themock_call/start_mock_callfor an entry point -
get_class_hash- retrieves a class hash of a contract -
replace_bytecode- replace the class hash of a contract -
l1_handler- executes a#[l1_handler]function to mock a message arriving from Ethereum -
spy_events- createsEventSpyinstance which spies on events emitted by contracts -
spy_messages_to_l1- createsL1MessageSpyinstance which spies on messages to L1 sent by contracts -
store- stores values in targeted contact's storage -
load- loads values directly from targeted contact's storage -
set_balance- sets new balance of ERC20 token for target contract -
CheatSpan- enum for specifying the number of target calls for a cheat -
Token- enum for specifying ERC20 token for a cheat -
interact_with_state- allows interacting with a contract's state in tests
Execution Info
Caller Address
cheat_caller_address- changes the caller address for contracts, for a number of callsstart_cheat_caller_address_global- changes the caller address for all contractsstart_cheat_caller_address- changes the caller address for contractsstop_cheat_caller_address- cancels thecheat_caller_address/start_cheat_caller_addressfor contractsstop_cheat_caller_address_global- cancels thestart_cheat_caller_address_global
Block Info
Block Number
cheat_block_number- changes the block number for contracts, for a number of callsstart_cheat_block_number_global- changes the block number for all contractsstart_cheat_block_number- changes the block number for contractsstop_cheat_block_number- cancels thecheat_block_number/start_cheat_block_numberfor contractsstop_cheat_block_number_global- cancels thestart_cheat_block_number_global
Block Timestamp
cheat_block_timestamp- changes the block timestamp for contracts, for a number of callsstart_cheat_block_timestamp_global- changes the block timestamp for all contractsstart_cheat_block_timestamp- changes the block timestamp for contractsstop_cheat_block_timestamp- cancels thecheat_block_timestamp/start_cheat_block_timestampfor contractsstop_cheat_block_timestamp_global- cancels thestart_cheat_block_timestamp_global
Sequencer Address
cheat_sequencer_address- changes the sequencer address for contracts, for a number of callsstart_cheat_sequencer_address_global- changes the sequencer address for all contractsstart_cheat_sequencer_address- changes the sequencer address for contractsstop_cheat_sequencer_address- cancels thecheat_sequencer_address/start_cheat_sequencer_addressfor contractsstop_cheat_sequencer_address_global- cancels thestart_cheat_sequencer_address_global
Transaction Info
Transaction Version
cheat_transaction_version- changes the transaction version for contracts, for a number of callsstart_cheat_transaction_version_global- changes the transaction version for all contractsstart_cheat_transaction_version- changes the transaction version for contractsstop_cheat_transaction_version- cancels thecheat_transaction_version/start_cheat_transaction_versionfor contractsstop_cheat_transaction_version_global- cancels thestart_cheat_transaction_version_global
Transaction Max Fee
cheat_max_fee- changes the transaction max fee for contracts, for a number of callsstart_cheat_max_fee_global- changes the transaction max fee for all contractsstart_cheat_max_fee- changes the transaction max fee for contractsstop_cheat_max_fee- cancels thecheat_max_fee/start_cheat_max_feefor contractsstop_cheat_max_fee_global- cancels thestart_cheat_max_fee_global
Transaction Signature
cheat_signature- changes the transaction signature for contracts, for a number of callsstart_cheat_signature_global- changes the transaction signature for all contractsstart_cheat_signature- changes the transaction signature for contractsstop_cheat_signature- cancels thecheat_signature/start_cheat_signaturefor contractsstop_cheat_signature_global- cancels thestart_cheat_signature_global
Transaction Hash
cheat_transaction_hash- changes the transaction hash for contracts, for a number of callsstart_cheat_transaction_hash_global- changes the transaction hash for all contractsstart_cheat_transaction_hash- changes the transaction hash for contractsstop_cheat_transaction_hash- cancels thecheat_transaction_hash/start_cheat_transaction_hashfor contractsstop_cheat_transaction_hash_global- cancels thestart_cheat_transaction_hash_global
Transaction Chain ID
cheat_chain_id- changes the transaction chain_id for contracts, for a number of callsstart_cheat_chain_id_global- changes the transaction chain_id for all contractsstart_cheat_chain_id- changes the transaction chain_id for contractsstop_cheat_chain_id- cancels thecheat_chain_id/start_cheat_chain_idfor contractsstop_cheat_chain_id_global- cancels thestart_cheat_chain_id_global
Transaction Nonce
cheat_nonce- changes the transaction nonce for contracts, for a number of callsstart_cheat_nonce_global- changes the transaction nonce for all contractsstart_cheat_nonce- changes the transaction nonce for contractsstop_cheat_nonce- cancels thecheat_nonce/start_cheat_noncefor contractsstop_cheat_nonce_global- cancels thestart_cheat_nonce_global
Transaction Resource Bounds
cheat_resource_bounds- changes the transaction resource bounds for contracts, for a number of callsstart_cheat_resource_bounds_global- changes the transaction resource bounds for all contractsstart_cheat_resource_bounds- changes the transaction resource bounds for contractsstop_cheat_resource_bounds- cancels thecheat_resource_bounds/start_cheat_resource_boundsfor contractsstop_cheat_resource_bounds_global- cancels thestart_cheat_resource_bounds_global
Transaction Tip
cheat_tip- changes the transaction tip for contracts, for a number of callsstart_cheat_tip_global- changes the transaction tip for all contractsstart_cheat_tip- changes the transaction tip for contractsstop_cheat_tip- cancels thecheat_tip/start_cheat_tipfor contractsstop_cheat_tip_global- cancels thestart_cheat_tip_global
Transaction Paymaster Data
cheat_paymaster_data- changes the transaction paymaster data for contracts, for a number of callsstart_cheat_paymaster_data_global- changes the transaction paymaster data for all contractsstart_cheat_paymaster_data- changes the transaction paymaster data for contractsstop_cheat_paymaster_data- cancels thecheat_paymaster_data/start_cheat_paymaster_datafor contractsstop_cheat_paymaster_data_global- cancels thestart_cheat_paymaster_data_global
Transaction Nonce Data Availability Mode
cheat_nonce_data_availability_mode- changes the transaction nonce data availability mode for contracts, for a number of callsstart_cheat_nonce_data_availability_mode_global- changes the transaction nonce data availability mode for all contractsstart_cheat_nonce_data_availability_mode- changes the transaction nonce data availability mode for contractsstop_cheat_nonce_data_availability_mode- cancels thecheat_nonce_data_availability_mode/start_cheat_nonce_data_availability_modefor contractsstop_cheat_nonce_data_availability_mode_global- cancels thestart_cheat_nonce_data_availability_mode_global
Transaction Fee Data Availability Mode
cheat_fee_data_availability_mode- changes the transaction fee data availability mode for contracts, for a number of callsstart_cheat_fee_data_availability_mode_global- changes the transaction fee data availability mode for all contractsstart_cheat_fee_data_availability_mode- changes the transaction fee data availability mode for contractsstop_cheat_fee_data_availability_mode- cancels thecheat_fee_data_availability_mode/start_cheat_fee_data_availability_modefor contractsstop_cheat_fee_data_availability_mode_global- cancels thestart_cheat_fee_data_availability_mode_global
Transaction Account Deployment
cheat_account_deployment_data- changes the transaction account deployment data for contracts, for a number of callsstart_cheat_account_deployment_data_global- changes the transaction account deployment data for all contractsstart_cheat_account_deployment_data- changes the transaction account deployment data for contractsstop_cheat_account_deployment_data- cancels thecheat_account_deployment_data/start_cheat_account_deployment_datafor contractsstop_cheat_account_deployment_data_global- cancels thestart_cheat_account_deployment_data_global
Transaction Proof Facts
cheat_proof_facts- changes the transaction proof facts for contracts, for a number of callsstart_cheat_proof_facts_global- changes the transaction proof facts for all contractsstart_cheat_proof_facts- changes the transaction proof facts for contractsstop_cheat_proof_facts- cancels thecheat_proof_facts/start_cheat_proof_factsfor contractsstop_cheat_proof_facts_global- cancels thestart_cheat_proof_facts_global
Account Contract Address
cheat_account_contract_address- changes the address of an account which the transaction originates from, for the given target and spanstart_cheat_account_contract_address_global- changes the address of an account which the transaction originates from, for all targetsstart_cheat_account_contract_address- changes the address of an account which the transaction originates from, for the given targetstop_cheat_account_contract_address- cancels thecheat_account_deployment_data/start_cheat_account_deployment_datafor the given targetstop_cheat_account_contract_address_global- cancels thestart_cheat_account_contract_address_global
ℹ️ Info To use cheatcodes you need to add
snforge_stdpackage as a development dependency in yourScarb.tomlusing the appropriate version.[dev-dependencies] snforge_std = "0.62.1"
Cheating Globally
Cheatcodes which have _global suffix allow to change specific properties in blockchain state for all targets and for indefinite time span. Therefore, you don't pass the target address, nor the span.
See the Cheating Addresses Globally example.
CheatSpan
enum CheatSpan {
Indefinite: (),
TargetCalls: NonZero<usize>
}CheatSpan is an enum used to specify for how long the target should be cheated for.
Indefiniteapplies the cheatcode indefinitely, until the cheat is canceled manually (e.g. usingstop_cheat_block_timestamp).TargetCallsapplies the cheatcode for a specified number of calls to the target, after which the cheat is canceled (or until the cheat is canceled manually).
caller_address
Cheatcodes modifying caller_address:
cheat_caller_address
fn cheat_caller_address(target: ContractAddress, caller_address: ContractAddress, span: CheatSpan)
Changes the caller address for the given target and span.
start_cheat_caller_address_global
fn start_cheat_caller_address_global(caller_address: ContractAddress)
Changes the caller address for all targets.
start_cheat_caller_address
fn start_cheat_caller_address(target: ContractAddress, caller_address: ContractAddress)
Changes the caller address for the given target.
stop_cheat_caller_address
fn stop_cheat_caller_address(target: ContractAddress)
Cancels the cheat_caller_address / start_cheat_caller_address for the given target.
stop_cheat_caller_address_global
fn stop_cheat_caller_address_global()
Cancels the start_cheat_caller_address_global.
block_number
Cheatcodes modifying block_number:
cheat_block_number
fn cheat_block_number(target: ContractAddress, block_number: u64, span: CheatSpan)
Changes the block number for the given target and span.
start_cheat_block_number_global
fn start_cheat_block_number_global(block_number: u64)
Changes the block number for all targets.
start_cheat_block_number
fn start_cheat_block_number(target: ContractAddress, block_number: u64)
Changes the block number for the given target.
stop_cheat_block_number
fn stop_cheat_block_number(target: ContractAddress)
Cancels the cheat_block_number / start_cheat_block_number for the given target.
stop_cheat_block_number_global
fn stop_cheat_block_number_global()
Cancels the start_cheat_block_number_global.
block_timestamp
Cheatcodes modifying block_timestamp:
cheat_block_timestamp
fn cheat_block_timestamp(target: ContractAddress, block_timestamp: u64, span: CheatSpan)
Changes the block timestamp for the given target and span.
start_cheat_block_timestamp_global
fn start_cheat_block_timestamp_global(block_timestamp: u64)
Changes the block timestamp for all targets.
start_cheat_block_timestamp
fn start_cheat_block_timestamp(target: ContractAddress, block_timestamp: u64)
Changes the block timestamp for the given target.
stop_cheat_block_timestamp
fn stop_cheat_block_timestamp(target: ContractAddress)
Cancels the cheat_block_timestamp / start_cheat_block_timestamp for the given target.
stop_cheat_block_timestamp_global
fn stop_cheat_block_timestamp_global()
Cancels the start_cheat_block_timestamp_global.
block_hash
Cheatcodes modifying get_block_hash_syscall output:
cheat_block_hash
fn cheat_block_hash(contract_address: ContractAddress, block_number: u64, block_hash: felt252, span: CheatSpan)
Changes the block hash for the given block number and contract address.
start_cheat_block_hash_global
fn start_cheat_block_hash_global(block_number: u64, block_hash: felt252)
Globally modifies the block hash for a specified block number until explicitly stopped.
stop_cheat_block_hash_global
fn stop_cheat_block_hash_global(block_number: u64)
Stops a global block hash modification.
start_cheat_block_hash
fn start_cheat_block_hash(contract_address: ContractAddress, block_number: u64, block_hash: felt252)
Modifies the block hash for a given block number and contract until the cheat is explicitly stopped.
stop_cheat_block_hash
fn stop_cheat_block_hash(contract_address: ContractAddress, block_number: u64)
Stops an active block hash modification for a specific contract.
sequencer_address
Cheatcodes modifying sequencer_address:
cheat_sequencer_address
fn cheat_sequencer_address(target: ContractAddress, sequencer_address: ContractAddress, span: CheatSpan)
Changes the sequencer address for the given target and span.
start_cheat_sequencer_address_global
fn start_cheat_sequencer_address_global(sequencer_address: ContractAddress)
Changes the sequencer address for all targets.
start_cheat_sequencer_address
fn start_cheat_sequencer_address(target: ContractAddress, sequencer_address: ContractAddress)
Changes the sequencer address for the given target.
stop_cheat_sequencer_address
fn stop_cheat_sequencer_address(target: ContractAddress)
Cancels the cheat_sequencer_address / start_cheat_sequencer_address for the given target.
stop_cheat_sequencer_address_global
fn stop_cheat_sequencer_address_global()
Cancels the start_cheat_sequencer_address_global.
Transaction version
Cheatcodes modifying transaction version:
cheat_transaction_version
fn cheat_transaction_version(target: ContractAddress, version: felt252, span: CheatSpan)
Changes the transaction version for the given target and span.
start_cheat_transaction_version_global
fn start_cheat_transaction_version_global(version: felt252)
Changes the transaction version for all targets.
start_cheat_transaction_version
fn start_cheat_transaction_version(target: ContractAddress, version: felt252)
Changes the transaction version for the given target.
stop_cheat_transaction_version
fn stop_cheat_transaction_version(target: ContractAddress)
Cancels the cheat_transaction_version / start_cheat_transaction_version for the given target.
stop_cheat_transaction_version_global
fn stop_cheat_transaction_version_global()
Cancels the start_cheat_transaction_version_global.
account_contract_address
Cheatcodes modifying account_contract_address:
cheat_account_contract_address
fn cheat_account_contract_address(target: ContractAddress, account_contract_address: ContractAddress, span: CheatSpan)
Changes the address of an account which the transaction originates from, for the given target and span.
start_cheat_account_contract_address_global
fn start_cheat_account_contract_address_global(account_contract_address: ContractAddress)
Changes the address of an account which the transaction originates from, for all targets.
start_cheat_account_contract_address
fn start_cheat_account_contract_address(target: ContractAddress, account_contract_address: ContractAddress)
Changes the address of an account which the transaction originates from, for the given target.
stop_cheat_account_contract_address
fn stop_cheat_account_contract_address(target: ContractAddress)
Cancels the cheat_account_contract_address / start_cheat_account_contract_address for the given target.
stop_cheat_account_contract_address_global
fn stop_cheat_account_contract_address_global()
Cancels the start_cheat_account_contract_address_global.
max_fee
Cheatcodes modifying max_fee:
cheat_max_fee
fn cheat_max_fee(target: ContractAddress, max_fee: u128, span: CheatSpan)
Changes the transaction max fee for the given target and span.
start_cheat_max_fee_global
fn start_cheat_max_fee_global(max_fee: u128)
Changes the transaction max fee for all targets.
start_cheat_max_fee
fn start_cheat_max_fee(target: ContractAddress, max_fee: u128)
Changes the transaction max fee for the given target.
stop_cheat_max_fee
fn stop_cheat_max_fee(target: ContractAddress)
Cancels the cheat_max_fee / start_cheat_max_fee for the given target.
stop_cheat_max_fee_global
fn stop_cheat_max_fee_global()
Cancels the start_cheat_max_fee_global.
signature
Cheatcodes modifying signature:
cheat_signature
fn cheat_signature(target: ContractAddress, signature: Span<felt252>, span: CheatSpan)
Changes the transaction signature for the given target and span.
start_cheat_signature_global
fn start_cheat_signature_global(signature: Span<felt252>)
Changes the transaction signature for all targets.
start_cheat_signature
fn start_cheat_signature(target: ContractAddress, signature: Span<felt252>)
Changes the transaction signature for the given target.
stop_cheat_signature
fn stop_cheat_signature(target: ContractAddress)
Cancels the cheat_signature / start_cheat_signature for the given target.
stop_cheat_signature_global
fn stop_cheat_signature_global()
Cancels the start_cheat_signature_global.
transaction_hash
Cheatcodes modifying transaction_hash:
cheat_transaction_hash
fn cheat_transaction_hash(target: ContractAddress, transaction_hash: felt252, span: CheatSpan)
Changes the transaction hash for the given target and span.
start_cheat_transaction_hash_global
fn start_cheat_transaction_hash_global(transaction_hash: felt252)
Changes the transaction hash for all targets.
start_cheat_transaction_hash
fn start_cheat_transaction_hash(target: ContractAddress, transaction_hash: felt252)
Changes the transaction hash for the given target.
stop_cheat_transaction_hash
fn stop_cheat_transaction_hash(target: ContractAddress)
Cancels the cheat_transaction_hash / start_cheat_transaction_hash for the given target.
stop_cheat_transaction_hash_global
fn stop_cheat_transaction_hash_global()
Cancels the start_cheat_transaction_hash_global.
chain_id
Cheatcodes modifying chain_id:
cheat_chain_id
fn cheat_chain_id(target: ContractAddress, chain_id: felt252, span: CheatSpan)
Changes the transaction chain_id for the given target and span.
start_cheat_chain_id_global
fn start_cheat_chain_id_global(chain_id: felt252)
Changes the transaction chain_id for all targets.
start_cheat_chain_id
fn start_cheat_chain_id(target: ContractAddress, chain_id: felt252)
Changes the transaction chain_id for the given target.
stop_cheat_chain_id
fn stop_cheat_chain_id(target: ContractAddress)
Cancels the cheat_chain_id / start_cheat_chain_id for the given target.
stop_cheat_chain_id_global
fn stop_cheat_chain_id_global()
Cancels the start_cheat_chain_id_global.
nonce
Cheatcodes modifying nonce:
cheat_nonce
fn cheat_nonce(target: ContractAddress, nonce: felt252, span: CheatSpan)
Changes the transaction nonce for the given target and span.
start_cheat_nonce_global
fn start_cheat_nonce_global(nonce: felt252)
Changes the transaction nonce for all targets.
start_cheat_nonce
fn start_cheat_nonce(target: ContractAddress, nonce: felt252)
Changes the transaction nonce for the given target.
stop_cheat_nonce
fn stop_cheat_nonce(target: ContractAddress)
Cancels the cheat_nonce / start_cheat_nonce for the given target.
stop_cheat_nonce_global
fn stop_cheat_nonce_global()
Cancels the start_cheat_nonce_global.
resource_bounds
Cheatcodes modifying resource_bounds:
cheat_resource_bounds
fn cheat_resource_bounds(target: ContractAddress, resource_bounds: Span<ResourcesBounds>, span: CheatSpan)
Changes the transaction resource bounds for the given target and span.
start_cheat_resource_bounds_global
fn start_cheat_resource_bounds_global(resource_bounds: Span<ResourcesBounds>)
Changes the transaction resource bounds for all targets.
start_cheat_resource_bounds
fn start_cheat_resource_bounds(target: ContractAddress, resource_bounds: Span<ResourcesBounds>)
Changes the transaction resource bounds for the given target.
stop_cheat_resource_bounds
fn stop_cheat_resource_bounds(target: ContractAddress)
Cancels the cheat_resource_bounds / start_cheat_resource_bounds for the given target.
stop_cheat_resource_bounds_global
fn stop_cheat_resource_bounds_global()
Cancels the start_cheat_resource_bounds_global.
tip
Cheatcodes modifying tip:
cheat_tip
fn cheat_tip(target: ContractAddress, tip: u128, span: CheatSpan)
Changes the transaction tip for the given target and span.
start_cheat_tip_global
fn start_cheat_tip_global(tip: u128)
Changes the transaction tip for all targets.
start_cheat_tip
fn start_cheat_tip(target: ContractAddress, tip: u128)
Changes the transaction tip for the given target.
stop_cheat_tip
fn stop_cheat_tip(target: ContractAddress)
Cancels the cheat_tip / start_cheat_tip for the given target.
stop_cheat_tip_global
fn stop_cheat_tip_global()
Cancels the start_cheat_tip_global.
paymaster_data
Cheatcodes modifying paymaster_data:
cheat_paymaster_data
fn cheat_paymaster_data(target: ContractAddress, paymaster_data: Span<felt252>, span: CheatSpan)
Changes the transaction paymaster data for the given target and span.
start_cheat_paymaster_data_global
fn start_cheat_paymaster_data_global(paymaster_data: Span<felt252>)
Changes the transaction paymaster data for all targets.
start_cheat_paymaster_data
fn start_cheat_paymaster_data(target: ContractAddress, paymaster_data: Span<felt252>)
Changes the transaction paymaster data for the given target.
stop_cheat_paymaster_data
fn stop_cheat_paymaster_data(target: ContractAddress)
Cancels the cheat_paymaster_data / start_cheat_paymaster_data for the given target.
stop_cheat_paymaster_data_global
fn stop_cheat_paymaster_data_global()
Cancels the start_cheat_paymaster_data_global.
nonce_data_availability_mode
Cheatcodes modifying nonce_data_availability_mode:
cheat_nonce_data_availability_mode
fn cheat_nonce_data_availability_mode(target: ContractAddress, nonce_data_availability_mode: u32, span: CheatSpan)
Changes the transaction nonce data availability mode for the given target and span.
start_cheat_nonce_data_availability_mode_global
fn start_cheat_nonce_data_availability_mode_global(nonce_data_availability_mode: u32)
Changes the transaction nonce data availability mode for all targets.
start_cheat_nonce_data_availability_mode
fn start_cheat_nonce_data_availability_mode(target: ContractAddress, nonce_data_availability_mode: u32)
Changes the transaction nonce data availability mode for the given target.
stop_cheat_nonce_data_availability_mode
fn stop_cheat_nonce_data_availability_mode(target: ContractAddress)
Cancels the cheat_nonce_data_availability_mode / start_cheat_nonce_data_availability_mode for the given target.
stop_cheat_nonce_data_availability_mode_global
fn stop_cheat_nonce_data_availability_mode_global()
Cancels the start_cheat_nonce_data_availability_mode_global.
fee_data_availability_mode
Cheatcodes modifying fee_data_availability_mode:
cheat_fee_data_availability_mode
fn cheat_fee_data_availability_mode(target: ContractAddress, fee_data_availability_mode: u32, span: CheatSpan)
Changes the transaction fee data availability mode for the given target and span.
start_cheat_fee_data_availability_mode_global
fn start_cheat_fee_data_availability_mode_global(fee_data_availability_mode: u32)
Changes the transaction fee data availability mode for all targets.
start_cheat_fee_data_availability_mode
fn start_cheat_fee_data_availability_mode(target: ContractAddress, fee_data_availability_mode: u32)
Changes the transaction fee data availability mode for the given target.
stop_cheat_fee_data_availability_mode
fn stop_cheat_fee_data_availability_mode(target: ContractAddress)
Cancels the cheat_fee_data_availability_mode / start_cheat_fee_data_availability_mode for the given target.
stop_cheat_fee_data_availability_mode_global
fn stop_cheat_fee_data_availability_mode_global()
Cancels the start_cheat_fee_data_availability_mode_global.
account_deployment_data
Cheatcodes modifying account_deployment_data:
cheat_account_deployment_data
fn cheat_account_deployment_data(target: ContractAddress, account_deployment_data: Span<felt252>, span: CheatSpan)
Changes the transaction account deployment data for the given target and span.
start_cheat_account_deployment_data_global
fn start_cheat_account_deployment_data_global(account_deployment_data: Span<felt252>)
Changes the transaction account deployment data for all targets.
start_cheat_account_deployment_data
fn start_cheat_account_deployment_data(target: ContractAddress, account_deployment_data: Span<felt252>)
Changes the transaction account deployment data for the given target.
stop_cheat_account_deployment_data
fn stop_cheat_account_deployment_data(target: ContractAddress)
Cancels the cheat_account_deployment_data / start_cheat_account_deployment_data for the given target.
stop_cheat_account_deployment_data_global
fn stop_cheat_account_deployment_data_global()
Cancels the start_cheat_account_deployment_data_global.
proof_facts
Cheatcodes modifying proof_facts:
cheat_proof_facts
fn cheat_proof_facts(contract_address: ContractAddress, proof_facts: Span<felt252>, span: CheatSpan)
Changes the transaction proof facts for the given target and span.
start_cheat_proof_facts_global
fn start_cheat_proof_facts_global(proof_facts: Span<felt252>)
Changes the transaction proof facts for all targets.
start_cheat_proof_facts
fn start_cheat_proof_facts(contract_address: ContractAddress, proof_facts: Span<felt252>)
Changes the transaction proof facts for the given target.
stop_cheat_proof_facts
fn stop_cheat_proof_facts(contract_address: ContractAddress)
Cancels the cheat_proof_facts / start_cheat_proof_facts for the given target.
stop_cheat_proof_facts_global
fn stop_cheat_proof_facts_global()
Cancels the start_cheat_proof_facts_global.
mock_call
Cheatcodes mocking contract entry point calls:
mock_call
fn mock_call<T, impl TSerde: serde::Serde<T>, impl TDestruct: Destruct<T>>( contract_address: ContractAddress, function_selector: felt252, ret_data: T, n_times: u32 )
Mocks contract call to a function_selector of a contract at the given address, for n_times first calls that are made to the contract.
A call to function function_selector will return data provided in ret_data argument.
An address with no contract can be mocked as well.
An entrypoint that is not present on the deployed contract is also possible to mock.
Note that the function is not meant for mocking internal calls - it works only for contract entry points.
start_mock_call
fn start_mock_call<T, impl TSerde: serde::Serde<T>, impl TDestruct: Destruct<T>>( contract_address: ContractAddress, function_selector: felt252, ret_data: T )
Mocks contract call to a function_selector of a contract at the given address, indefinitely.
See mock_call for comprehensive definition of how it can be used.
stop_mock_call
fn stop_mock_call(contract_address: ContractAddress, function_selector: felt252)
Cancels the mock_call / start_mock_call for the function function_selector of a contract at the given address.
Example
Let's consider a contract which simulates a shopping cart. It has a function get_products that returns a list of products in the cart.
#[derive(Copy, Debug, Drop, Serde, starknet::Store)]
pub struct Product {
pub name: felt252,
pub price: u64,
pub quantity: u64,
}
#[starknet::interface]
pub trait IShoppingCart<TContractState> {
fn get_products(self: @TContractState) -> Array<Product>;
}
#[starknet::contract]
pub mod ShoppingCart {
use starknet::storage::{MutableVecTrait, StoragePointerReadAccess, Vec, VecTrait};
use super::Product;
#[storage]
struct Storage {
products: Vec<Product>,
}
#[constructor]
fn constructor(ref self: ContractState, initial_products: Array<Product>) {
for product in initial_products {
self.products.push(product);
}
}
#[abi(embed_v0)]
impl ShoppingCartImpl of super::IShoppingCart<ContractState> {
fn get_products(self: @ContractState) -> Array<Product> {
let mut products = array![];
for i in 0..self.products.len() {
products.append(self.products.at(i).read());
}
products
}
}
}Test code:
use cheatcodes_reference::mock_call_example::{
IShoppingCartDispatcher, IShoppingCartDispatcherTrait, Product,
};
use snforge_std::{ContractClassTrait, DeclareResultTrait, declare, start_mock_call, stop_mock_call};
#[test]
fn test_mock_call() {
// 1. Create calldata for the contract deployment
let mut calldata = ArrayTrait::new();
// 2. Serialize initial products (in this case an empty array)
let initial_products: Array<Product> = array![];
initial_products.serialize(ref calldata);
// 3. Declare and deploy the ShoppingCart contract
let contract = declare("ShoppingCart").unwrap().contract_class();
let (contract_address, _) = contract.deploy(@calldata).unwrap();
// 4. Create an instance of the dispatcher
let dispatcher = IShoppingCartDispatcher { contract_address };
// 5. Mock the returned value of the `get_products` function
let mock_products = array![
Product { name: 'Banana', price: 2, quantity: 5 },
Product { name: 'Apple', price: 3, quantity: 10 },
];
// 6. Start the mock call with the mocked products
start_mock_call(contract_address, selector!("get_products"), mock_products);
// 7. Call the `get_products` function through the dispatcher
let retrieved_products: Array<Product> = dispatcher.get_products();
// 8. Verify the retrieved products
let product_0 = retrieved_products.at(0);
assert(*product_0.name == 'Banana', 'product_0.name');
assert(*product_0.price == 2, 'product_0.price');
assert(*product_0.quantity == 5, 'product_0.quantity');
let product_1 = retrieved_products.at(1);
assert(*product_1.name == 'Apple', 'product_1.name');
assert(*product_1.price == 3, 'product_1.price');
assert(*product_1.quantity == 10, 'product_1.quantity');
// 9. Stop the mock call
stop_mock_call(contract_address, selector!("get_products"));
}Let's run the test:
$ snforge test test_mock_call
Output:
Collected 1 test(s) from cheatcodes_reference package
Running 0 test(s) from src/
Running 1 test(s) from tests/
[PASS] cheatcodes_reference_integrationtest::test_mock_call::test_mock_call ([..])
Tests: 1 passed, 0 failed, 0 ignored, [..] filtered out
get_class_hash
fn get_class_hash(contract_address: ContractAddress) -> ClassHash
Returns a class hash of a contract at the specified address.
💡 Tip
This cheatcode can be used to test if your contract upgrade procedure is correct
replace_bytecode
fn replace_bytecode(contract: ContractAddress, new_class: ClassHash) -> Result<(), ReplaceBytecodeError>
Replaces class for given contract address.
The new_class hash has to be declared in order for the replacement class to execute the code when interacting with the contract.
Returns Result::Ok if the replacement succeeded, and a ReplaceBytecodeError with appropriate error type otherwise
ReplaceBytecodeError
An enum with appropriate type of replacement failure
pub enum ReplaceBytecodeError {
/// Means that the contract does not exist, and thus bytecode cannot be replaced
ContractNotDeployed,
/// Means that the given class for replacement is not declared
UndeclaredClassHash,
}l1_handler
fn new(target: ContractAddress, selector: felt252) -> L1Handler
Returns an L1Handler structure which can be used to mock sending messages from L1 for the contract to handle in function marked with #[l1_handler].
#[derive(Drop, Clone)]
pub struct L1Handler {
target: ContractAddress,
selector: felt252,
}
fn execute(self: L1Handler, from_address: felt252, payload: Span<felt252>) -> SyscallResult<()>
Mocks an L1 -> L2 message from Ethereum handled by the given L1 handler function.
Example
Let's consider a very simple contract, which receives an L1 message with an array of numbers them:
#[starknet::contract]
mod L1HandlerExample {
#[storage]
struct Storage {}
#[l1_handler]
fn handle_l1_message(ref self: ContractState, from_address: felt252, numbers: Array<felt252>) {
assert!(from_address == 0x123456789012345678901234567890123456789, "Unexpected address");
assert!(numbers.len() == 3, "Expected exactly 3 numbers");
}
}Test code:
use snforge_std::cheatcodes::contract_class::DeclareResultTrait;
use snforge_std::{ContractClassTrait, L1HandlerTrait, declare};
#[test]
fn test_l1_handler() {
// 1. Declare and deploy the Starknet contract
let example_contract = declare("L1HandlerExample").unwrap().contract_class();
let (contract_address, _) = example_contract.deploy(@array![]).unwrap();
// 2. Define the L1 handler to be called
let l1_handler = L1HandlerTrait::new(contract_address, selector!("handle_l1_message"));
// 3. Define Ethereum address of the message sender
let eth_address = 0x123456789012345678901234567890123456789;
// 4. The payload to be sent to the L1 handler
let payload = array![1, 2, 3];
let mut serialized_payload = array![];
payload.serialize(ref serialized_payload);
// 5. Execute the L1 handler with the Ethereum address and payload
// This will trigger the `handle_l1_message` function of the contract
l1_handler.execute(eth_address, serialized_payload.span()).unwrap();
}Let's run the test:
$ snforge test test_l1_handler
Output:
Collected 1 test(s) from cheatcodes_reference package
Running 1 test(s) from tests/
[PASS] cheatcodes_reference_integrationtest::test_l1_handler::test_l1_handler ([..])
Running 0 test(s) from src/
Tests: 1 passed, 0 failed, 0 ignored, [..] filtered out
spy_events
fn spy_events() -> EventSpy
Creates EventSpy instance which spies on events emitted after its creation.
pub struct EventSpy {
...
}An event spy structure.
pub struct Events {
pub events: Array<(ContractAddress, Event)>,
}A wrapper structure on an array of events to handle event filtering.
pub struct Event {
pub keys: Array<felt252>,
pub data: Array<felt252>,
}Raw event format (as seen via the RPC-API), can be used for asserting the emitted events.
Implemented traits
EventSpyTrait
pub trait EventSpyTrait {
fn get_events(ref self: EventSpy) -> Events;
}Gets all events since the creation of the given EventSpy.
EventSpyAssertionsTrait
pub trait EventSpyAssertionsTrait<T, +starknet::Event<T>, +Drop<T>> {
fn assert_emitted(ref self: EventSpy, events: @Array<(ContractAddress, T)>);
fn assert_not_emitted(ref self: EventSpy, events: @Array<(ContractAddress, T)>);
}Allows to assert the expected events emission (or lack thereof), in the scope of the EventSpy structure.
EventsFilterTrait
pub trait EventsFilterTrait {
fn emitted_by(self: @Events, contract_address: ContractAddress) -> Events;
}Filters events emitted by a given ContractAddress.
spy_messages_to_l1
fn spy_messages_to_l1() -> MessageToL1Spy
Creates MessageToL1Spy instance that spies on all messages sent to L1 after its creation.
struct MessageToL1Spy {
// ..
}Message spy structure allowing to get messages emitted only after its creation.
pub struct MessagesToL1 {
pub messages: Array<(ContractAddress, MessageToL1)>,
}A wrapper structure on an array of messages to handle filtering smoothly.
messages is an array of (l2_sender_address, message) tuples.
pub struct MessageToL1 {
/// An ethereum address where the message is destined to go
pub to_address: EthAddress,
/// Actual payload which will be delivered to L1 contract
pub payload: Array<felt252>,
}Raw message to L1 format (as seen via the RPC-API), can be used for asserting the sent messages.
Implemented traits
MessageToL1SpyTrait
trait MessageToL1SpyTrait {
/// Gets all messages given [`MessageToL1Spy`] spies for.
fn get_messages(ref self: MessageToL1Spy) -> MessagesToL1;
}Gets all messages since the creation of the given MessageToL1Spy.
MessageToL1SpyAssertionsTrait
trait MessageToL1SpyAssertionsTrait {
fn assert_sent(ref self: MessageToL1Spy, messages: @Array<(ContractAddress, MessageToL1)>);
fn assert_not_sent(ref self: MessageToL1Spy, messages: @Array<(ContractAddress, MessageToL1)>);
}Allows to assert the expected sent messages (or lack thereof), in the scope of MessageToL1Spy structure.
MessageToL1FilterTrait
trait MessageToL1FilterTrait {
/// Filter messages emitted by a sender of a given [`ContractAddress`]
fn sent_by(self: @MessagesToL1, contract_address: ContractAddress) -> MessagesToL1;
/// Filter messages emitted by a receiver of a given ethereum address
fn sent_to(self: @MessagesToL1, to_address: EthAddress) -> MessagesToL1;
}Filters messages emitted by a given ContractAddress, or sent to given EthAddress.
store
fn store(target: ContractAddress, storage_address: felt252, serialized_value: Span<felt252>)
Stores felts from serialized_value in target contract's storage, starting at storage_address.
load
fn load(target: ContractAddress, storage_address: felt252, size: felt252) -> Array<felt252>
Loads size felts from target contract's storage into an Array, starting at storage_address.
generate_random_felt
fn generate_random_felt() -> felt252
Generates a (pseudo) random felt252 value.
generate_arg
fn generate_arg<T, +Serde<T>, +Drop<T>, +Into<T, felt252>>(min_value: T, max_value: T) -> T
Returns a random number from a range [min_value, max_value].
It is used in the context of fuzz testing to implement Fuzzable trait.
set_balance
fn set_balance(target: ContractAddress, new_balance: u256, token: Token)
Sets balance of token for target contract to new_balance.
See Token docs on how to define and use tokens.
Token
pub enum Token {
STRK,
ETH,
Custom: CustomToken,
}
pub struct CustomToken {
pub contract_address: ContractAddress,
pub balances_variable_selector: felt252,
}Token is an enum used to specify ERC20 token for which the balance should be cheated. Possible variants are:
STRKis the default STRK token (predeployed in every test case).ETHis the default ETH token (predeployed in every test case).Customallows to specify a custom token by providing its contract address and balances variable selector.
pub impl TokenImpl of TokenTrait {
fn contract_address(self: Token) -> ContractAddress {
match self {
Token::STRK => STRK_CONTRACT_ADDRESS.try_into().unwrap(),
Token::ETH => ETH_CONTRACT_ADDRESS.try_into().unwrap(),
Token::Custom(CustomToken { contract_address, .. }) => contract_address,
}
}
fn balances_variable_selector(self: Token) -> felt252 {
match self {
Token::STRK | TOKEN::ETH => selector!("ERC20_balances"),
Token::Custom(CustomToken { balances_variable_selector,
.., }) => balances_variable_selector,
}
}
}Balances variable selector
balances_variable_selector is simply a selector of the storage variable, which holds the mapping of balances -> amounts. The name of variable isn't specified by ERC20 standard (it can have any name), hence we allow to specify it. Let's have a part of example ERC20 contract storage:
...
#[storage]
struct Storage {
...
balances: Map<ContractAddress, u256>,
...
}
...In the above example, balances_variable_selector would have following value:
let token = Token::Custom(
CustomToken {
contract_address: ...,
balances_variable_selector: selector!("balances"),
},
);interact_with_state
⚠️ Warning
The feature might not work correctly if you're using Cairo version earlier than
2.11, because closures weren’t fully supported before it.
pub fn interact_with_state<F, +Drop<F>, impl func: core::ops::FnOnce<F, ()>, +Drop<func::Output>>(contract_address: ContractAddress, f: F,) -> func::Output
Allows to use contract_state_for_testing for a deployed contract, enabling interaction with its state in tests.
To use this cheatcode, it is necessary to take care of the following:
- The contract implementation must be visible in the test context
- Storage struct along with the variables that you want to access must be public
- If testing internal contract functions, the respective trait or specific function must be imported
- Storage related traits must be imported, such as
StoragePointerReadAccessandStoragePointerWriteAccess
📝 Note To use
interact_with_statewith a forked contract, it is required to have the contract's implementation.
Usage
To use this cheatcode, follow these steps:
- Provide the contract address as the first argument
- Define a closure that modifies the contract's state and pass it as the second argument
- Inside the closure, define a mutable variable for the contract's state using
contract_state_for_testing - Use this state variable to interact with the contract state
Here’s a minimal example that modifies a single storage variable in a contract:
interact_with_state(contract_address, || {
let mut state = MyContract::contract_state_for_testing();
state.balance.write(1000);
});
For more extensive example usage, please refer to the testing contract internals documentation.
Library Reference
ℹ️ Info Full documentation for the
snforgelibrary can be found here.
declare- declares a contract and returns aContractClasswhich can be interacted with laterget_call_trace- gets current test call trace (with contracts interactions included)fs- module containing functions for interacting with the filesystemenv- module containing functions for interacting with the system environmentsignature- module containing struct and trait for creatingecdsasignatures
ℹ️ Info To use cheatcodes you need to add
snforge_stdpackage as a development dependency in yourScarb.tomlusing the appropriate version.[dev-dependencies] snforge_std = "0.62.1"
byte_array Module
Module containing utilities for manipulating ByteArrays.
Functions
fn try_deserialize_bytearray_error(x: Span<felt252>) -> Result<ByteArray, ByteArray>
This function is meant to transform a serialized output from a contract call into a ByteArray.
Returns the parsed ByteArray, or an Err with reason, if the parsing failed.
declare
#[derive(Drop, Serde, Clone)]
pub enum DeclareResult {
Success: ContractClass,
AlreadyDeclared: ContractClass,
}
pub trait DeclareResultTrait {
/// Gets inner `ContractClass`
/// `self` - an instance of the struct `DeclareResult` which is obtained by calling `declare`
// Returns the `@ContractClass`
fn contract_class(self: @DeclareResult) -> @ContractClass;
}
fn declare(contract: ByteArray) -> Result<DeclareResult, Array<felt252>>Declares a contract for later deployment.
The contract argument accepts either a contract name (e.g. MyContract),
an absolute module tree path (e.g. my_package::module::MyContract) or
a partial module tree path (e.g. module::MyContract).
Use the full module path to disambiguate when multiple contracts share the same name.
Returns the DeclareResult that encapsulated possible outcomes in the enum:
Success: Contains the successfully declaredContractClass.AlreadyDeclared: ContainsContractClassand signals that the contract has already been declared.
See docs of ContractClass for more info about the resulting struct.
ContractClass
A struct which enables interaction with given class hash.
It can be obtained by using declare, or created with an arbitrary ClassHash.
#[derive(Drop, Serde, Copy)]
pub struct ContractClass {
pub class_hash: ClassHash,
}Implemented traits
ContractClassTrait
pub trait ContractClassTrait {
fn precalculate_address(
self: @ContractClass, constructor_calldata: @Array::<felt252>
) -> ContractAddress;
fn deploy(
self: @ContractClass, constructor_calldata: @Array::<felt252>
) -> SyscallResult<(ContractAddress, Span<felt252>)>;
fn deploy_at(
self: @ContractClass,
constructor_calldata: @Array::<felt252>,
contract_address: ContractAddress
) -> SyscallResult<(ContractAddress, Span<felt252>)>;
fn new<T, +Into<T, ClassHash>>(class_hash: T) -> ContractClass;
}get_call_trace
fn get_call_trace() -> CallTrace;(For whole structure definition, please refer
to snforge-std source)
Gets current call trace of the test, up to the last call made to a contract.
The whole structure is represented as a tree of calls, in which each contract interaction is a new execution scope - thus resulting in a new nested trace.
📝 Note
The topmost-call is representing the test call, which will always be present if you're running a test.
Displaying the trace
The CallTrace structure implements a Display trait, for a pretty-print with indentations
println!("{}", get_call_trace());fs Module
Module containing functions for interacting with the filesystem.
Files parsed by different functions must adhere to file format rules
Traits
Functions
File Format Rules
Some rules have to be checked when providing a file for snforge, in order for correct parsing behavior. Different ones apply for JSON and plain text files.
Plain Text Files
- Elements have to be separated with newlines
- Elements have to be either:
- Cairo
felt252values, surrounded by'' - byte arrays, surrounded by
""
- Cairo
Example
Below is an example of valid plain text file:
1
2
'hello'
10
"world"
JSON Files
- Elements have to be either:
- Cairo
felt252values, surrounded by'' - byte arrays, surrounded by
"" - array of integers or strings fulfilling the above conditions
- Cairo
⚠️ Warning
A JSON object is an unordered data structure. To make reading JSONs deterministic, the values are read from the JSON in an order that is alphabetical in respect to JSON keys. Nested JSON values are sorted by the flattened format keys
(a.b.c).
Example
Below is an example of valid JSON file:
{
"a": 1,
"nested": {
"b": 2,
"c": 448378203247
},
"d": 10,
"e": "world"
}
File
Trait for handling file operations in Starknet Foundry.
trait FileTrait {
fn new(path: ByteArray) -> File;
}ℹ️ Info
Specific rules must be followed for snforge to correctly parse JSON and plain text files.
Read file format rules for more.
Example
File content:
'Hello Starknet!'
'Let's code in Cairo!'
"Example byte array"
Test code:
use snforge_std::fs::FileTrait;
#[test]
fn file_trait_example() {
// Create an instance of `File` to be used later
let _file = FileTrait::new("data/hello_starknet.txt");
}FileParser<T>
Trait used for parsing files in different formats, such as JSON and plain text.
trait FileParser<T, +Serde<T>> {
fn parse_txt(file: @File) -> Option<T>;
fn parse_json(file: @File) -> Option<T>;
}ℹ️ Info
Specific rules must be followed for snforge to correctly parse JSON and plain text files.
Read file format rules for more.
Example
File content:
{
"age": 30,
"job": "Software Engineer",
"location": {
"city": "New York",
"country": "USA"
},
"name": "John",
"surname": "Doe"
}
Test code:
use core::array::ArrayTrait;
use core::option::OptionTrait;
use core::serde::Serde;
use snforge_std::fs::{FileParser, FileTrait};
#[derive(Debug, Serde, Drop, PartialEq)]
struct Location {
city: ByteArray,
country: ByteArray,
}
#[derive(Debug, Serde, Drop, PartialEq)]
struct User {
age: u32,
job: ByteArray,
location: Location,
name: ByteArray,
surname: ByteArray,
}
#[test]
fn parse_json_example() {
// Create an instance of `File` to be used later
let file = FileTrait::new("data/user.json");
// Parse the JSON content from the file
let content = FileParser::<User>::parse_json(@file).expect('Failed to parse JSON');
// Serialize the content to an array for comparison
let mut output_array = ArrayTrait::new();
content.serialize(ref output_array);
println!("{:?}", content);
assert!(content.name == "John");
assert!(content.location.country == "USA");
assert!(content.age == 30);
}Let's run the test:
$ snforge test parse_json_example
Output:
Collected 1 test(s) from snforge_library_reference package
Running 1 test(s) from tests/
User { age: 30, job: "Software Engineer", location: Location { city: "New York", country: "USA" }, name: "John", surname: "Doe" }
[PASS] snforge_library_reference_integrationtest::test_fs_parse_json::parse_json_example ([..])
Running 0 test(s) from src/
Tests: 1 passed, 0 failed, 0 ignored, [..] filtered out
read_txt
Function for reading plain text files.
fn read_txt(file: @File) -> Array<felt252>;ℹ️ Info
Specific rules must be followed for snforge to correctly parse plain text files.
Read file format rules for more.
Example
File content:
'Hello Starknet!'
'Let's code in Cairo!'
"Example byte array"
Test code:
use snforge_std::fs::{FileTrait, read_txt};
#[test]
fn read_txt_example() {
// Create an instance of `File` to be used later
let file = FileTrait::new("data/hello_starknet.txt");
// Read the content of the file
let content = read_txt(@file);
let expected = array![
'Hello Starknet!',
'Let\'s code in Cairo!', // Below is serialized byte array "Example byte array"
0,
6051711116678136165665715375637410673222009, 18,
];
let mut i = 0;
// Iterate through the content and compare with expected values
while i != content.len() {
println!("0x{:x}", *content[i]);
assert(*content[i] == *expected[i], 'unexpected content');
i += 1;
};
}Let's run the test:
$ snforge test read_txt_example
Output:
Collected 1 test(s) from snforge_library_reference package
Running 1 test(s) from tests/
0x48656c6c6f20537461726b6e657421
0x4c6574277320636f646520696e20436169726f21
0x0
0x4578616d706c652062797465206172726179
0x12
[PASS] snforge_library_reference_integrationtest::test_fs_read_txt::read_txt_example ([..])
Running 0 test(s) from src/
Tests: 1 passed, 0 failed, 0 ignored, [..] filtered out
read_json
Function for reading JSON files.
fn read_json(file: @File) -> Array<felt252>;ℹ️ Info
Specific rules must be followed for snforge to correctly parse JSON files.
Read file format rules for more.
Example
File content:
{
"age": 30,
"job": "Software Engineer",
"location": {
"city": "New York",
"country": "USA"
},
"name": "John",
"surname": "Doe"
}
Test code:
use snforge_std::fs::{FileTrait, read_json};
#[test]
fn read_json_example() {
// Create an instance of `File` to be used later
let file = FileTrait::new("data/user.json");
// Read the JSON content from the file
let content = read_json(@file);
let expected_serialized_json = array![
30, 0, 28391512738467412385612170632190008583538, 17, 0, 5649052288429290091, 8, 0, 5591873,
3, 0, 1248815214, 4, 0, 4484965, 3,
];
let mut i = 0;
// Iterate through the content and compare with expected values
while i != content.len() {
println!("0x{:x}", *content[i]);
assert!(*content[i] == *expected_serialized_json[i]);
i += 1;
};
}Let's run the test:
$ snforge test read_json_example
Output:
Collected 1 test(s) from snforge_library_reference package
Running 1 test(s) from tests/
0x1e
0x0
0x536f66747761726520456e67696e656572
0x11
0x0
0x4e657720596f726b
0x8
0x0
0x555341
0x3
0x0
0x4a6f686e
0x4
0x0
0x446f65
0x3
[PASS] snforge_library_reference_integrationtest::test_fs_read_json::read_json_example ([..])
Running 0 test(s) from src/
Tests: 1 passed, 0 failed, 0 ignored, [..] filtered out
env Module
Module containing functions for interacting with the system environment.
var
fn var(name: ByteArray) -> Array<felt252>
Reads an environment variable, without parsing it.
The serialized output is correlated with the inferred input type, same as during reading from a file.
📝 Note
If you want snfoundry to treat your variable like a short string, surround it with 'single quotes'.
If you would like it to be serialized as a
ByteArray, use "double quoting". It will be then de-serializable withSerde.
signature Module
Module containing KeyPair struct and interface for creating ecdsa signatures.
signature::stark_curve- implementation ofKeyPairTraitfor the STARK curvesignature::secp256k1_curve- implementation ofKeyPairTraitfor Secp256k1 Curvesignature::secp256r1_curve- implementation ofKeyPairTraitfor Secp256r1 Curve
⚠️ Security Warning
Please note that cryptography in Starknet Foundry is still experimental and has not been audited.
Use at your own risk!
KeyPair
struct KeyPair<SK, PK> {
secret_key: SK,
public_key: PK,
}KeyPairTrait
trait KeyPairTrait<SK, PK> {
fn generate() -> KeyPair<SK, PK>;
fn from_secret_key(secret_key: SK) -> KeyPair<SK, PK>;
}SignerTrait
trait SignerTrait<T, H, U> {
fn sign(self: T, message_hash: H) -> Result<U, SignError> ;
}VerifierTrait
trait VerifierTrait<T, H, U> {
fn verify(self: T, message_hash: H, signature: U) -> bool;
}Example
use snforge_std::signature::KeyPairTrait;
use snforge_std::signature::secp256r1_curve::{Secp256r1CurveKeyPairImpl, Secp256r1CurveSignerImpl, Secp256r1CurveVerifierImpl};
use snforge_std::signature::secp256k1_curve::{Secp256k1CurveKeyPairImpl, Secp256k1CurveSignerImpl, Secp256k1CurveVerifierImpl};
use snforge_std::signature::stark_curve::{StarkCurveKeyPairImpl, StarkCurveSignerImpl, StarkCurveVerifierImpl};
use starknet::secp256r1::{Secp256r1Point, Secp256r1PointImpl};
use starknet::secp256k1::{Secp256k1Point, Secp256k1PointImpl};
use core::starknet::SyscallResultTrait;
#[test]
fn test_using_curves() {
// Secp256r1
let key_pair = KeyPairTrait::<u256, Secp256r1Point>::generate();
let (r, s): (u256, u256) = key_pair.sign(msg_hash).unwrap();
let is_valid = key_pair.verify(msg_hash, (r, s));
// Secp256k1
let key_pair = KeyPairTrait::<u256, Secp256k1Point>::generate();
let (r, s): (u256, u256) = key_pair.sign(msg_hash).unwrap();
let is_valid = key_pair.verify(msg_hash, (r, s));
// StarkCurve
let key_pair = KeyPairTrait::<felt252, felt252>::generate();
let (r, s): (felt252, felt252) = key_pair.sign(msg_hash).unwrap();
let is_valid = key_pair.verify(msg_hash, (r, s));
}fuzzable Module
Module containing Fuzzable trait needed for fuzz testing and its implementations for basic types.
Fuzzable
pub trait Fuzzable<T, +Debug<T>> {
fn blank() -> T;
fn generate() -> T;
}This trait is used by snforge to generate random data for fuzz testing.
Any type that is used as a parameter in a test function with the #[fuzzer] attribute must implement this trait.
blank()returns an empty or default value. The specific value used does not matter much, as it is only used by snforge internals and does not affect test execution. For types that implement theDefaulttrait, it is recommended to returnDefault::default().generate()function is used to return a random value of the given type. To implement this function, it is necessary to either use aFuzzableimplementation from a different type, or use the generate_arg cheatcode, which can uniformly generate a random number within a specified range.
#[derive(Fuzzable)]
For structs and enums whose fields/variants already implement Fuzzable, use the derive macro to generate the implementation automatically instead of writing it by hand:
#[derive(Debug, Drop, Fuzzable)]
struct Point {
x: u64,
y: u64,
}
#[derive(Debug, Drop, Fuzzable)]
enum Direction {
North,
South,
East,
West,
}For generic types, #[derive(Fuzzable)] automatically appends a +snforge_std::fuzzable::Fuzzable<T> and +core::fmt::Debug<T> bound for each type parameter.
The macro can be used on:
- Structs - all field types must implement
Fuzzable - Enums - the variant's type must implement
Fuzzable
It cannot be used on empty enums.
Manual Implementation Example
For custom fuzzing logic, implement the trait manually.
use core::num::traits::Bounded;
use snforge_std::fuzzable::{Fuzzable, generate_arg};
#[derive(Debug, Drop)]
struct Message {
id: u64,
text: ByteArray
}
impl FuzzableMessage of Fuzzable<Message> {
fn blank() -> Message {
Message {
// Implementation may consist of:
// Specifying a concrete value for the field
id: 0,
// Or using default value from `Default` trait
text: Default::default()
}
}
fn generate() -> Message {
Message {
// Using `generate_arg` cheatcode
id: generate_arg(0, Bounded::<u64>::MAX),
// Or calling `generate` function on a type that already implements `Fuzzable`
text: Fuzzable::<ByteArray>::generate()
}
}
}testing Module
Module containing functions useful for testing.
Functions
get_current_vm_step
Gets the current step during test execution.
fn get_current_vm_step() -> u32;Example
Test code:
use snforge_std::testing::get_current_vm_step;
#[feature("safe_dispatcher")]
fn setup() {
let mut _counter = 0_u32;
while _counter < 1_000 {
_counter += 1;
}
}
#[test]
fn test_setup_steps() {
let steps_start = get_current_vm_step();
setup();
let steps_end = get_current_vm_step();
// Assert that setup used no more than 20_000 steps
assert!(steps_end - steps_start <= 20_000);
}Let's run the test:
$ snforge test test_setup_steps
Output:
Collected 1 test(s) from testing_reference package
Running 1 test(s) from tests/
[PASS] testing_reference_integrationtest::tests::test_setup_steps ([..])
Running 0 test(s) from src/
Tests: 1 passed, 0 failed, 0 ignored, 0 filtered out
sncast CLI Reference
- common flags
- account
- alias
- declare
- declare-from
- deploy
- invoke
- call
- multicall
- script
- show-config
- config-path
- get
- ledger
- utils
- verify
- completions
sncast common flags
These flags must be specified directly after the sncast command and before the subcommand name.
--profile, -p <PROFILE_NAME>
Optional.
Used for snfoundry.toml.
Selects the [sncast.<PROFILE_NAME>] section in snfoundry.toml (local and/or global).
Defaults to default.
--scarb-profile <PROFILE_NAME>
Optional.
Used for scarb and Scarb.toml uses, mainly for building contracts.
Defaults to release.
--account, -a <ACCOUNT_NAME>
Optional.
Account name used to interact with the network, aliased in the accounts file.
Overrides account from snfoundry.toml.
If used with --keystore, should be a path to starkli account JSON file.
--accounts-file, -f <PATH_TO_ACCOUNTS_FILE>
Optional.
Path to the accounts file holding accounts information. Defaults to ~/.starknet_accounts/starknet_open_zeppelin_accounts.json.
--keystore, -k <PATH_TO_KEYSTORE_FILE>
Optional.
Path to keystore file. When specified, the --account argument must be a path to starkli account JSON file.
--json, -j
Optional.
If passed, output will be displayed in json format.
--wait, -w
Optional.
If passed, command will wait until transaction is accepted or rejected.
--wait-timeout <TIME_IN_SECONDS>
Optional.
If --wait is passed, this will set the time after which sncast times out. Defaults to 60s.
--wait-retry-interval <TIME_IN_SECONDS>
Optional.
If --wait is passed, this will set the retry interval - how often sncast should fetch tx info from the node. Defaults to 5s.
--version, -v
Prints out sncast version.
--help, -h
Prints out help.
account
Provides a set of account management commands.
It has the following subcommands:
import
Import an account to accounts file.
Account information will be saved to the file specified by --accounts-file argument,
which is ~/.starknet_accounts/starknet_open_zeppelin_accounts.json by default.
--name, -n <NAME>
Optional.
Name of the account to be imported.
--address, -a <ADDRESS>
Required.
Address of the account. It can be either:
- Felt in hex (prefixed with
0x) or decimal representation. @aliasdefined in[sncast.<profile>.aliases]insnfoundry.toml. See aliases.
--type, -t <ACCOUNT_TYPE>
Required.
Type of the account. Possible values: oz, ready, braavos.
--url, -u <RPC_URL>
Optional.
Starknet RPC node url address.
Overrides url from snfoundry.toml.
--network <NETWORK>
Optional.
Use predefined network with public provider
Possible values: mainnet, sepolia, devnet.
Overrides network from snfoundry.toml.
--class-hash, -c <CLASS_HASH>
Optional.
Class hash of the account. It can be either:
- Felt in hex (prefixed with
0x) or decimal representation. @aliasdefined in[sncast.<profile>.aliases]insnfoundry.toml. See aliases.
--private-key <PRIVATE_KEY>
Optional.
Account private key.
--ledger-path <HD_PATH>
Optional.
EIP-2645 derivation path of the Ledger key that controls this account (e.g., m//starknet'/sncast'/0'/1'/0).
When provided, the public key is read from the Ledger device instead of from --private-key.
Conflicts with: --private-key, --private-key-file, --ledger-account-id
See Ledger Hardware Wallet for details.
--ledger-account-id <ACCOUNT_ID>
Optional.
Shorthand for --ledger-path. The account ID is used to derive the path m//starknet'/sncast'/0'/<account-id>'/0.
Conflicts with: --ledger-path, --private-key, --private-key-file
See Ledger Hardware Wallet for details.
--private-key-file <PRIVATE_KEY_FILE_PATH>
Optional. If neither --private-key nor --private-key-file is passed, the user will be prompted to enter the account private key.
Path to the file holding account private key.
--salt, -s <SALT>
Optional.
Salt for the account address.
Limitation: For
ready(formerlyargent) accounts, address validation only supports accounts deployed with guardian key set to 0.
--add-profile <NAME>
Optional.
If passed, a profile with corresponding name will be added to the local snfoundry.toml.
--silent
Optional.
If passed, the command will not trigger an interactive prompt to add an account as a default
create
Prepare all prerequisites for account deployment.
Account information will be saved to the file specified by --accounts-file argument,
which is ~/.starknet_accounts/starknet_open_zeppelin_accounts.json by default.
--name, -n <ACCOUNT_NAME>
Optional.
Account name under which account information is going to be saved.
If --name is not provided, it will be generated automatically.
--url, -u <RPC_URL>
Optional.
Starknet RPC node url address.
Overrides url from snfoundry.toml.
--network <NETWORK>
Optional.
Use predefined network with a public provider
Possible values: mainnet, sepolia, devnet.
Overrides network from snfoundry.toml.
--type, -t <ACCOUNT_TYPE>
Optional. Required if --class-hash is passed.
Type of the account. Possible values: oz, ready, braavos. Defaults to oz.
Versions of the account contracts:
| Account Contract | Version | Class Hash |
|---|---|---|
oz | v1.0.0 | 0x05b4b537eaa2399e3aa99c4e2e0208ebd6c71bc1467938cd52c798c601e43564 |
ready | v0.4.0 | 0x036078334509b514626504edc9fb252328d1a240e4e948bef8d0c08dff45927f |
braavos | v1.2.0 | 0x03957f9f5a1cbfe918cedc2015c85200ca51a5f7506ecb6de98a5207b759bf8a |
--salt, -s <SALT>
Optional.
Salt for the account address. If omitted random one will be generated.
--add-profile <NAME>
Optional.
If passed, a profile with corresponding name will be added to the local snfoundry.toml.
--class-hash, -c
Optional.
Class hash of a custom openzeppelin account contract declared to the network. It can be either:
- Felt in hex (prefixed with
0x) or decimal representation. @aliasdefined in[sncast.<profile>.aliases]insnfoundry.toml. See aliases.
--ledger-path <HD_PATH>
Optional.
EIP-2645 derivation path of the Ledger key that will control this account (e.g., m//starknet'/sncast'/0'/1'/0).
When provided, the public key is read from the Ledger device.
Conflicts with: --ledger-account-id
See Ledger Hardware Wallet for details.
--ledger-account-id <ACCOUNT_ID>
Optional.
Shorthand for --ledger-path. The account ID is used to derive the path m//starknet'/sncast'/0'/<account-id>'/0.
Conflicts with: --ledger-path
See Ledger Hardware Wallet for details.
deploy
Deploy previously created account to Starknet.
--name, -n <ACCOUNT_NAME>
Required.
Name of the (previously created) account to be deployed.
--url, -u <RPC_URL>
Optional.
Starknet RPC node url address.
Overrides url from snfoundry.toml.
--network <NETWORK>
Optional.
Use predefined network with a public provider
Possible values: mainnet, sepolia, devnet.
Overrides network from snfoundry.toml.
--max-fee, -m <MAX_FEE>
Optional.
Maximum fee for the deploy_account denoted in FRI. Must be greater than zero. If provided, it is not possible to use any of the following fee related flags: --l1-gas, --l1-gas-price, --l2-gas, --l2-gas-price, --l1-data-gas, --l1-data-gas-price.
--l1-gas <L1_GAS>
Optional.
Maximum L1 gas for the deploy_account transaction. When not used, defaults to auto-estimation.
--l1-gas-price <l1_gas_price>
Optional.
Maximum L1 gas unit price for the deploy_account transaction. When not used, defaults to auto-estimation.
--l2-gas <L2_GAS>
Optional.
Maximum L2 gas for the deploy_account transaction. When not used, defaults to auto-estimation.
--l2-gas-price <L2_GAS_PRICE>
Optional.
Maximum L2 gas unit price for the deploy_account transaction. When not used, defaults to auto-estimation.
--l1-data-gas <L1_DATA_GAS>
Optional.
Maximum L1 data gas for the deploy_account transaction. When not used, defaults to auto-estimation.
--l1-data-gas-price <l1_data_gas_price>
Optional.
Maximum L1 data gas unit price for the deploy_account transaction. When not used, defaults to auto-estimation.
--tip <TIP>
Optional.
Conflicts with: --estimate-tip
Tip for the transaction. When not provided, defaults to 0 unless --estimate-tip is used.
--estimate-tip
Optional.
Conflicts with: --tip
If passed, an estimated tip will be added to pay for the transaction. The tip is estimated based on the current network conditions and added to the transaction fee.
--dry-run
Optional.
Conflicts with all fee related flags: --max-fee, --l1-gas, --l1-gas-price, --l2-gas, --l2-gas-price, --l1-data-gas, --l1-data-gas-price, --tip, --estimate-tip
If passed, the transaction will not be sent to the network and the fee will be estimated instead. See also: --detailed.
--detailed
Optional.
If passed, the output will include detailed fee estimation results instead of just overall fee. Requires --dry-run flag to be used.
--silent
Optional.
If passed, the command will not trigger an interactive prompt to add an account as a default
delete
Delete an account from accounts-file.
--name, -n <ACCOUNT_NAME>
Required.
Account name which is going to be deleted.
--url, -u <RPC_URL>
Optional.
Starknet RPC node url address.
Overrides url from snfoundry.toml.
--network <NETWORK>
Optional.
Use predefined network with a public provider
Possible values: mainnet, sepolia, devnet.
Overrides network from snfoundry.toml.
--network-name
Optional.
Network in accounts-file associated with the account. By default, the network passed as --network of RPC node.
--yes
Optional.
If passed, assume "yes" as answer to confirmation prompt and run non-interactively
list
List all available accounts.
Account information will be retrieved from the file specified in user's environment.
The output format is dependent on user's configuration, either provided via CLI or specified in snfoundry.toml.
Hides user's private keys by default.
⚠️ Warning This command outputs cryptographic information about accounts, e.g. user's private key. Use it responsibly to not cause any vulnerabilities to your environment and confidential data.
Required Common Arguments — Passed By CLI or Specified in snfoundry.toml
Optional Common Arguments — Passed By CLI or Specified in snfoundry.toml
--display-private-keys, -p
Optional.
If passed, show private keys along with the rest of the account information.
alias
Manage aliases from snfoundry.toml.
It has the following subcommands:
list
List aliases from the current effective snfoundry.toml configuration (resolved from snfoundry.toml config files according to the precedence rules).
declare
Send a declare transaction of Cairo contract to Starknet.
Required Common Arguments — Passed By CLI or Specified in snfoundry.toml
--contract-name, -c <CONTRACT_NAME>
Required.
Name of the contract. Contract name is a part after the mod keyword in your contract file.
This argument also accepts a module tree path, for example hello_sncast::contracts::HelloSncast or contracts::HelloSncast.
--url, -u <RPC_URL>
Optional.
Starknet RPC node url address.
Overrides url from snfoundry.toml.
--network <NETWORK>
Optional.
Use predefined network with public provider
Possible values: mainnet, sepolia, devnet.
Overrides network from snfoundry.toml.
--max-fee, -m <MAX_FEE>
Optional.
Maximum fee for the declare denoted in FRI. Must be greater than zero. If provided, it is not possible to use any of the following fee related flags: --l1-gas, --l1-gas-price, --l2-gas, --l2-gas-price, --l1-data-gas, --l1-data-gas-price.
--l1-gas <L1_GAS>
Optional.
Maximum L1 gas for the declare transaction. When not used, defaults to auto-estimation.
--l1-gas-price <l1_gas_price>
Optional.
Maximum L1 gas unit price for the declare transaction. When not used, defaults to auto-estimation.
--l2-gas <L2_GAS>
Optional.
Maximum L2 gas for the declare transaction. When not used, defaults to auto-estimation.
--l2-gas-price <L2_GAS_PRICE>
Optional.
Maximum L2 gas unit price for the declare transaction. When not used, defaults to auto-estimation.
--l1-data-gas <L1_DATA_GAS>
Optional.
Maximum L1 data gas for the declare transaction. When not used, defaults to auto-estimation.
--l1-data-gas-price <l1_data_gas_price>
Optional.
Maximum L1 data gas unit price for the declare transaction. When not used, defaults to auto-estimation.
--tip <TIP>
Optional.
Conflicts with: --estimate-tip
Tip for the transaction. When not provided, defaults to 0 unless --estimate-tip is used.
--estimate-tip
Optional.
Conflicts with: --tip
If passed, an estimated tip will be added to pay for the transaction. The tip is estimated based on the current network conditions and added to the transaction fee.
--dry-run
Optional.
Conflicts with all fee related flags: --max-fee, --l1-gas, --l1-gas-price, --l2-gas, --l2-gas-price, --l1-data-gas, --l1-data-gas-price, --tip, --estimate-tip
If passed, the transaction will not be sent to the network and the fee will be estimated instead. See also: --detailed.
--detailed
Optional.
If passed, the output will include detailed fee estimation results instead of just overall fee. Requires --dry-run flag to be used.
--nonce, -n <NONCE>
Optional.
Nonce for transaction. If not provided, nonce will be set automatically.
--no-abi
Optional.
If passed, omits ABI from the declared class. This changes the resulting class hash.
--package <NAME>
Optional.
Name of the package that should be used.
If supplied, a contract from this package will be used. Required if more than one package exists in a workspace.
declare-from
Declare a contract either:
- from a compiled Sierra file
- by fetching it from another Starknet instance.
The allowed args depend on the chosen contract source:
- File:
--sierra-file(required),--no-abi(optional) - Network:
--class-hash(required),--block-id(optional),--source-url(optional),--source-network(optional)
Note: file and network args are mutually exclusive.
Required Common Arguments — Passed By CLI or Specified in snfoundry.toml
--sierra-file <SIERRA_FILE>
Required in file mode.
Path to the compiled Sierra contract class file (e.g. target/dev/MyContract_MyContract.contract_class.json).
--class-hash, -g <CLASS_HASH>
Required in network mode.
Class hash of contract declared on a different network. It can be either:
- Felt in hex (prefixed with
0x) or decimal representation. @aliasdefined in[sncast.<profile>.aliases]insnfoundry.toml. See aliases.
--url, -u <RPC_URL>
Optional.
Starknet RPC node url address.
Overrides url from snfoundry.toml.
--network <NETWORK>
Optional.
Use predefined network with public provider
Possible values: mainnet, sepolia, devnet.
Overrides network from snfoundry.toml.
--source-url, -s <RPC_URL>
Optional.
Starknet RPC node url address of the source network where the contract is already declared.
Can only be used with --class-hash.
--source-network <NETWORK>
Optional.
Use predefined network with public provider where the contract is already declared.
Possible values: mainnet, sepolia, devnet.
Can only be used with --class-hash.
--max-fee, -m <MAX_FEE>
Optional.
Maximum fee for the declare denoted in FRI. Must be greater than zero. If provided, it is not possible to use any of the following fee related flags: --l1-gas, --l1-gas-price, --l2-gas, --l2-gas-price, --l1-data-gas, --l1-data-gas-price.
--l1-gas <L1_GAS>
Optional.
Maximum L1 gas for the declare transaction. When not used, defaults to auto-estimation.
--l1-gas-price <l1_gas_price>
Optional.
Maximum L1 gas unit price for the declare transaction. When not used, defaults to auto-estimation.
--l2-gas <L2_GAS>
Optional.
Maximum L2 gas for the declare transaction. When not used, defaults to auto-estimation.
--l2-gas-price <L2_GAS_PRICE>
Optional.
Maximum L2 gas unit price for the declare transaction. When not used, defaults to auto-estimation.
--l1-data-gas <L1_DATA_GAS>
Optional.
Maximum L1 data gas for the declare transaction. When not used, defaults to auto-estimation.
--l1-data-gas-price <l1_data_gas_price>
Optional.
Maximum L1 data gas unit price for the declare transaction. When not used, defaults to auto-estimation.
--tip <TIP>
Optional.
Conflicts with: --estimate-tip
Tip for the transaction. When not provided, defaults to 0 unless --estimate-tip is used.
--estimate-tip
Optional.
Conflicts with: --tip
If passed, an estimated tip will be added to pay for the transaction. The tip is estimated based on the current network conditions and added to the transaction fee.
--dry-run
Optional.
Conflicts with all fee related flags: --max-fee, --l1-gas, --l1-gas-price, --l2-gas, --l2-gas-price, --l1-data-gas, --l1-data-gas-price, --tip, --estimate-tip
If passed, the transaction will not be sent to the network and the fee will be estimated instead. See also: --detailed.
--detailed
Optional.
If passed, the output will include detailed fee estimation results instead of just overall fee. Requires --dry-run flag to be used.
--nonce, -n <NONCE>
Optional.
Nonce for transaction. If not provided, nonce will be set automatically.
--no-abi
Optional.
If passed, omits ABI from the declared class. This changes the resulting class hash.
Can only be used with --sierra-file.
--block-id, -b <BLOCK_ID>
Optional.
Block identifier on which class of declared contract should be fetched.
Possible values: pre_confirmed, latest, block hash (0x prefixed string), and block number (u64).
latest is used as a default value.
Can only be used with --class-hash.
deploy
Deploy a contract to Starknet.
Required Common Arguments — Passed By CLI or Specified in snfoundry.toml
--class-hash, -g <CLASS_HASH>
Required if --contract-name is not provided.
Class hash of contract to deploy. It can be either:
- Felt in hex (prefixed with
0x) or decimal representation. @aliasdefined in[sncast.<profile>.aliases]insnfoundry.toml. See aliases.
--contract-name <CONTRACT_NAME>
Required if --class-hash is not provided.
Name of the contract to deploy. Can be used instead of --class-hash. Requires --package if more than one package exists in a workspace.
This argument also accepts a module tree path, for example hello_sncast::contracts::HelloSncast or contracts::HelloSncast.
--package <NAME>
Optional.
Name of the package that should be used.
If supplied, a contract from this package will be used. Required if more than one package exists in a workspace.
--url, -u <RPC_URL>
Optional.
Starknet RPC node url address.
Overrides url from snfoundry.toml.
--network <NETWORK>
Optional.
Use predefined network with public provider
Possible values: mainnet, sepolia, devnet.
Overrides network from snfoundry.toml.
--constructor-calldata, -c <CONSTRUCTOR_CALLDATA>
Optional.
Conflicts with: --arguments
Calldata for the contract constructor. Each token may be:
- Felt in hex (prefixed with
0x) or decimal representation. @aliasdefined in[sncast.<profile>.aliases]insnfoundry.toml. See aliases.
--arguments
Optional.
Conflicts with: --constructor-calldata
Constructor arguments provided as a comma-separated string of Cairo expressions.
For example: --arguments '1, 2, MyStruct { x: 1, y: 2 }, MyEnum::Variant'
For more information on supported expressions and syntax, see Calldata Transformation.
--salt, -s <SALT>
Optional.
Salt for the contract address.
--unique
Optional.
If passed, the salt will be additionally modified with an account address.
--max-fee, -m <MAX_FEE>
Optional.
Maximum fee for the deploy denoted in FRI. Must be greater than zero. If provided, it is not possible to use any of the following fee related flags: --l1-gas, --l1-gas-price, --l2-gas, --l2-gas-price, --l1-data-gas, --l1-data-gas-price.
--l1-gas <L1_GAS>
Optional.
Maximum L1 gas for the deploy transaction. When not used, defaults to auto-estimation.
--l1-gas-price <l1_gas_price>
Optional.
Maximum L1 gas unit price for the deploy transaction. When not used, defaults to auto-estimation.
--l2-gas <L2_GAS>
Optional.
Maximum L2 gas for the deploy transaction. When not used, defaults to auto-estimation.
--l2-gas-price <L2_GAS_PRICE>
Optional.
Maximum L2 gas unit price for the deploy transaction. When not used, defaults to auto-estimation.
--l1-data-gas <L1_DATA_GAS>
Optional.
Maximum L1 data gas for the deploy transaction. When not used, defaults to auto-estimation.
--l1-data-gas-price <l1_data_gas_price>
Optional.
Maximum L1 data gas unit price for the deploy transaction. When not used, defaults to auto-estimation.
--tip <TIP>
Optional.
Conflicts with: --estimate-tip
Tip for the transaction. When not provided, defaults to 0 unless --estimate-tip is used.
--estimate-tip
Optional.
Conflicts with: --tip
If passed, an estimated tip will be added to pay for the transaction. The tip is estimated based on the current network conditions and added to the transaction fee.
--dry-run
Optional.
Conflicts with all fee related flags: --max-fee, --l1-gas, --l1-gas-price, --l2-gas, --l2-gas-price, --l1-data-gas, --l1-data-gas-price, --tip, --estimate-tip
If passed, the transaction will not be sent to the network and the fee will be estimated instead. See also: --detailed.
--detailed
Optional.
If passed, the output will include detailed fee estimation results instead of just overall fee. Requires --dry-run flag to be used.
--nonce, -n <NONCE>
Optional.
Nonce for transaction. If not provided, nonce will be set automatically.
--no-abi
Optional.
If passed, omits ABI from the declared class. This changes the resulting class hash.
Can only be used with --contract-name.
invoke
Send an invoke transaction to Starknet.
Required Common Arguments — Passed By CLI or Specified in snfoundry.toml
--contract-address, -d <CONTRACT_ADDRESS>
Required.
The address of the contract being called. It can be either:
- Felt in hex (prefixed with
0x) or decimal representation. @aliasdefined in[sncast.<profile>.aliases]insnfoundry.toml. See aliases.
--function, -f <FUNCTION_NAME>
Required.
The name of the function to call.
--calldata, -c <CALLDATA>
Optional.
Conflicts with: --arguments
Inputs to the function, represented by a list of space-delimited values, e.g. 0x1 2 0x3.
Each token may be:
- Felt in hex (prefixed with
0x) or decimal representation. @aliasdefined in[sncast.<profile>.aliases]insnfoundry.toml. See aliases.
--arguments
Optional.
Conflicts with: --calldata
Function arguments provided as a comma-separated string of Cairo expressions.
For example: --arguments '1, 2, MyStruct { x: 1, y: 2 }, MyEnum::Variant'
For more information on supported expressions and syntax, see Calldata Transformation.
--url, -u <RPC_URL>
Optional.
Starknet RPC node url address.
Overrides url from snfoundry.toml.
--network <NETWORK>
Optional.
Use predefined network with public provider
Possible values: mainnet, sepolia, devnet.
Overrides network from snfoundry.toml.
--max-fee, -m <MAX_FEE>
Optional.
Maximum fee for the invoke denoted in FRI. Must be greater than zero. If provided, it is not possible to use any of the following fee related flags: --l1-gas, --l1-gas-price, --l2-gas, --l2-gas-price, --l1-data-gas, --l1-data-gas-price.
--l1-gas <L1_GAS>
Optional.
Maximum L1 gas for the invoke transaction. When not used, defaults to auto-estimation.
--l1-gas-price <l1_gas_price>
Optional.
Maximum L1 gas unit price for the invoke transaction. When not used, defaults to auto-estimation.
--l2-gas <L2_GAS>
Optional.
Maximum L2 gas for the invoke transaction. When not used, defaults to auto-estimation.
--l2-gas-price <L2_GAS_PRICE>
Optional.
Maximum L2 gas unit price for the invoke transaction. When not used, defaults to auto-estimation.
--l1-data-gas <L1_DATA_GAS>
Optional.
Maximum L1 data gas for the invoke transaction. When not used, defaults to auto-estimation.
--l1-data-gas-price <l1_data_gas_price>
Optional.
Maximum L1 data gas unit price for the invoke transaction. When not used, defaults to auto-estimation.
--tip <TIP>
Optional.
Conflicts with: --estimate-tip
Tip for the transaction. When not provided, defaults to 0 unless --estimate-tip is used.
--estimate-tip
Optional.
Conflicts with: --tip
If passed, an estimated tip will be added to pay for the transaction. The tip is estimated based on the current network conditions and added to the transaction fee.
--dry-run
Optional.
Conflicts with all fee related flags: --max-fee, --l1-gas, --l1-gas-price, --l2-gas, --l2-gas-price, --l1-data-gas, --l1-data-gas-price, --tip, --estimate-tip
If passed, the transaction will not be sent to the network and the fee will be estimated instead. See also: --detailed.
--detailed
Optional.
If passed, the output will include detailed fee estimation results instead of just overall fee. Requires --dry-run flag to be used.
--nonce, -n <NONCE>
Optional.
Nonce for transaction. If not provided, nonce will be set automatically.
--proof-file <PROOF_FILE>
Optional.
Must be passed together with --proof-facts-file
Path to a plain text file containing a proof (base64-encoded string).
--proof-facts-file <PROOF_FACTS_FILE>
Optional.
Must be passed together with --proof-file
Path to a plain text file containing proof facts (comma-separated felt values).
call
Call a smart contract on Starknet with the given parameters.
--contract-address, -d <CONTRACT_ADDRESS>
Required.
The address of the contract being called. It can be either:
- Felt in hex (prefixed with
0x) or decimal representation. @aliasdefined in[sncast.<profile>.aliases]insnfoundry.toml. See aliases.
--function, -f <FUNCTION_NAME>
Required.
The name of the function being called.
--url, -u <RPC_URL>
Optional.
Starknet RPC node url address.
Overrides url from snfoundry.toml.
--network <NETWORK>
Optional.
Use predefined network with public provider
Possible values: mainnet, sepolia, devnet.
Overrides network from snfoundry.toml.
--calldata, -c <CALLDATA>
Optional.
Conflicts with: --arguments
Inputs to the function, represented by a list of space-delimited values, e.g. 0x1 2 0x3.
Each token may be:
- Felt in hex (prefixed with
0x) or decimal representation. @aliasdefined in[sncast.<profile>.aliases]insnfoundry.toml. See aliases.
--arguments
Optional.
Conflicts with: --calldata
Function arguments provided as a comma-separated string of Cairo expressions.
For example: --arguments '1, 2, MyStruct { x: 1, y: 2 }, MyEnum::Variant'
For more information on supported expressions and syntax, see Calldata Transformation.
--block-id, -b <BLOCK_ID>
Optional.
Block identifier on which call should be performed.
Possible values: pre_confirmed, latest, block hash (0x prefixed string), and block number (u64).
pre_confirmed is used as a default value.
multicall
Provides utilities for performing multicalls on Starknet.
Multicall has the following subcommands:
new
Generates an empty template for the multicall .toml file that may be later used with the run subcommand. It writes it to a file provided as a required argument.
Usage
multicall new <OUTPUT_PATH> [OPTIONS]
Arguments
OUTPUT_PATH - a path to a file to write the generated .toml to. Required.
--overwrite, -o
Optional.
If the file specified by <OUTPUT_PATH> already exists, this flag overwrites it.
run
Execute a single multicall transaction containing every call from passed file.
Required Common Arguments — Passed By CLI or Specified in snfoundry.toml
--path, -p <PATH>
Required.
Path to a TOML file with call declarations.
--url, -u <RPC_URL>
Optional.
Starknet RPC node url address.
Overrides url from snfoundry.toml.
--network <NETWORK>
Optional.
Use predefined network with public provider
Possible values: mainnet, sepolia, devnet.
Overrides network from snfoundry.toml.
--max-fee, -m <MAX_FEE>
Optional.
Maximum fee for the invoke denoted in FRI. Must be greater than zero. If provided, it is not possible to use any of the following fee related flags: --l1-gas, --l1-gas-price, --l2-gas, --l2-gas-price, --l1-data-gas, --l1-data-gas-price.
--l1-gas <L1_GAS>
Optional.
Maximum L1 gas for the invoke transaction. When not used, defaults to auto-estimation.
--l1-gas-price <l1_gas_price>
Optional.
Maximum L1 gas unit price for the invoke transaction. When not used, defaults to auto-estimation.
--l2-gas <L2_GAS>
Optional.
Maximum L2 gas for the invoke transaction. When not used, defaults to auto-estimation.
--l2-gas-price <L2_GAS_PRICE>
Optional.
Maximum L2 gas unit price for the invoke transaction. When not used, defaults to auto-estimation.
--l1-data-gas <L1_DATA_GAS>
Optional.
Maximum L1 data gas for the invoke transaction. When not used, defaults to auto-estimation.
--l1-data-gas-price <l1_data_gas_price>
Optional.
Maximum L1 data gas unit price for the invoke transaction. When not used, defaults to auto-estimation.
--nonce, -n <NONCE>
Optional.
Nonce of the transaction. If not provided, nonce will be set automatically.
--tip <TIP>
Optional.
Conflicts with: --estimate-tip
Tip for the transaction. When not provided, defaults to 0 unless --estimate-tip is used.
--estimate-tip
Optional.
Conflicts with: --tip
If passed, an estimated tip will be added to pay for the transaction. The tip is estimated based on the current network conditions and added to the transaction fee.
--dry-run
Optional.
Conflicts with all fee related flags: --max-fee, --l1-gas, --l1-gas-price, --l2-gas, --l2-gas-price, --l1-data-gas, --l1-data-gas-price, --tip, --estimate-tip
If passed, the transaction will not be sent to the network and the fee will be estimated instead. See also: --detailed.
--detailed
Optional.
If passed, the output will include detailed fee estimation results instead of just overall fee. Requires --dry-run flag to be used.
File example:
[[call]]
call_type = "deploy"
class_hash = "0x076e94149fc55e7ad9c5fe3b9af570970ae2cf51205f8452f39753e9497fe849"
inputs = []
id = "map_contract"
unique = false
[[call]]
call_type = "invoke"
contract_address = "0x38b7b9507ccf73d79cb42c2cc4e58cf3af1248f342112879bfdf5aa4f606cc9"
function = "put"
inputs = ["0x123", "234"]
[[call]]
call_type = "invoke"
contract_address = "@map_contract"
function = "put"
inputs = ["0x123", "234"]
[[call]]
call_type = "deploy"
class_hash = "0x2bb3d35dba2984b3d0cd0901b4e7de5411daff6bff5e072060bcfadbbd257b1"
inputs = ["0x123", "@map_contract"]
unique = false
execute
Execute a single multicall transaction containing every call from passed CLI arguments.
Supported call types:
Subsequent calls need to be separated with a / delimiter. For example: sncast multicall execute deploy ... / invoke ... / deploy ...
Required Common Arguments — Passed By CLI or Specified in snfoundry.toml
--url, -u <RPC_URL>
Optional.
Starknet RPC node url address.
Overrides url from snfoundry.toml.
--network <NETWORK>
Optional.
Use predefined network with public provider
Possible values: mainnet, sepolia, devnet.
Overrides network from snfoundry.toml.
--max-fee, -m <MAX_FEE>
Optional.
Maximum fee for the invoke denoted in FRI. Must be greater than zero. If provided, it is not possible to use any of the following fee related flags: --l1-gas, --l1-gas-price, --l2-gas, --l2-gas-price, --l1-data-gas, --l1-data-gas-price.
--l1-gas <L1_GAS>
Optional.
Maximum L1 gas for the invoke transaction. When not used, defaults to auto-estimation.
--l1-gas-price <l1_gas_price>
Optional.
Maximum L1 gas unit price for the invoke transaction. When not used, defaults to auto-estimation.
--l2-gas <L2_GAS>
Optional.
Maximum L2 gas for the invoke transaction. When not used, defaults to auto-estimation.
--l2-gas-price <L2_GAS_PRICE>
Optional.
Maximum L2 gas unit price for the invoke transaction. When not used, defaults to auto-estimation.
--l1-data-gas <L1_DATA_GAS>
Optional.
Maximum L1 data gas for the invoke transaction. When not used, defaults to auto-estimation.
--l1-data-gas-price <l1_data_gas_price>
Optional.
Maximum L1 data gas unit price for the invoke transaction. When not used, defaults to auto-estimation.
--tip <TIP>
Optional.
Conflicts with: --estimate-tip
Tip for the transaction. When not provided, defaults to 0 unless --estimate-tip is used.
--estimate-tip
Optional.
Conflicts with: --tip
If passed, an estimated tip will be added to pay for the transaction. The tip is estimated based on the current network conditions and added to the transaction fee.
--dry-run
Optional.
Conflicts with all fee related flags: --max-fee, --l1-gas, --l1-gas-price, --l2-gas, --l2-gas-price, --l1-data-gas, --l1-data-gas-price, --tip, --estimate-tip
If passed, the transaction will not be sent to the network and the fee will be estimated instead. See also: --detailed.
--detailed
Optional.
If passed, the output will include detailed fee estimation results instead of just overall fee. Requires --dry-run flag to be used.
--nonce, -n <NONCE>
Optional.
Nonce for transaction. If not provided, nonce will be set automatically.
deploy
Configure a deploy call as part of a multicall transaction.
--id <ID>
Optional.
An optional identifier to reference this step in later steps. This is useful for referencing deployed contracts in later calls within the same multicall. Value can be later reference with @id syntax. It can be used with the --contract-address and --calldata flags in subsequent calls.
📝 Note
The
@idreference cannot be used with the--argumentsflag.
--class-hash, -g <CLASS_HASH>
Required.
Class hash of contract to deploy.
--constructor-calldata, -c <CONSTRUCTOR_CALLDATA>
Optional.
Conflicts with: --arguments
Calldata for the contract constructor.
--arguments
Optional.
Conflicts with: --constructor-calldata
Constructor arguments provided as a comma-separated string of Cairo expressions.
For example: --arguments '1, 2, MyStruct { x: 1, y: 2 }, MyEnum::Variant'
For more information on supported expressions and syntax, see Calldata Transformation.
--salt, -s <SALT>
Optional.
Salt for the contract address.
--unique
Optional.
If passed, the salt will be additionally modified with an account address.
invoke
Configure an invoke call as part of a multicall transaction.
--contract-address, -d <CONTRACT_ADDRESS>
Required.
The address of the contract being called in hex (prefixed with '0x') or decimal representation.
--function, -f <FUNCTION_NAME>
Required.
The name of the function to call.
--calldata, -c <CALLDATA>
Optional.
Conflicts with: --arguments
Inputs to the function, represented by a list of space-delimited values 0x1 2 0x3.
Calldata arguments may be either 0x hex or decimal felts.
--arguments
Optional.
Conflicts with: --calldata
Function arguments provided as a comma-separated string of Cairo expressions.
For example: --arguments '1, 2, MyStruct { x: 1, y: 2 }, MyEnum::Variant'
For more information on supported expressions and syntax, see Calldata Transformation.
show_config
Prints the config currently being used
--url, -u <RPC_URL>
Optional.
Starknet RPC node url address.
Overrides url from snfoundry.toml.
--network <NETWORK>
Optional.
Use predefined network with public provider
Possible values: mainnet, sepolia, devnet.
Overrides network from snfoundry.toml.
config_path
Prints paths to the local and global snfoundry.toml config files that are currently being used.
This command does not validate config contents.
script
Provides a set of commands to manage deployment scripts.
Script has the following subcommands:
init
Create a deployment script template.
The command creates the following file and directory structure:
.
└── scripts
└── my_script
├── Scarb.toml
└── src
├── lib.cairo
└── my_script.cairo
<SCRIPT_NAME>
Required.
Name of a script to create.
run
Compile and run a cairo deployment script.
Required Common Arguments — Passed By CLI or Specified in snfoundry.toml
<MODULE_NAME>
Required.
Script module name that contains the 'main' function that will be executed.
--url, -u <RPC_URL>
Optional.
Starknet RPC node url address.
Overrides url from snfoundry.toml.
--network <NETWORK>
Optional.
Use predefined network with public provider
Possible values: mainnet, sepolia, devnet.
Overrides network from snfoundry.toml.
--package <NAME>
Optional.
Name of the package that should be used.
If supplied, a script from this package will be used. Required if more than one package exists in a workspace.
--no-state-file
Optional.
Do not read/write state from/to the state file.
If set, a script will not read the state from the state file, and will not write a state to it.
verify
Verify Cairo contract on a chosen verification provider.
--class-hash, -g <CLASS_HASH>
Optional. Required if --contract-address is not provided.
The class hash of the contract that is to be verified. It can be either:
- Felt in hex (prefixed with
0x) or decimal representation. @aliasdefined in[sncast.<profile>.aliases]insnfoundry.toml. See aliases.
--contract-address, -d <CONTRACT_ADDRESS>
Optional. Required if --class-hash is not provided.
The address of the contract that is to be verified. It can be either:
- Felt in hex (prefixed with
0x) or decimal representation. @aliasdefined in[sncast.<profile>.aliases]insnfoundry.toml. See aliases.
--contract-name <CONTRACT_NAME>
Required.
The name of the contract. The contract name is the part after the mod keyword in your contract file.
This argument also accepts a module tree path, for example hello_sncast::contracts::HelloSncast or contracts::HelloSncast.
--verifier, -v <VERIFIER>
Required.
The verification provider to use for the verification. Possible values are:
walnutvoyager
--network, -n <NETWORK>
Optional.
The network on which block explorer will perform the verification. Possible values are:
mainnetsepolia
--url <RPC_URL>
Optional.
Starknet RPC node url address. Will use public provider if not set.
--package <NAME>
Optional.
Name of the package that should be used.
If supplied, a contract from this package will be used. Required if more than one package exists in a workspace.
--confirm-verification
Optional.
If passed, assume "yes" as answer to confirmation prompt and run non-interactively.
--test-files
Optional.
Include test files under src/ for verification. Only applies to voyager.
ledger
Interact with a Ledger hardware wallet.
See Ledger Hardware Wallet for a full guide.
Subcommands
- app-version — Get the Starknet app version from the device
- get-public-key — Read a public key from the device
- sign-hash — Blind-sign a raw hash with the device
ledger app-version
Get the Starknet app version from the connected Ledger device.
No arguments are required. Make sure the Starknet app is open on the device before running.
Example
$ sncast ledger app-version
Output:
App Version: 2.4.0
ledger get-public-key
Read the public key at a given EIP-2645 derivation path from the connected Ledger device.
One of --path or --account-id is required.
--path <HD_PATH>
EIP-2645 derivation path (e.g., m//starknet'/sncast'/0'/1'/0).
Conflicts with: --account-id
--account-id <ACCOUNT_ID>
Shorthand for --path. The account ID is used to derive the path m//starknet'/sncast'/0'/<account-id>'/0.
Conflicts with: --path
--no-display
Optional.
If passed, the public key will not be shown on the Ledger screen for confirmation. By default, confirmation is requested on the device.
Example
$ sncast ledger get-public-key --path "m//starknet'/sncast'/0'/1'/0"
$ sncast ledger get-public-key --account-id 1
Output:
Public Key: 0x[..]
ledger sign-hash
Blind-sign a raw hash using the connected Ledger device.
⚠️ Warning
Blind signing a raw hash could be dangerous. Only sign hashes from trusted sources. If you are sending a transaction, use Ledger as a signer instead.
One of --path or --account-id is required.
--path <HD_PATH>
EIP-2645 derivation path (e.g., m//starknet'/sncast'/0'/1'/0).
Conflicts with: --account-id
--account-id <ACCOUNT_ID>
Shorthand for --path. The account ID is used to derive the path m//starknet'/sncast'/0'/<account-id>'/0.
Conflicts with: --path
<HASH>
Required (positional).
The hash to sign, as a hex string with or without 0x prefix.
Example
$ sncast ledger sign-hash \
--path "m//starknet'/sncast'/0'/1'/0" \
0x0111111111111111111111111111111111111111111111111111111111111111
$ sncast ledger sign-hash \
--account-id 1 \
0x0111111111111111111111111111111111111111111111111111111111111111
Output:
Hash signature:
r: 0x[..]
s: 0x[..]
completions
Generates a completions script for the specified shell and writes it to stdout.
[SHELL]
Optional
If not specified, the script will be generated for the shell detected under $SHELL variable.
Possible values: bash, elvish, fish, powershell, zsh
-h, --help
Print help.
get
Commands for querying Starknet state.
It has the following subcommands:
balanceblockclass-hash-atnoncespec-versiontx(alias:transaction)tx-receipt(alias:transaction-receipt)tx-status(alias:transaction-status)
get balance
Fetch balance of the account for specified token.
--token, -t <TOKEN>
Optional.
Conflicts with: --token-address
Name of the token to check the balance for. Possible values
strk(default)eth
--token-address, -d <TOKEN_ADDRESS>
Optional.
Conflicts with: --token
Token contract address to check the balance for. Token needs to be compatible with ERC-20 standard. It can be either:
- Felt in hex (prefixed with
0x) or decimal representation. @aliasdefined in[sncast.<profile>.aliases]insnfoundry.toml. See aliases.
--block-id, -b <BLOCK_ID>
Optional.
Block identifier on which balance should be fetched.
Possible values: pre_confirmed, latest, block hash (0x prefixed string), and block number (u64).
pre_confirmed is used as a default value.
--url, -u <RPC_URL>
Optional.
Starknet RPC node url address.
Overrides url from snfoundry.toml.
--network <NETWORK>
Optional.
Use predefined network with public provider
Possible values: mainnet, sepolia, devnet.
Overrides network from snfoundry.toml.
get block
Get a block with transaction hashes.
<BLOCK_ID>
Optional.
Block identifier on which the block should be fetched.
Possible values: pre_confirmed, latest, block hash (0x prefixed string), and block number (u64).
pre_confirmed is used as a default value.
--full
Optional.
Retrieve full transactions instead of only their hashes.
--receipts
Optional.
Retrieve transactions receipts instead of only their hashes. Use --full to retrieve transaction details instead.
--url, -u <RPC_URL>
Optional.
Starknet RPC node url address.
Overrides url from snfoundry.toml.
--network <NETWORK>
Optional.
Use predefined network with public provider
Possible values: mainnet, sepolia, devnet.
Overrides network from snfoundry.toml.
get class-hash-at
Get the class hash of a contract deployed at a given address.
<CONTRACT_ADDRESS>
Required.
Address of the contract. It can be either:
- Felt in hex (prefixed with
0x) or decimal representation. @aliasdefined in[sncast.<profile>.aliases]insnfoundry.toml. See aliases.
--block-id, -b <BLOCK_ID>
Optional.
Block identifier on which class hash should be fetched.
Possible values: pre_confirmed, latest, block hash (0x prefixed string), and block number (u64).
pre_confirmed is used as a default value.
--url, -u <RPC_URL>
Optional.
Starknet RPC node url address.
Overrides url from snfoundry.toml.
--network <NETWORK>
Optional.
Use predefined network with public provider
Possible values: mainnet, sepolia, devnet.
Overrides network from snfoundry.toml.
get nonce
Get the nonce of the specified contract.
<CONTRACT_ADDRESS>
Required.
Address of the contract. It can be either:
- Felt in hex (prefixed with
0x) or decimal representation. @aliasdefined in[sncast.<profile>.aliases]insnfoundry.toml. See aliases.
--block-id, -b <BLOCK_ID>
Optional.
Block identifier on which nonce should be fetched.
Possible values: pre_confirmed, latest, block hash (0x prefixed string), and block number (u64).
pre_confirmed is used as a default value.
--url, -u <RPC_URL>
Optional.
Starknet RPC node url address.
Overrides url from snfoundry.toml.
--network <NETWORK>
Optional.
Use predefined network with public provider
Possible values: mainnet, sepolia, devnet.
Overrides network from snfoundry.toml.
get spec-version
Get the version of the Starknet JSON-RPC specification used by the node.
--url, -u <RPC_URL>
Optional.
Starknet RPC node url address.
Overrides url from snfoundry.toml.
--network <NETWORK>
Optional.
Use predefined network with public provider
Possible values: mainnet, sepolia, devnet.
Overrides network from snfoundry.toml.
get tx
Get the details of a transaction.
This command is also available as get transaction.
<TRANSACTION_HASH>
Required.
Hash of the transaction.
--url, -u <RPC_URL>
Optional.
Starknet RPC node url address.
Overrides url from snfoundry.toml.
--network <NETWORK>
Optional.
Use predefined network with public provider
Possible values: mainnet, sepolia, devnet.
Overrides network from snfoundry.toml.
--with-proof-facts
Optional.
If passed, includes proof facts in the transaction response (when supported by the connected RPC node).
get tx-receipt
Get the receipt of a transaction.
This command is also available as get transaction-receipt.
<TRANSACTION_HASH>
Required.
Hash of the transaction.
--url, -u <RPC_URL>
Optional.
Starknet RPC node url address.
Overrides url from snfoundry.toml.
--network <NETWORK>
Optional.
Use predefined network with public provider
Possible values: mainnet, sepolia, devnet.
Overrides network from snfoundry.toml.
get tx-status
Get the status of a transaction.
This command is also available as get transaction-status.
<TRANSACTION_HASH>
Required.
Hash of the transaction
--url, -u <RPC_URL>
Optional.
Starknet RPC node url address.
Overrides url from snfoundry.toml.
--network <NETWORK>
Optional.
Use predefined network with public provider
Possible values: mainnet, sepolia, devnet.
Overrides network from snfoundry.toml.
utils
Provides a set of utility commands.
It has the following subcommands:
serialize
Serialize Cairo expressions into calldata.
--arguments
Required.
Function arguments provided as a comma-separated string of Cairo expressions.
For example: --arguments '1, 2, MyStruct { x: 1, y: 2 }, MyEnum::Variant'
For more information on supported expressions and syntax, see Calldata Transformation.
--class-hash, -c <CLASS-HASH>
Optional.
Conflicts with: --contract-address, --abi-file
The class hash of the contract class which contains the function. It can be either:
- Felt in hex (prefixed with
0x) or decimal representation. @aliasdefined in[sncast.<profile>.aliases]insnfoundry.toml. See aliases.
--contract-address, -d <CONTRACT_ADDRESS>
Optional.
Conflicts with: --class-hash, --abi-file
The address of the contract which contains the function. It can be either:
- Felt in hex (prefixed with
0x) or decimal representation. @aliasdefined in[sncast.<profile>.aliases]insnfoundry.toml. See aliases.
--abi-file, <ABI_FILE_PATH>
Optional.
Conflicts with: --class-hash, --contract-address
Path to the file holding contract ABI.
--function, -f <FUNCTION_NAME>
Required.
The name of the function whose calldata should be serialized.
--url, -u <RPC_URL>
Optional.
Starknet RPC node url address.
Overrides url from snfoundry.toml.
--network <NETWORK>
Optional.
Use predefined network with public provider
Possible values: mainnet, sepolia, devnet.
Overrides network from snfoundry.toml.
class-hash
Calculate the class hash of a contract.
Either --contract-name or --sierra-file must be provided.
--contract-name <CONTRACT_NAME>
Optional.
The name of the contract. The contract name is the part after the mod keyword in your contract file.
This argument also accepts a module tree path, for example hello_sncast::contracts::HelloSncast or contracts::HelloSncast.
When provided, the contract is built before its class hash is calculated.
--sierra-file <SIERRA_FILE>
Optional.
Path to an already compiled Sierra contract class JSON file.
--package <NAME>
Optional.
Specifies the scarb package to be used. Cannot be used together with --sierra-file.
General Example
$ sncast utils \
class-hash \
--contract-name HelloSncast
Output:
Class Hash: 0x0[..]
Example with a Sierra file
$ sncast utils \
class-hash \
--sierra-file target/dev/hello_sncast_HelloSncast.contract_class.json
Output:
Class Hash: 0x06134dac6883ac052bea8db10bc9ee8af6bad5eeab001cd61b8eaba6a03be103
contract-address
Calculate the address of a not yet deployed contract.
--class-hash, -g <CLASS_HASH>
Optional.
Conflicts with: --contract-name
The class hash of the contract to deploy. It can be either:
- Felt in hex (prefixed with
0x) or decimal representation. @aliasdefined in[sncast.<profile>.aliases]insnfoundry.toml. See aliases.
--contract-name <CONTRACT_NAME>
Optional.
Conflicts with: --class-hash
The name of the contract. The contract name is the part after the mod keyword in your contract file.
The class hash is derived from the locally built artifact.
This argument also accepts a module tree path, for example hello_sncast::contracts::HelloSncast or contracts::HelloSncast.
--constructor-calldata <CONSTRUCTOR_CALLDATA>
Optional.
Conflicts with: --arguments
Constructor calldata as a series of felts. Each token may be:
- Felt in hex (prefixed with
0x) or decimal representation. @aliasdefined in[sncast.<profile>.aliases]insnfoundry.toml. See aliases.
Requires --url or --network to fetch the contract ABI when used together with --class-hash.
--arguments <ARGUMENTS>
Optional.
Conflicts with: --constructor-calldata
Constructor arguments as a comma-separated string of Cairo expressions.
For example: --arguments '1, 2, MyStruct { x: 1, y: 2 }'
Requires --url or --network to fetch the contract ABI when used together with --class-hash.
For more information on supported expressions and syntax, see Calldata Transformation.
--salt, -s <SALT>
Optional.
Salt for the address. If not provided, a random salt is generated and included in the response.
--unique
Optional.
If set, the salt is modified with the deployer account address, making the address unique per deployer.
--deployer-address <DEPLOYER_ADDRESS>
Optional.
The deployer account address used to modify the salt when --unique is set. It can be either:
- Felt in hex (prefixed with
0x) or decimal representation. @aliasdefined in[sncast.<profile>.aliases]insnfoundry.toml. See aliases.
Defaults to zero.
--package <PACKAGE>
Optional.
Conflicts with: --class-hash
Specifies the Scarb package to use when looking up the contract by name.
--url, -u <RPC_URL>
Optional.
Starknet RPC node url address. Required when using --arguments or --constructor-calldata together with --class-hash.
Overrides url from snfoundry.toml.
--network <NETWORK>
Optional.
Use predefined network with public provider.
Possible values: mainnet, sepolia, devnet.
Overrides network from snfoundry.toml.
selector
Calculate entrypoint selector from function name.
<NAME>
Required.
The function name (e.g. transfer, balance_of). Do not include parentheses or parameter types.
Example
$ sncast utils selector transfer
Output:
Selector: 0x0[..]
Library Reference
ℹ️ Info Full documentation for the
sncastlibrary can be found here.
declare- declares a contractdeploy- deploys a contractinvoke- invokes a contract's functioncall- calls a contract's functionget_nonce- gets account's nonce for a given block tagtx_status- gets the status of a transaction using its hasherrors- sncast_std error types reference
ℹ️ Info To use the library functions you need to add
sncast_stdpackage as a dependency in yourScarb.tomlusing the appropriate version.[dependencies] sncast_std = "0.62.1"
declare
pub fn declare(contract_name: ByteArray, fee_settings: FeeSettings, nonce: Option<felt252>) -> Result<DeclareResult, ScriptCommandError>
Declares a contract and returns DeclareResult.
contract_name- name of a contract as Cairo string. It is a name of the contract (part aftermodkeyword) e.g."HelloStarknet".fee_settings- fee settings for the transaction, seeFeeSettingsTrait.nonce- nonce for declare transaction. If not provided, nonce will be set automatically.
use sncast_std::{FeeSettingsTrait, declare};
fn main() {
let fee_settings = FeeSettingsTrait::max_fee(9999999);
let result = declare("HelloStarknet", fee_settings, Option::None).expect('declare failed');
println!("declare result: {}", result);
println!("debug declare result: {:?}", result);
}Returned Type
- If the contract has not been declared,
DeclareResult::Successis returned containing respective transaction hash. - If the contract has already been declared,
DeclareResult::AlreadyDeclaredis returned.
Getting the Class Hash
Both variants contain class_hash of the declared contract. Import DeclareResultTrait to access it.
pub trait DeclareResultTrait {
fn class_hash(self: @DeclareResult) -> @ClassHash;
}Structures Used by the Command
#[derive(Drop, Copy, Debug, Serde)]
pub enum DeclareResult {
Success: DeclareTransactionResult,
AlreadyDeclared: AlreadyDeclaredResult,
}
#[derive(Drop, Copy, Debug, Serde)]
pub struct DeclareTransactionResult {
pub class_hash: ClassHash,
pub transaction_hash: felt252,
}
#[derive(Drop, Copy, Debug, Serde)]
pub struct AlreadyDeclaredResult {
pub class_hash: ClassHash,
}deploy
pub fn deploy( class_hash: ClassHash, constructor_calldata: Array::<felt252>, salt: Option<felt252>, unique: bool, fee_settings: FeeSettings, nonce: Option<felt252> ) -> Result<DeployResult, ScriptCommandError>
Deploys a contract and returns DeployResult.
#[derive(Drop, Clone, Debug)]
pub struct DeployResult {
pub contract_address: ContractAddress,
pub transaction_hash: felt252,
}class_hash- class hash of a contract to deploy.constructor_calldata- calldata for the contract constructor.salt- salt for the contract address.unique- determines if salt should be further modified with the account address.fee_settings- fee settings for the transaction, see `FeeSettingsTrait.nonce- nonce for deploy transaction. If not provided, nonce will be set automatically.
use sncast_std::{FeeSettingsTrait, deploy};
use starknet::ClassHash;
fn main() {
let fee_settings = FeeSettingsTrait::max_fee(9999999);
let salt = 0x1;
let nonce = 0x1;
let class_hash: ClassHash = 0x03a8b191831033ba48ee176d5dde7088e71c853002b02a1cfa5a760aa98be046
.try_into()
.expect('Invalid class hash value');
let result = deploy(
class_hash, ArrayTrait::new(), Option::Some(salt), true, fee_settings, Option::Some(nonce),
)
.expect('deploy failed');
println!("deploy result: {}", result);
println!("debug deploy result: {:?}", result);
}invoke
pub fn invoke( contract_address: ContractAddress, entry_point_selector: felt252, calldata: Array::<felt252>, fee_settings: FeeSettings, nonce: Option<felt252> ) -> Result<InvokeResult, ScriptCommandError>
Invokes a contract and returns InvokeResult.
contract_address- address of the contract to invoke.entry_point_selector- the selector of the function to invoke.calldata- inputs to the function to be invoked.fee_settings- fee settings for the transaction, see `FeeSettingsTrait.nonce- nonce for invoke transaction. If not provided, nonce will be set automatically.
use sncast_std::{FeeSettingsTrait, invoke};
use starknet::ContractAddress;
fn main() {
let contract_address: ContractAddress =
0x1e52f6ebc3e594d2a6dc2a0d7d193cb50144cfdfb7fdd9519135c29b67e427
.try_into()
.expect('Invalid contract address value');
let fee_settings = FeeSettingsTrait::estimate();
let result = invoke(
contract_address, selector!("put"), array![0x1, 0x2], fee_settings, Option::None,
)
.expect('invoke failed');
println!("invoke result: {}", result);
println!("debug invoke result: {:?}", result);
}Structures used by the command:
#[derive(Drop, Clone, Debug)]
pub struct InvokeResult {
pub transaction_hash: felt252,
}call
pub fn call( contract_address: ContractAddress, function_selector: felt252, calldata: Array::<felt252> ) -> Result<CallResult, ScriptCommandError>
Calls a contract and returns CallResult.
contract_address- address of the contract to call.function_selector- the selector of the function to call.calldata- inputs to the function to be called.
use sncast_std::call;
use starknet::ContractAddress;
fn main() {
let contract_address: ContractAddress =
0x1e52f6ebc3e594d2a6dc2a0d7d193cb50144cfdfb7fdd9519135c29b67e427
.try_into()
.expect('Invalid contract address value');
let result = call(contract_address, selector!("get"), array![0x1]).expect('call failed');
println!("call result: {}", result);
println!("debug call result: {:?}", result);
}Structure used by the command:
#[derive(Drop, Clone, Debug)]
pub struct CallResult {
pub data: Array::<felt252>,
}get_nonce
pub fn get_nonce(block_tag: felt252) -> felt252
Gets nonce of an account for a given block tag (pre_confirmed or latest) and returns nonce as felt252.
block_tag- block tag name, one ofpre_confirmedorlatest.
use sncast_std::get_nonce;
fn main() {
let nonce = get_nonce('latest');
println!("nonce: {}", nonce);
println!("debug nonce: {:?}", nonce);
}tx_status
pub fn tx_status(transaction_hash: felt252) -> Result<TxStatusResult, ScriptCommandError>
Gets the status of a transaction using its hash and returns TxStatusResult.
transaction_hash- hash of the transaction
use sncast_std::tx_status;
fn main() {
let transaction_hash = 0x00ae35dacba17cde62b8ceb12e3b18f4ab6e103fa2d5e3d9821cb9dc59d59a3c;
let status = tx_status(transaction_hash).expect('Failed to get status');
println!("transaction status: {:?}", status);
}Structures used by the command:
#[derive(Drop, Clone, Debug, Serde, PartialEq)]
pub enum FinalityStatus {
Received,
Candidate,
PreConfirmed,
AcceptedOnL2,
AcceptedOnL1,
}
#[derive(Drop, Copy, Debug, Serde, PartialEq)]
pub enum ExecutionStatus {
Succeeded,
Reverted,
}
#[derive(Drop, Clone, Debug, Serde, PartialEq)]
pub struct TxStatusResult {
pub finality_status: FinalityStatus,
pub execution_status: Option<ExecutionStatus>
}errors
#[derive(Drop, PartialEq, Serde, Debug)]
pub struct ErrorData {
msg: ByteArray
}
#[derive(Drop, PartialEq, Serde, Debug)]
pub struct ContractErrorData {
revert_error: ContractExecutionError
}
#[derive(Drop, PartialEq, Debug)]
pub struct TransactionExecutionErrorData {
transaction_index: felt252,
execution_error: ContractExecutionError,
}
#[derive(Drop, PartialEq, Debug)]
pub enum ContractExecutionError {
Nested: Box<ContractExecutionErrorInner>,
Message: ByteArray
}
#[derive(Drop, Serde, Debug)]
pub struct ContractExecutionErrorInner {
contract_address: ContractAddress,
class_hash: felt252,
selector: felt252,
error: ContractExecutionError,
}
#[derive(Drop, Serde, PartialEq, Debug)]
pub enum StarknetError {
/// Failed to receive transaction
FailedToReceiveTransaction,
/// Contract not found
ContractNotFound,
/// Requested entrypoint does not exist in the contract
EntryPointNotFound,
/// Block not found
BlockNotFound,
/// Invalid transaction index in a block
InvalidTransactionIndex,
/// Class hash not found
ClassHashNotFound,
/// Transaction hash not found
TransactionHashNotFound,
/// Contract error
ContractError: ContractErrorData,
/// Transaction execution error
TransactionExecutionError: TransactionExecutionErrorData,
/// Class already declared
ClassAlreadyDeclared,
/// Invalid transaction nonce
InvalidTransactionNonce,
/// The transaction's resources don't cover validation or the minimal transaction fee
InsufficientResourcesForValidate,
/// Account balance is smaller than the transaction's max_fee
InsufficientAccountBalance,
/// Account validation failed
ValidationFailure: ErrorData,
/// Compilation failed
CompilationFailed,
/// Contract class size it too large
ContractClassSizeIsTooLarge,
/// Sender address in not an account contract
NonAccount,
/// A transaction with the same hash already exists in the mempool
DuplicateTx,
/// the compiled class hash did not match the one supplied in the transaction
CompiledClassHashMismatch,
/// the transaction version is not supported
UnsupportedTxVersion,
/// the contract class version is not supported
UnsupportedContractClassVersion,
/// An unexpected error occurred
UnexpectedError: ErrorData,
}
#[derive(Drop, Serde, PartialEq, Debug)]
pub enum ProviderError {
StarknetError: StarknetError,
RateLimited,
UnknownError: ErrorData,
}
#[derive(Drop, Serde, PartialEq, Debug)]
pub enum TransactionError {
Reverted: ErrorData,
}
#[derive(Drop, Serde, PartialEq, Debug)]
pub enum WaitForTransactionError {
TransactionError: TransactionError,
TimedOut,
ProviderError: ProviderError,
}
#[derive(Drop, Serde, PartialEq, Debug)]
pub enum ScriptCommandError {
UnknownError: ErrorData,
ContractArtifactsNotFound: ErrorData,
WaitForTransactionError: WaitForTransactionError,
ProviderError: ProviderError,
}FeeSettingsTrait
#[generate_trait]
pub trait FeeSettingsTrait {
/// Sets transaction resource bounds with specified gas values.
fn resource_bounds(
l1_gas: u64,
l1_gas_price: u128,
l2_gas: u64,
l2_gas_price: u128,
l1_data_gas: u64,
l1_data_gas_price: u128
) -> FeeSettings;
/// Ensures that total resource bounds of transaction execution won't exceed the given value.
fn max_fee(max_fee: felt252) -> FeeSettings;
/// Performs an automatic estimation of the resource bounds.
fn estimate() -> FeeSettings;
}The Manifest Format
The snfoundry.toml contains the project's manifest and allows specifying sncast settings.
You can configure sncast settings and arguments instead of providing them in the CLI along with the commands.
If snfoundry.toml is not found in the root directory, sncast will look for it in all parent directories.
If it is not found, default values will be used.
snfoundry.toml Contents
[sncast.<profile-name>]
[sncast.myprofile]
# ...
All fields are optional and do not have to be provided. In case a field is not defined in a manifest file, it must be provided in CLI when executing a relevant sncast command.
Profiles allow you to define different sets of configurations for various environments or use cases. For more details, see the profiles explanation.
📝 Tip
Keys unrecognized by the currently used
sncastversion are ignored with a warning:[sncast.myprofile] unknown-key = "some value"To avoid these warnings, use the latest
sncastversion and update your config to the latest format.
url
The url field specifies the address of RPC provider. It's mutually exclusive with the network field.
[sncast.myprofile]
url = "http://example.com"
network
The network field specifies the network to use. It's mutually exclusive with the url field.
[sncast.myprofile]
network = "sepolia"
accounts-file
The accounts-file field specifies the path to a file containing account information.
If not provided, the default path is ~/.starknet_accounts/starknet_open_zeppelin_accounts.json.
[sncast.myprofile]
accounts-file = "path/to/accounts.json"
account
The account field specifies which account from the accounts-file to use for transactions.
[sncast.myprofile]
account = "user-dev"
keystore
The keystore field specifies the path to the keystore file.
[sncast.myprofile]
keystore = "path/to/keystore"
wait-params
The wait-params field defines the waiting parameters for transactions. By default, timeout (in seconds) is set to 300 and retry-interval (in seconds) to 5.
This means transactions will be checked every 5 seconds, with a total of 60 attempts before timing out.
retry-interval and timeout must be greater than 0.
retry-interval cannot be greater than timeout.
[sncast.myprofile]
wait-params = { timeout = 300, retry-interval = 5 }
show-explorer-links
Enable printing links pointing to pages with transaction details in the chosen block explorer
[sncast.myprofile]
show-explorer-links = true
block-explorer
The block-explorer field specifies the block explorer service used to display links to transaction details.
📝 Note For details on how block explorers are used in
sncastand when links are shown, see the Block Explorers section.
| Value | URL |
|---|---|
| Voyager | https://voyager.online |
| ViewBlock | https://viewblock.io/starknet |
| OkLink | https://www.oklink.com/starknet |
[sncast.myprofile]
block-explorer = "Voyager"
scarb-profile
The scarb-profile field sets which Scarb profile sncast uses when it runs scarb commands (e.g. scarb build when declaring contracts or running scripts).
Defaults to release.
[sncast.myprofile]
scarb-profile = "release"
[sncast.<profile-name>.aliases]
Frequently used felt values (contract addresses, class hashes, etc.) can be defined in the aliases table and later used in commands, e.g. sncast call --contract-address @map.
📝 Note For details on how aliases are used and the list of supported commands, see the Aliases section.
Aliases follow the same precedence rules as other snfoundry.toml settings, meaning they can be overridden via a higher-precedence config.
[sncast.myprofile.aliases]
map = "0xcd8f9ab31324bb93251837e4efb4223ee195454f6304fcfcb277e277653008"
map-class = "0x2a09379665a749e609b4a8459c86fe954566a6beeaddd0950e43f6c700ed321"
[sncast.<profile-name>.networks]
The URLs of the predefined networks can be configured.
When you use --network <network_name>, sncast first checks whether you have a custom URL configured for that network.
In the absence of a user-defined value, the default configuration is applied - public RPC provider is used for mainnet and sepolia, and the devnet endpoint is determined automatically.
[sncast.myprofile.networks]
mainnet = "https://mainnet.your-node.com"
sepolia = "https://sepolia.your-node.com"
devnet = "http://127.0.0.1:5050"
Complete Example of snfoundry.toml File
[sncast.myprofile1]
url = "http://127.0.0.1:5050/"
accounts-file = "../account-file"
account = "mainuser"
keystore = "~/keystore"
wait-params = { timeout = 500, retry-interval = 10 }
block-explorer = "Voyager"
show-explorer-links = true
scarb-profile = "release"
[sncast.myprofile1.networks]
mainnet = "https://mainnet.your-node.com"
sepolia = "https://sepolia.your-node.com"
devnet = "http://127.0.0.1:5050"
[sncast.dev]
url = "http://127.0.0.1:5056/rpc"
account = "devuser"
The Manifest Format
The Scarb.toml contains the package manifest that is needed in package compilation process. It can be used to provide configuration for Starknet Foundry Forge. For more, see official Scarb documentation.
Scarb.toml Contents
[tool.snforge]
[tool.snforge]
# ...
Allows to configure snforge settings. All fields are optional.
exit_first
The exit_first fields specifies whether to stop tests execution immediately upon the first failure. See more about stopping test execution after first failed test.
[tool.snforge]
exit_first = true
fuzzer_runs
The fuzzer_runs field specifies the number of runs of the random fuzzer.
fuzzer_seed
The fuzzer_seed field specifies the seed for the random fuzzer.
See more about fuzzer.
Example of fuzzer configuration
[tool.snforge]
fuzzer_runs = 1234
fuzzer_seed = 1111
tracked_resource
The tracked_resource field specifies which execution resource snforge should track.
When --tracked-resource is passed on the CLI, the CLI value takes precedence over Scarb.toml.
Valid values are:
sierra-gascairo-steps
[tool.snforge]
tracked_resource = "cairo-steps"
[[tool.snforge.fork]]
[[tool.snforge.fork]]
# ...
Allows to configure forked tests. If defined, all fields outlined below must also be defined. See more about fork testing.
name
The name field specifies the name of the fork.
[[tool.snforge.fork]]
name = "SOME_NAME"
url
The url field specifies the address of RPC provider.
[[tool.snforge.fork]]
url = "http://your.rpc.url"
block_id.<tag|number|hash>
The block_id field specifies the block to fork from. It can be specified by tag, number or hash.
[[tool.snforge.fork]]
block_id.hash = "0x123"
Example configuration with two forks
[[tool.snforge.fork]]
name = "SOME_NAME"
url = "http://your.rpc.url"
block_id.tag = "latest"
[[tool.snforge.fork]]
name = "SOME_SECOND_NAME"
url = "http://your.second.rpc.url"
block_id.number = "123"
[tool.scarb]
[tool.scarb]
allow-prebuilt-plugins = ["snforge_std"]
It allows scarb to download precompiled dependencies used by snforge_std from the registry.
The snforge_std library depends on a Cairo plugin that is written in Rust, and otherwise is compiled locally on the user's side.
[profile.<dev|release>.cairo]
By default, these arguments do not need to be defined. Only set them to use profiler or coverage.
Adjust Cairo compiler configuration parameters when compiling this package. These options are not taken into consideration when this package is used as a dependency for another package. All fields are optional.
[profile.dev.cairo]
# ...
unstable-add-statements-code-locations-debug-info
See unstable-add-statements-code-locations-debug-info in Scarb documentation.
[profile.dev.cairo]
unstable-add-statements-code-locations-debug-info = true
unstable-add-statements-functions-debug-info
See unstable-add-statements-functions-debug-info in Scarb documentation.
[profile.dev.cairo]
unstable-add-statements-functions-debug-info = true
inlining-strategy
See inlining-strategy in Scarb documentation.
[profile.dev.cairo]
inlining-strategy = "avoid"
enable-gas
See enable-gas in Scarb documentation.
snforge test requires gas calculation to be enabled and rejects packages where it is disabled.
The default value is true, so you typically do not need to set this.
Setting it to false (for example, to support an executable target in the same package) makes tests in that package unrunnable with snforge test.
In that case, use profile separation: keep gas enabled in the profile used for tests (for example dev), and disable it only in the profile used to build the executable.
[profile.dev.cairo]
enable-gas = true
Example of configuration which allows coverage report generation
[profile.dev.cairo]
unstable-add-statements-code-locations-debug-info = true
unstable-add-statements-functions-debug-info = true
inlining-strategy = "avoid"
[features]
A package defines a set of named features in the [features] section of Scarb.toml file. Each defined feature can list other features that should be enabled with it. All fields are optional.
[features]
# ...
<feature-name>
The <feature-name> field specifies the name of the feature and list of other features that should be enabled with it.
See features in Scarb documentation.
[features]
enable_for_tests = []
Example of Scarb.toml allowing conditional contracts compilation
Firstly, define a contract in the src directory with a #[cfg(feature: '<FEATURE_NAME>')] attribute:
#[starknet::contract]
#[cfg(feature: 'enable_for_tests')]
mod MockContract {
// ...
}Then update Scarb.toml so it includes the following lines:
[features]
enable_for_tests = []
[[target.starknet-contract]]
The starknet-contract target allows to build the package as a Starknet Contract. See more about Starknet Contract Target in Scarb documentation.
[[target.starknet-contract]]
# ...
sierra
See more about Sierra contract class generation in Scarb documentation.
[[target.starknet-contract]]
sierra = true
casm
Enabling casm = true in Scarb.toml causes unnecessary overhead and should be disabled unless required by other tools. Tools like snforge and sncast recompile Sierra to CASM separately, resulting in redundant processing. This duplicates CASM generation, significantly impacting performance, especially for large Sierra programs. See more about CASM contract class generation in Scarb documentation.
[[target.starknet-contract]]
casm = true
build-external-contracts
The build-external-contracts allows to use contracts from your dependencies inside your tests. It accepts a list of strings, each of which is a reference to a contract defined in a dependency. You need to add dependency which implements this contracts to your Scarb.toml. See more about compiling external contracts in Scarb documentation.
[[target.starknet-contract]]
build-external-contracts = ["openzeppelin::account::account::Account"]
Example of configuration which allows to use external contracts in tests
# ...
[dependencies]
starknet = ">=2.8.2"
openzeppelin = { git = "https://github.com/OpenZeppelin/cairo-contracts.git", branch = "cairo-2" }
[[target.starknet-contract]]
build-external-contracts = ["openzeppelin::account::account::Account"]
# ...
Complete example of Scarb.toml
[package]
name = "example_package"
version = "0.1.0"
edition = "2023_11"
# See more keys and their definitions at https://docs.swmansion.com/scarb/docs/reference/manifest.html
[dependencies]
starknet = "2.8.2"
[dev-dependencies]
snforge_std = "0.62.1"
starknet = ">=2.8.2"
openzeppelin = { git = "https://github.com/OpenZeppelin/cairo-contracts.git", branch = "cairo-2" }
[[target.starknet-contract]]
sierra = true
build-external-contracts = ["openzeppelin::account::account::Account"]
[scripts]
test = "snforge test"
# foo = { path = "vendor/foo" }
[tool.snforge]
exit_first = true
fuzzer_runs = 1234
fuzzer_seed = 1111
[[tool.snforge.fork]]
name = "SOME_NAME"
url = "http://your.rpc.url"
block_id.tag = "latest"
[[tool.snforge.fork]]
name = "SOME_SECOND_NAME"
url = "http://your.second.rpc.url"
block_id.number = "123"
[[tool.snforge.fork]]
name = "SOME_THIRD_NAME"
url = "http://your.third.rpc.url"
block_id.hash = "0x123"
[profile.dev.cairo]
unstable-add-statements-code-locations-debug-info = true
unstable-add-statements-functions-debug-info = true
inlining-strategy = "avoid"
[features]
enable_for_tests = []
Inlining Optimizer
The inlining optimizer helps you find the optimal value for the Scarb compiler's inlining-strategy
setting. This setting controls how aggressively the compiler inlines function calls,
which affects both runtime gas cost and contract bytecode size.
The optimizer tries to optimize the parameter for a subset of contracts that you choose from your project, against a benchmark you define as an snforge test case.
Overview
During Cairo contracts compilation, the compiler applies an optimization called inlining. It works by replacing some functions calls, with "inlined" source code of the called function. This may make the resulting compilation artifacts larger, as we copy some of your code, but it can make the performance of the compiled code better. The amount of inlining that should be applied to your code is a balance between those two. Each of the projects you write may have a different "perfect" amount of inlining it needs. Also, the right amount of inlining may depend on your use case - sometimes, if your contract will be called rarely, it may make sense to use less inlining and save gas during the contract declaration. There is really no way for the compiler to find this balance during the compilation. Instead, the compiler assumes some default "weight" of the function, and inlines all functions below this "weight". This one-suit-all solution is practical, but leaves some leeway for you to optimize the compiler configuration to best suit your projects needs. The inlinig optimizer built into snforge is a tool, that should help you look for the right amount of inlining that your project needs.
The inlining optimization during the compilation can be configured with inlining-strategy key in your Scarb.toml file.
The inlining-strategy value determines the inlining threshold: the compiler inlines a function when its cost estimate is below this value.
A higher threshold means more aggressive inlining, which can lower runtime gas but also increase contract bytecode size.
Note, that defining how compiler measures function "weight" is outside the scope for this document.
Also, the exact definition may change between compiler releases!
From practical standpoint, it should be enough to treat this as a blackbox hyperparameter of your compilation.
The snforge optimize-inlining helps you better understand the effects of changing the inlining-strategy key, by compiling your project for a range of inlining keys and benchmark them against a predefined benchmark.
Usage
The optimizer requires a single representative test to measure gas at each threshold.
Pass it with --exact and a fully qualified test name, the same way as snforge test --exact:
It also requires you to specify a subset of contracts from your project that should be benchmarked.
You can specify by passing their names / paths to --contracts argument.
Note, that only contracts specified with this argument will be changed before executing your benchmarks - all other contracts are compiled with default inlinig strategy.
$ snforge optimize-inlining --contracts MyContract --exact my_package::tests::my_test
📝 Note
The test should exercise the hot paths you care about!
The optimizer works on a copy of the project in a temporary directory so that intermediate
Scarb.toml edits do not affect your working tree.
Output
After testing all thresholds the optimizer prints a results table:
┌──────────────┬─────────────────┬──────────────────┬──────────────────────────┬────────┐
│ Threshold │ Total Gas │ Contract Size │ Contract Bytecode L2 Gas │ Status │
├──────────────┼─────────────────┼──────────────────┼──────────────────────────┼────────┤
│ 0 │ 123456 │ 204800 │ 512000 │ ✓ │
│ 25 │ 118000 │ 215040 │ 537600 │ ✓ │
│ 50 │ 115200 │ 225280 │ 563200 │ ✓ │
│ ... │
└──────────────┴─────────────────┴──────────────────┴──────────────────────────┴────────┘
Lowest runtime gas cost: threshold=50, gas=115200, contract bytecode L2 gas=563200
Lowest contract size cost: threshold=0, gas=123456, contract bytecode L2 gas=512000
A PNG graph is also saved to the project's target directory, showing how gas and contract
bytecode L2 gas vary with the threshold.
Applying the Result
Add --gas or --size to automatically write the optimal threshold back to Scarb.toml:
# Minimize runtime gas cost
$ snforge optimize-inlining --contracts MyContract --exact my_package::tests::my_test --gas
# Minimize contract bytecode L2 gas (deployment cost)
$ snforge optimize-inlining --contracts MyContract --exact my_package::tests::my_test --size
This updates the active Scarb profile with:
[profile.dev.cairo]
inlining-strategy = 50
📝 Note
--gasand--sizeare mutually exclusive. Without either flag,Scarb.tomlis not modified and the results are only printed for your review.
Contract Size Limits
By default the optimizer skips thresholds that produce contracts exceeding Starknet's on-chain
limits. You can adjust these limits with --max-contract-size (bytes) and --max-contract-program-len:
$ snforge optimize-inlining \
--contracts MyContract \
--exact my_package::tests::my_test \
--max-contract-size 3000000 \
--max-contract-program-len 60000
Thresholds that violate either limit are marked with ✗ in the results table and are excluded from
the optimal threshold selection.
Search Range and Step
By default the optimizer tests thresholds from 0 to 250 in steps of 25. Adjust this with
--min-threshold, --max-threshold, and --step:
$ snforge optimize-inlining \
--contracts MyContract \
--exact my_package::tests::my_test \
--min-threshold 20 \
--max-threshold 100 \
--step 10
A smaller step gives a finer-grained result but requires more compilations and test runs.
Passing Test Arguments
snforge optimize-inlining accepts the same flags as snforge test for controlling fuzzer runs,
profiles, features, and so on. For example, to run under the release profile:
$ snforge optimize-inlining --contracts MyContract --exact my_package::tests::my_test --release
Starknet Foundry Github Action
If you wish to use Starknet Foundry in your Github Actions workflow, you can use the setup-snfoundry action. This action installs the necessary snforge and sncast binaries.
📝 Note At this moment, only Linux and MacOS are supported.
Example workflow
Make sure you pass the valid path to Scarb.lock to setup-scarb action. This way, all dependencies including snforge_scarb_plugin will be cached between runs.
name: My workflow
on:
push:
pull_request:
jobs:
check:
runs-on: ubuntu-latest
steps:
- uses: actions/checkout@v4
- name: Setup Starknet Foundry
uses: foundry-rs/setup-snfoundry@v3
- name: Setup Scarb
uses: software-mansion/setup-scarb@v1
with:
scarb-lock: ./hello_starknet/Scarb.lock
- name: Run tests
run: cd hello_starknet && snforge test
Workflow With Partitioned Tests
If you have a large number of tests, you can speed up your CI by partitioning tests and running them in parallel jobs. Here's an example workflow that demonstrates how to achieve this:
name: My workflow
on:
push:
pull_request:
jobs:
check:
runs-on: ubuntu-latest
strategy:
fail-fast: false
matrix:
partition: [ 1, 2, 3, 4 ]
steps:
- uses: actions/checkout@v4
- name: Setup Starknet Foundry
uses: foundry-rs/setup-snfoundry@v3
- name: Setup Scarb
uses: software-mansion/setup-scarb@v1
with:
scarb-lock: ./hello_starknet/Scarb.lock
- name: Run tests
run: |
cd hello_starknet
snforge test --partition '${{ matrix.partition }}/4'
Read more about tests partitioning here.
snforge 0.56.0 Migration Guide
Starting from version 0.56.0, snforge requires Scarb version 2.12.0 or newer.
This is due to the migration to the Scarb V2 version of procedural macros, which are used to handle arguments like #[test]
in snforge.
Thanks to this migration, tools like the Cairo plugin for VSCode shows better, more descriptive errors.
Scarb Versions >= 2.12.0
For Scarb versions >= 2.12.0, we recommend upgrading your snforge_std dependency to the one matching your snforge
installation (0.56.0 at the time of writing this doc).
In your Scarb.toml file, update the dependency:
[dev-dependencies]
snforge_std = "0.62.1"
No further action is required.
Scarb Versions < 2.12.0
⚠️ Warning
Support for Scarb versions < 2.12.0 has been removed in
snforge0.56.0.If you are using Scarb < 2.12.0, you must upgrade to Scarb 2.12.0 or newer. The deprecated
snforge_std_deprecatedpackage andsnforge_scarb_plugin_deprecatedplugin are no longer supported, and no new versions of these will be published.
To upgrade:
First, update your Scarb installation to version 2.12.0 or newer.
Next, in your Scarb.toml, remove the snforge_std_deprecated dependency and add snforge_std:
[dev-dependencies]
- snforge_std_deprecated = "0.55.0"
+ snforge_std = "0.62.1"
Then, replace all kinds of imports in your code from snforge_std_deprecated to snforge_std:
// Replace use statements
- use snforge_std_deprecated::{ContractClassTrait, start_cheat_caller_address};
+ use snforge_std::{ContractClassTrait, start_cheat_caller_address};
// Replace full path usages
- let result = snforge_std_deprecated::declare("MyContract").unwrap();
+ let result = snforge_std::declare("MyContract").unwrap();